
Walser Pistenraupen Modellbau
My PB600 W Polar in scale 1:12 is still work in progress. Here you will find information about my work, like the current status and what's going on.
Chassis and body are finished, the snow blade and tiller are work in progress. A winch will later be added.
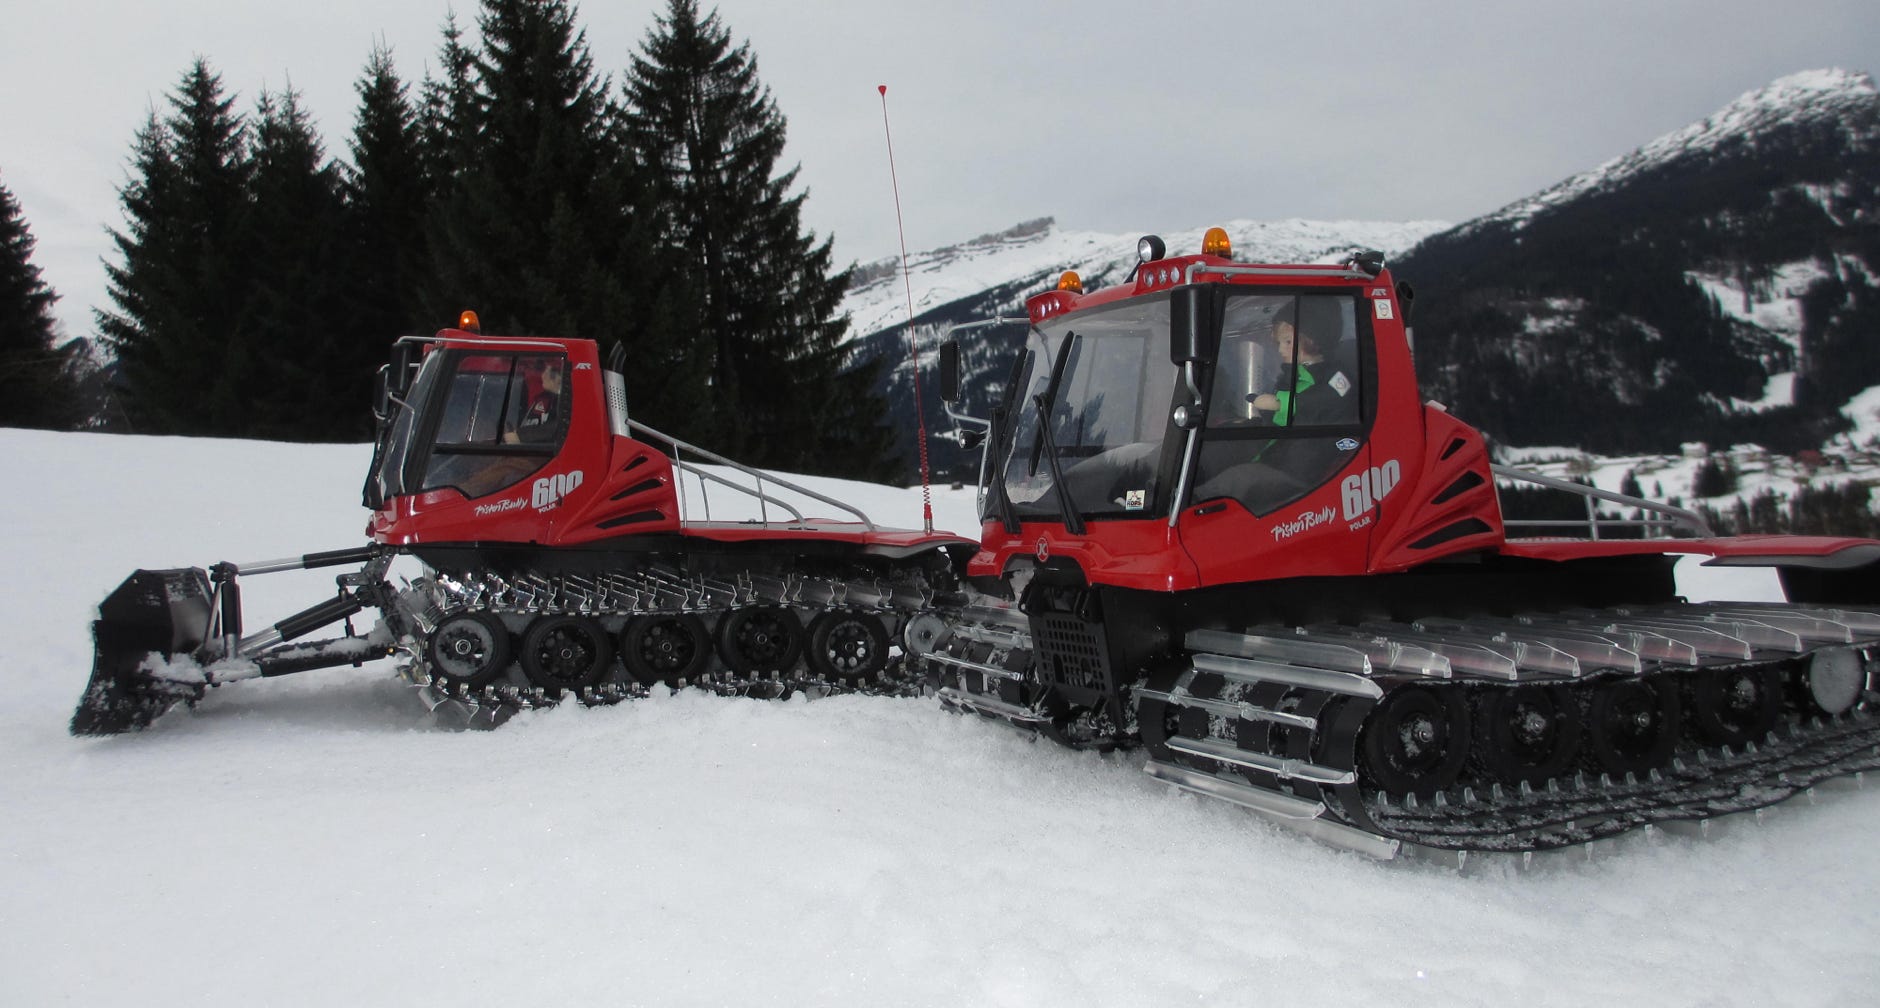
My PB600 in front with Fabian’s PB600 with the Ifen mountain in the background
The body of the PistenBully 600 is vaccuum formed from PVC sheets. The driver cabin itself is one single piece. The air intakes, rear cover etc. are separate pieces. The picture shows the raw mold of the driver cabin.
The body is masked with transparent tape for the first paint application, a gray primer, which is applied by air brush.
Afterwards red paint is sprayed.

DNow a new masking is applied, but this time the red areas are masked, because the next paint is black.
The painting of the body is now finished, and the lights can be installed.
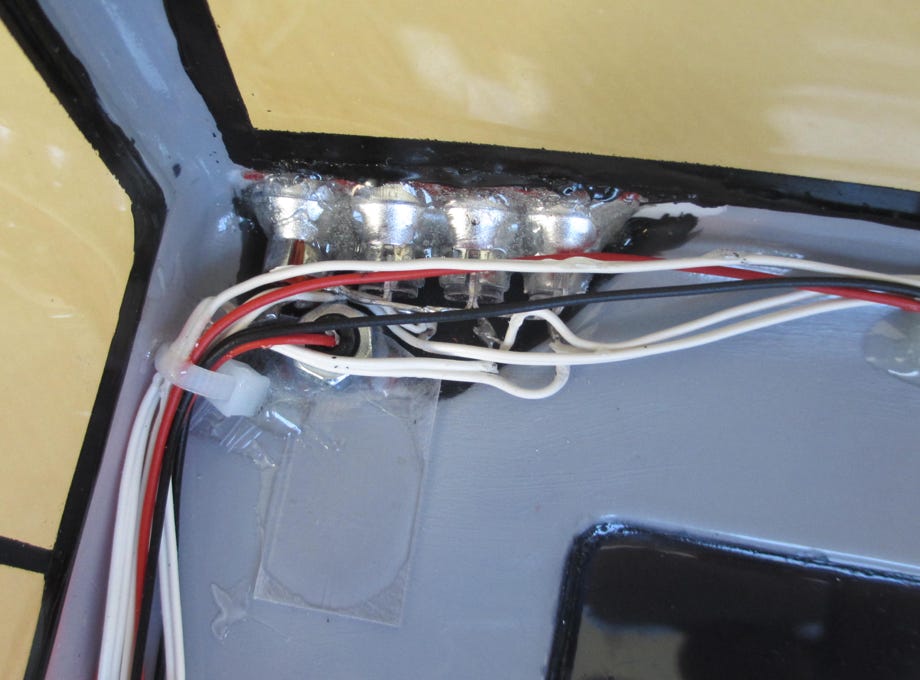
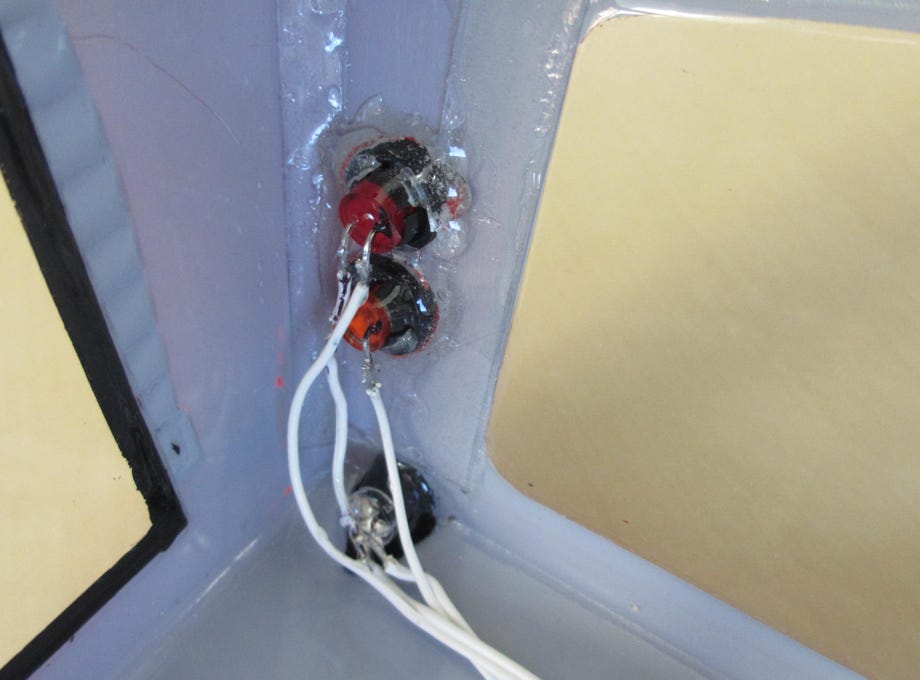
LEDs are put in four reflectors which are glued together, and then glued from the inside at the respective location. Finally wires are soldered to the LEDs and glued to the body with epoxy glue (lower left picture).
The rear LEDs are put in so called LED-clips and mounted to the body (lower right picture)

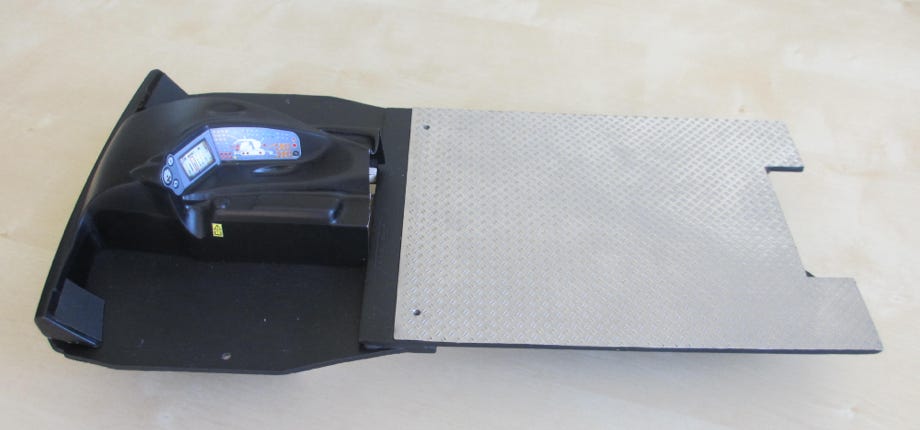
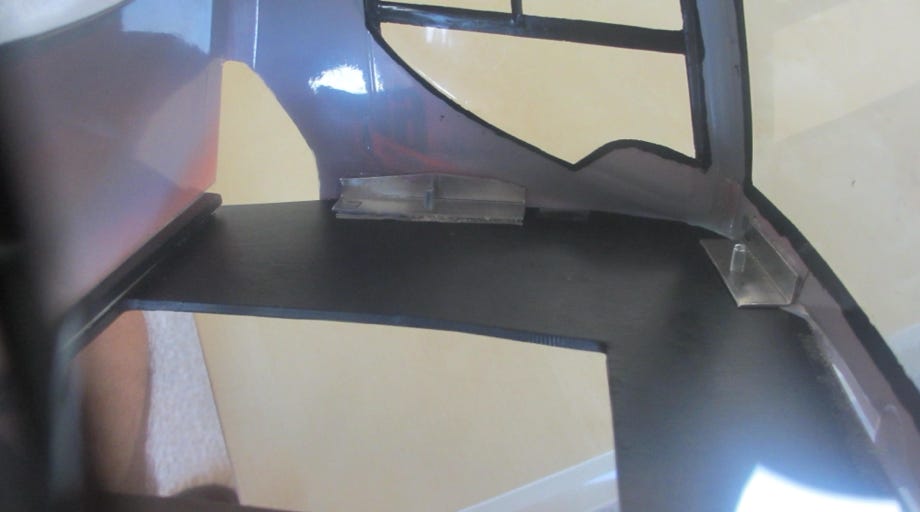
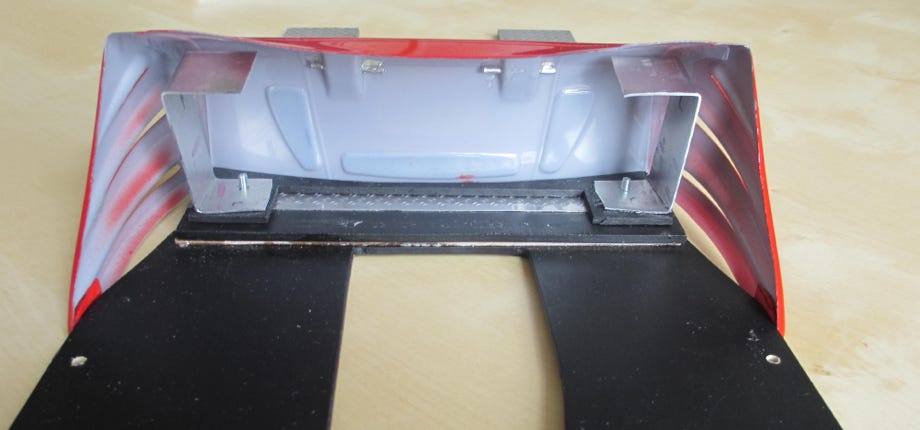
Now the base plate is made, to which the body will be attached. Due to the vaccuum forming from PVC the body is not sturdy and very elastic. That's why it needs to be stiffened by mounting it to a base plate. The base plate and body form one part and this makes it easy to mount it on the chassis.
A structured aluminum sheet for models is glued to the rear part of the base plate, just like at the original.
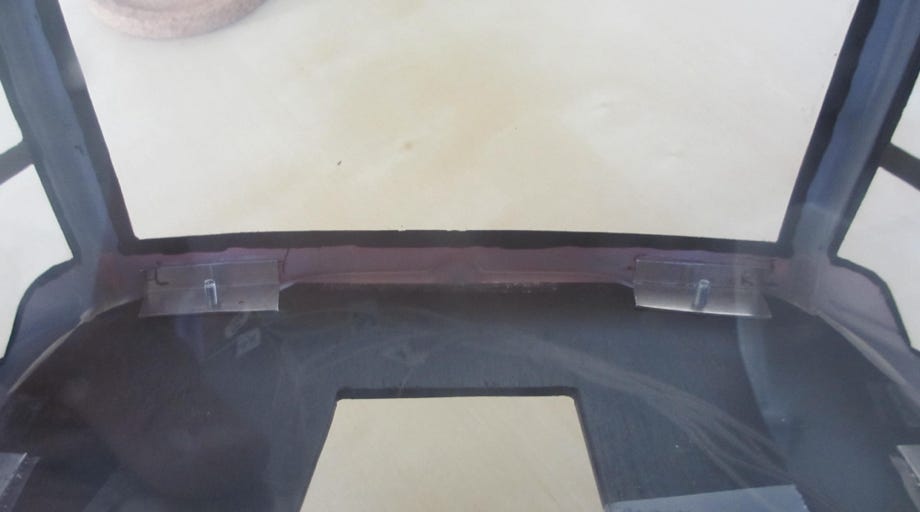
Small L-shapes are glued to the body, with a thread at their lower side. This enables to mount the body to the base plate, and also to remove it if needed (pictures below).
The exhausts are mounted to two U-shaped aluminum parts, and the cover is glued in place.
The space under the rear cover can be used for example for electronics. Due to the narrow chassis tub every space must be used.
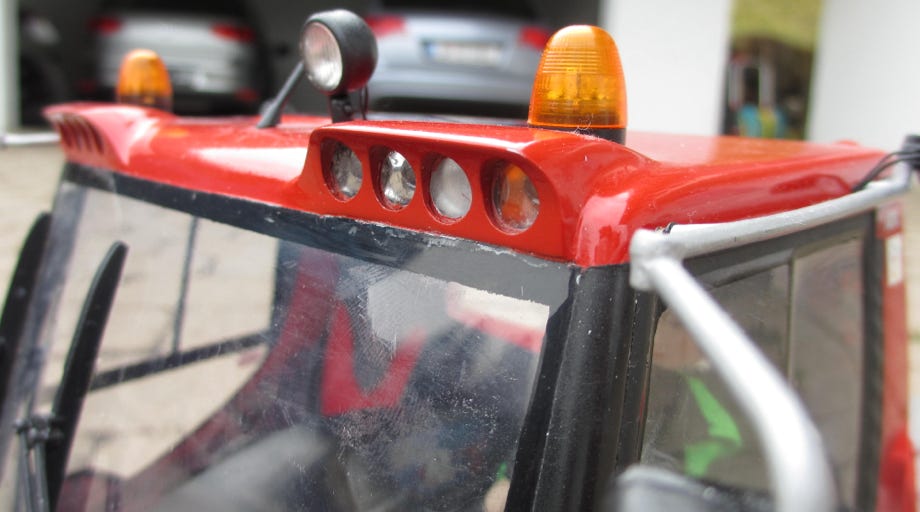
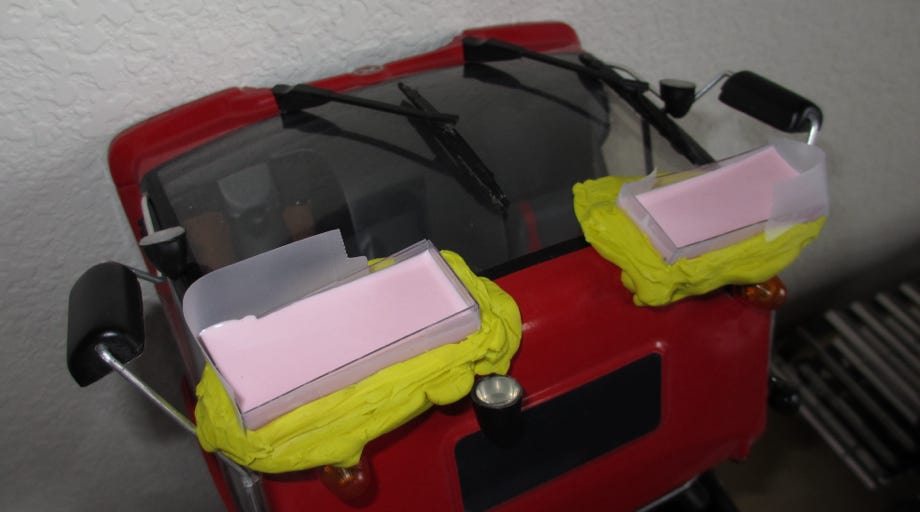
The characteristic "eye brows" of the PB600 roof head lights are missing at the vacuum formed driver cabin due to the production process. But of course I wanted to have them as well, because the model should be true scale to the original.
Albert made these by hand from plastic parts for his PB600. It seemed to be the easiest way to simply cast them.
Albert's comment:
"It was a strange feeling to pour silicon on the model. But what wouldn't you do for a friend!" :-)
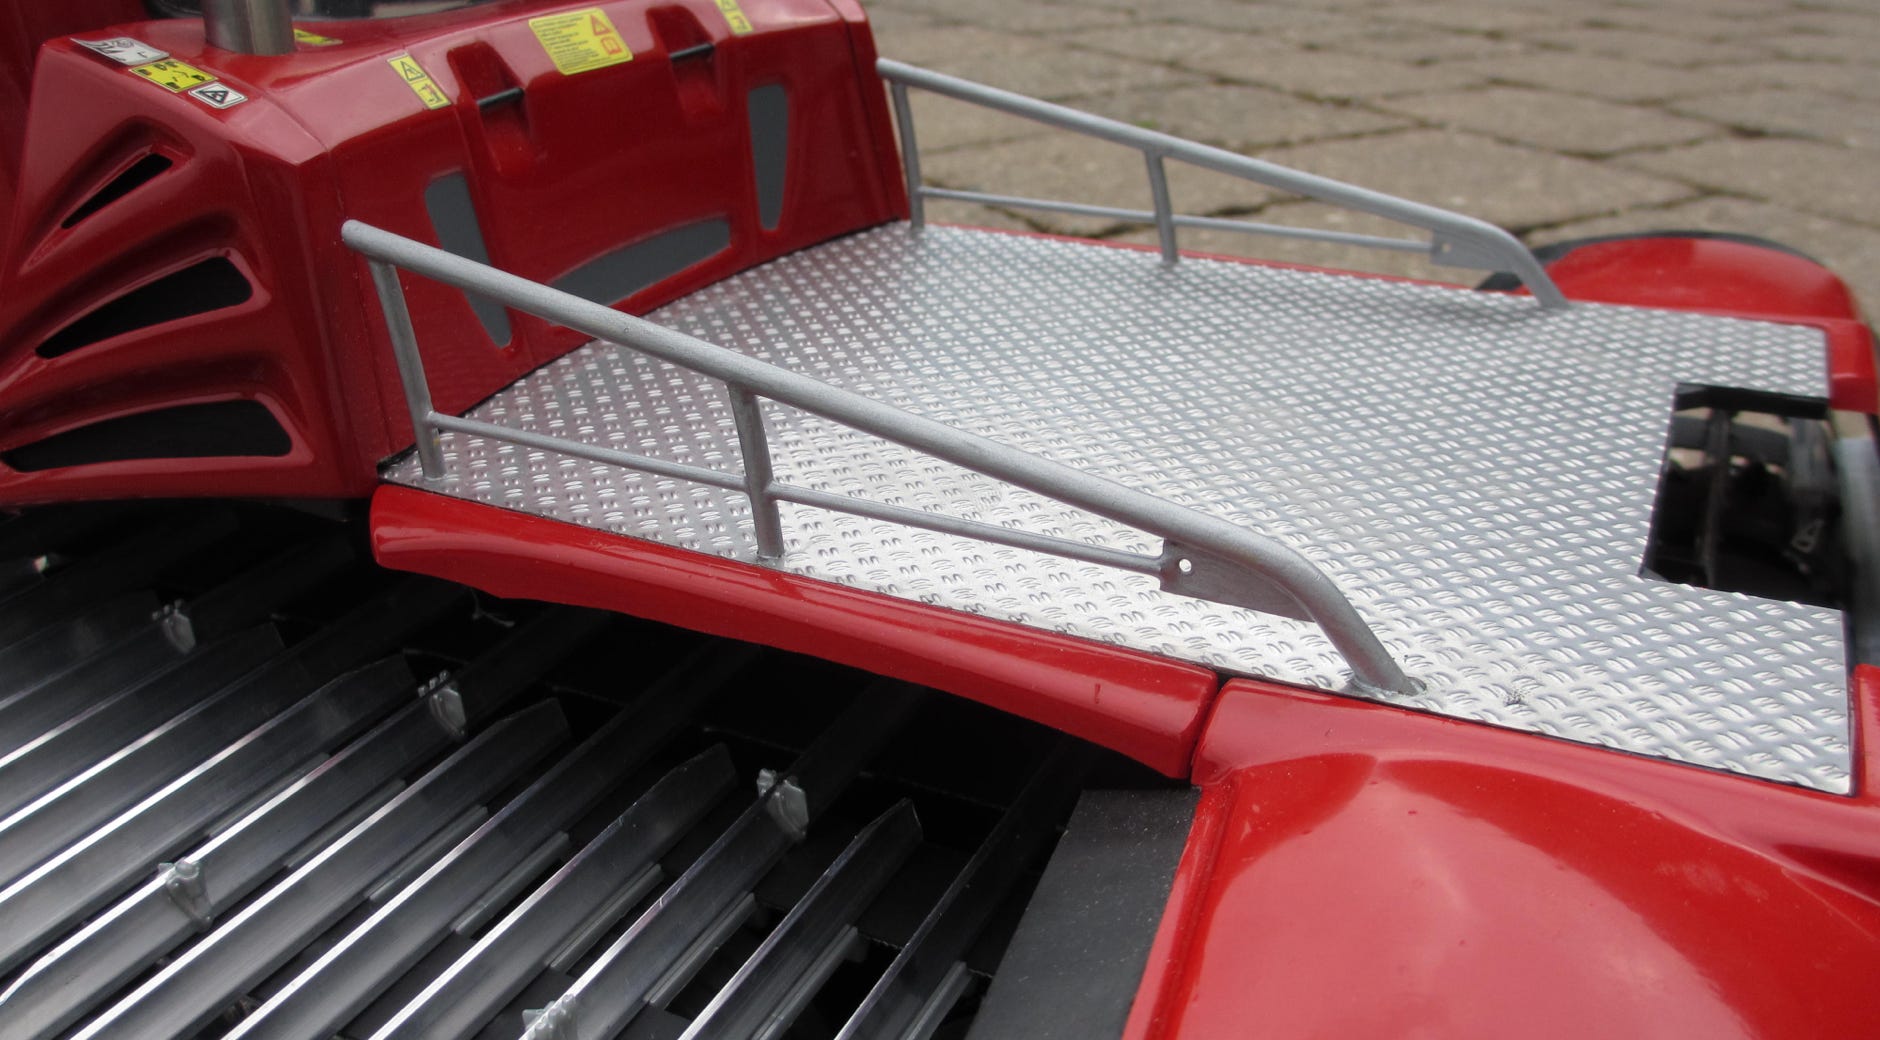
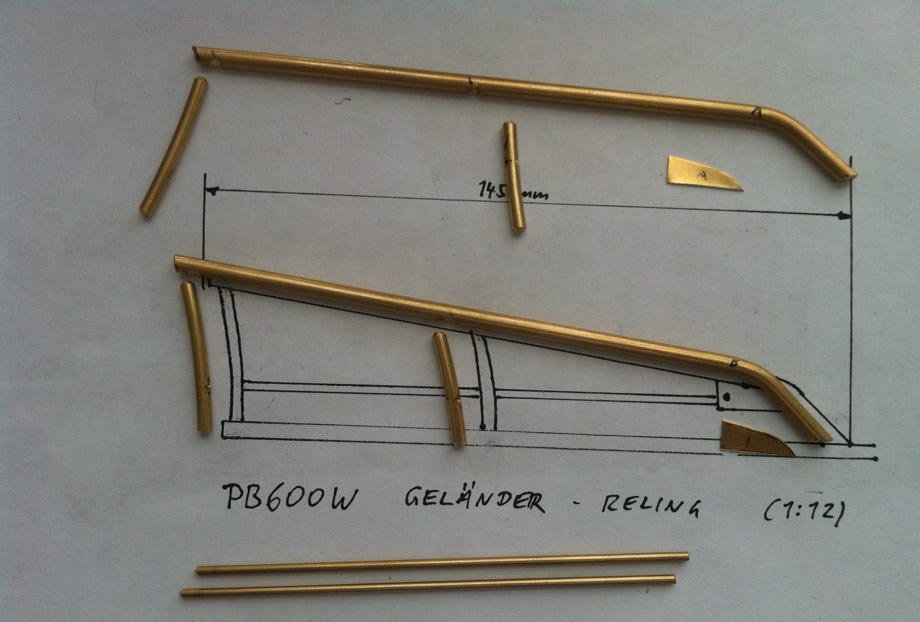
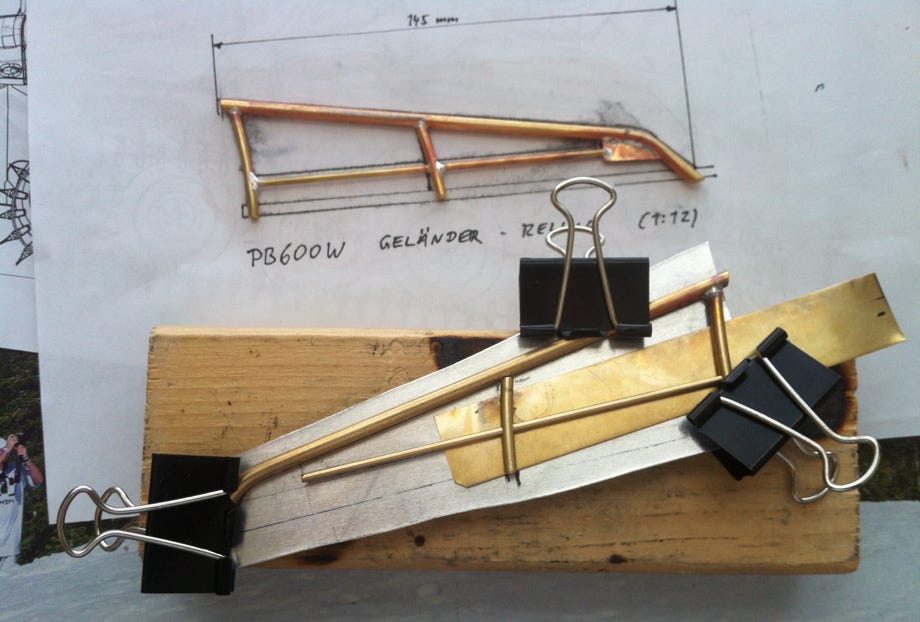
Also the railing of the platform was soldered in true scale from brass rods. This is the lower rail for the winch version.
The pictures below show the individual parts and how they were soldered.
Advice: print the drawing on a laser printer, then place it upside down on the aluminum sheet and soak it with lacquer thinner. The toner will be transferred to the aluminum.
Then the parts can be put much easier into the correct position for soldering and fixed with metal clamps. The solder does not stick to the aluminum.
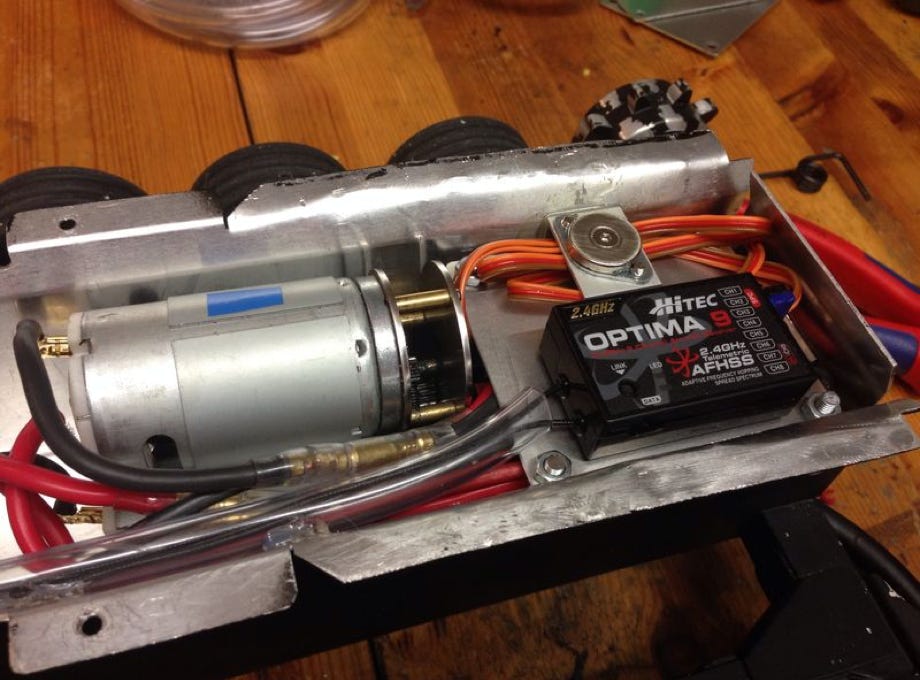
I decided to use Pistenking's PB 600 chassis because it is ready to use within short time. The flexible shafts are a very good solution, as no tricky mounting of bevel gears needs to be done to take care of the forces. The center of gravity is perfect, as the motors are a only a bit after the driver cabin.
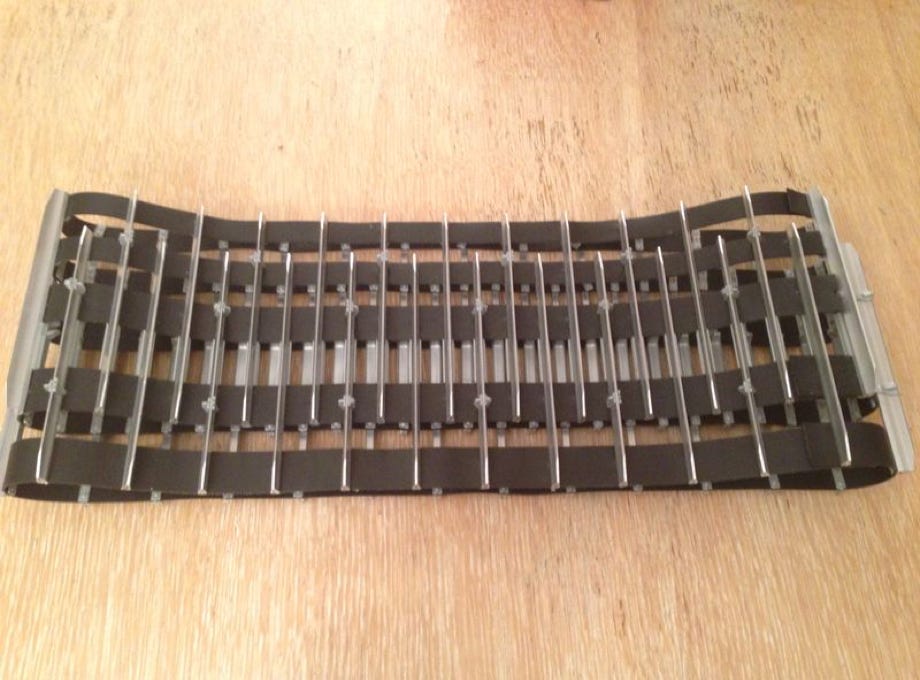
Meanwhile I got and assembled the super scale metal tracks from Pistenking. According to our WPM-tradition we named them "Eagle-Tracks", based on a suggestion from a fan of our FaceBook page.
The eagle is the animal, which lives in the highest regions of the Alps, and therefore this name fits perfectly for these tracks.
Already two of our WPM snow cats are equipped with the Eagle Tracks.
I’m using the kit by AT modellbau for the tiller.
A micro motor is hidden inside of the tiller. The motor shaft will fixed with a bolt inside a brass part, which is glued to the tiller.
The motor itself is bolted to the tiller frame with an U-shaped aluminum part.
The other side of the tiller is fixed with a bearing to the frame.
The motorization was done according to the article of Klaus Bergdolt in Rad & Kette 2/2012.
The tiller is still under construction.
Aligning the holder for the overthrow protectors
Diese Seite verwendet Cookies. Sie stimmen der Verwendung von Cookies durch Anklicken von “OK” zu. Nähere Informationen finden Sie in unseren Datenschutzbestimmungen.
This page is using Cookies. You are permitting the use of cookies by clicking on “OK”. More information can be found at our Privacy Protection.


