Walser Pistenraupen Modellbau
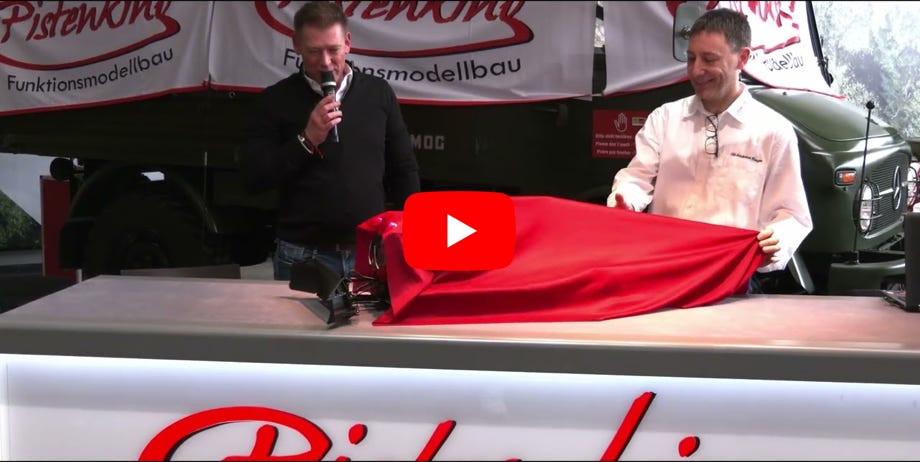
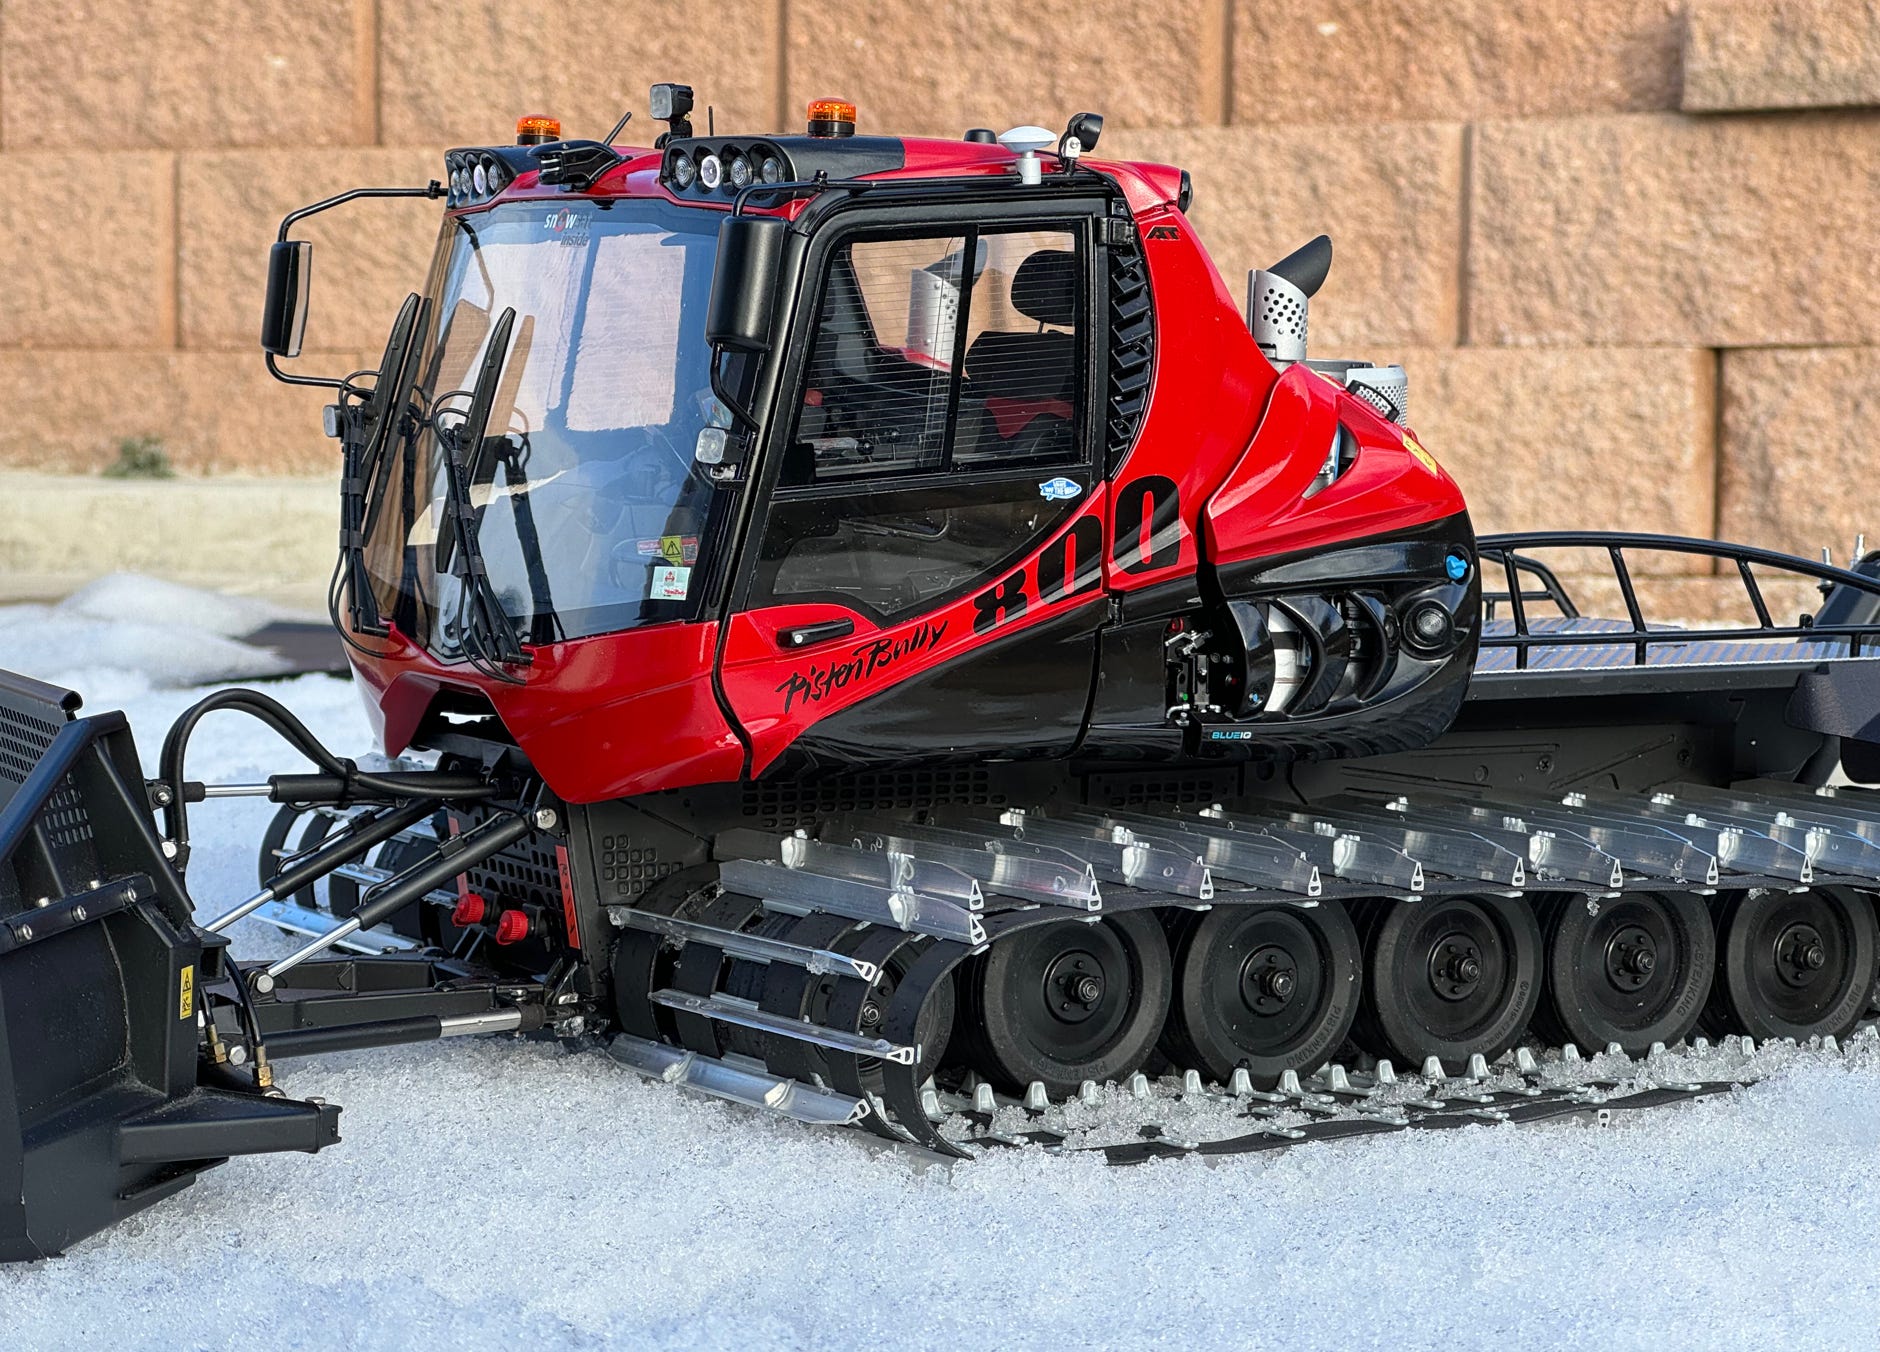
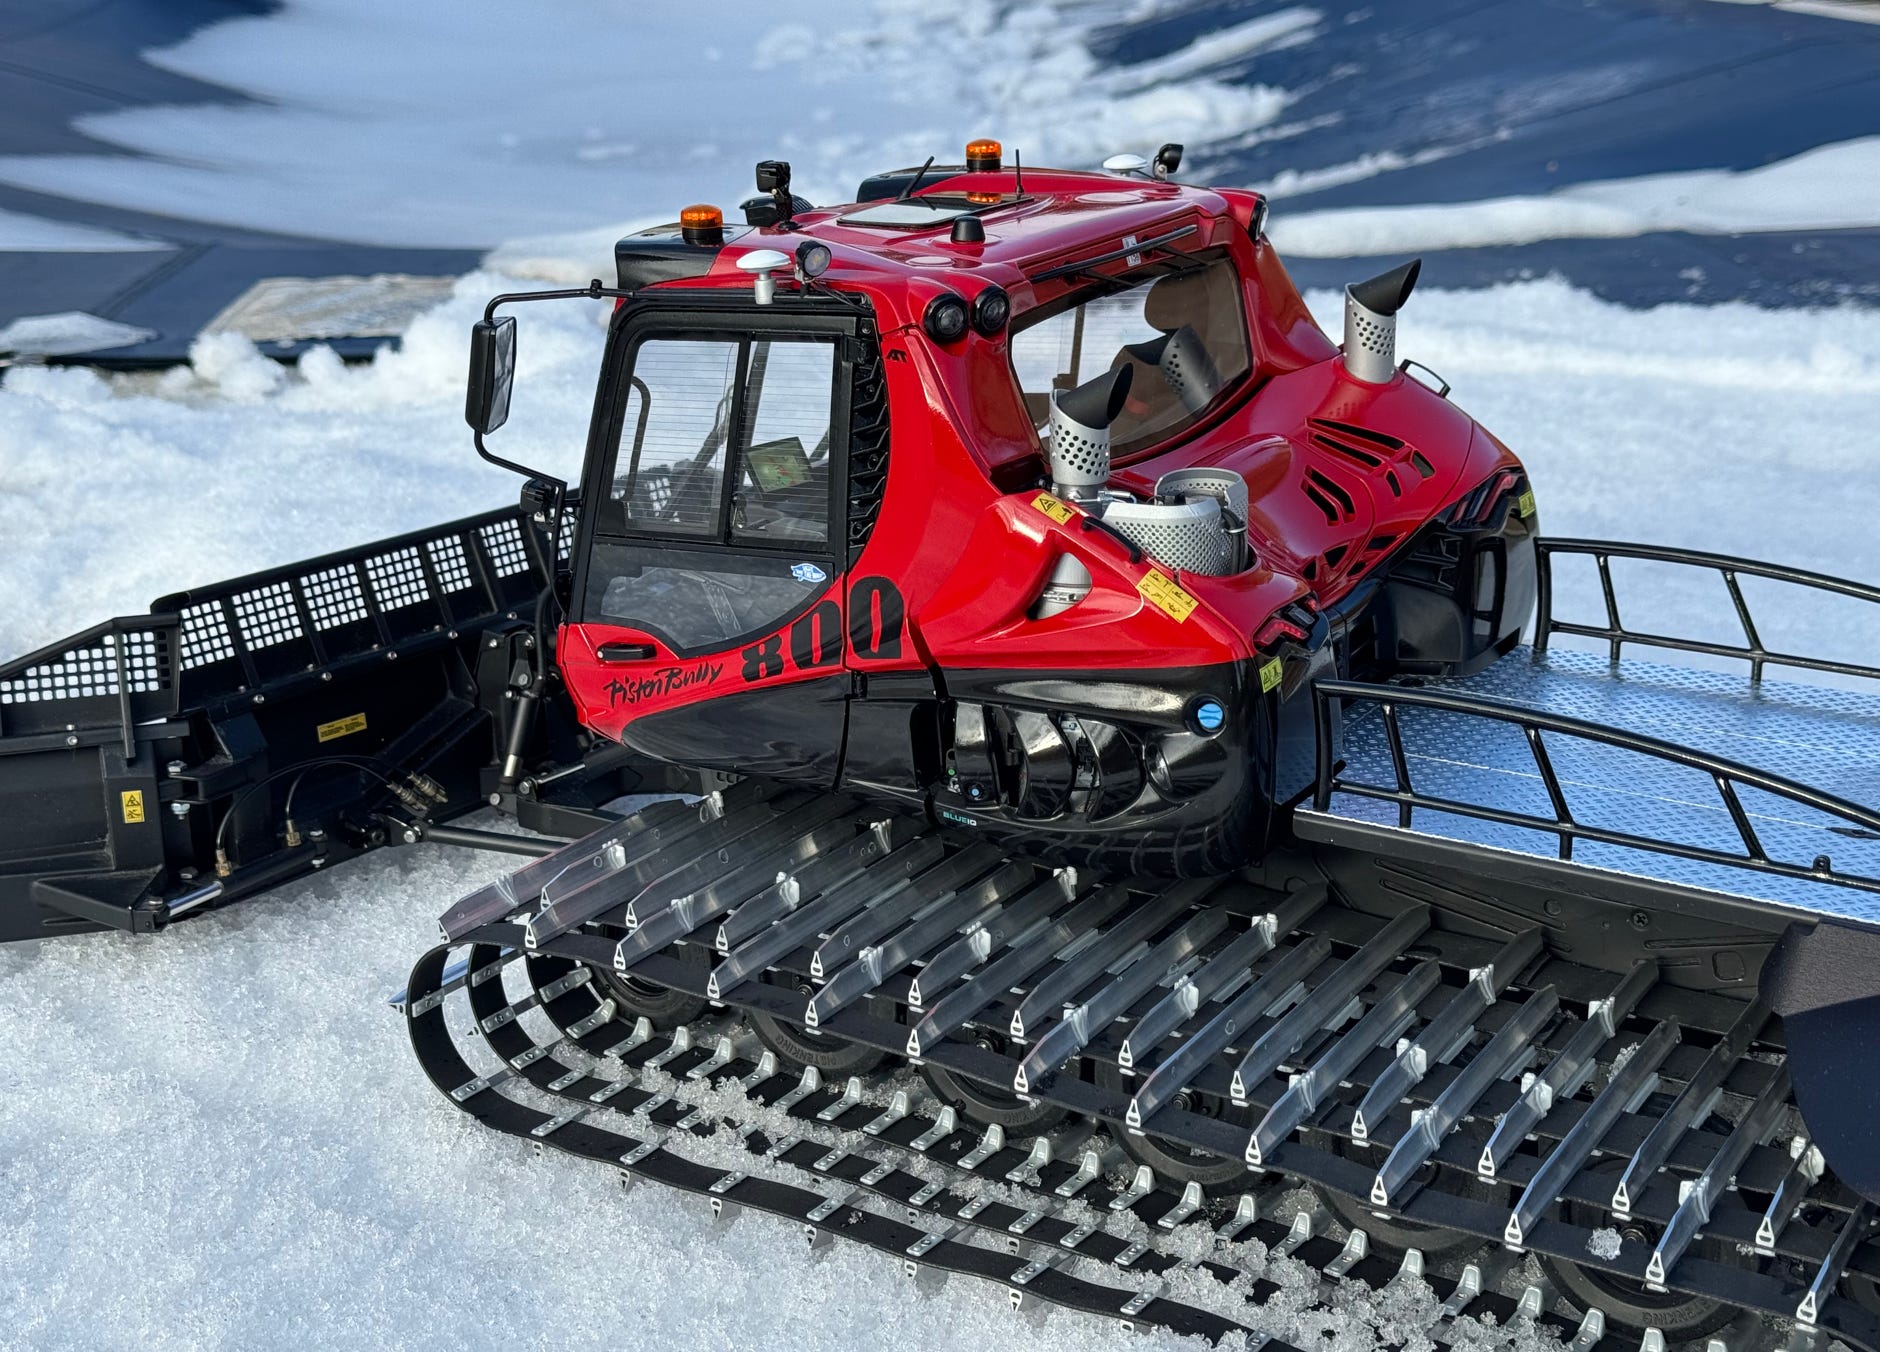
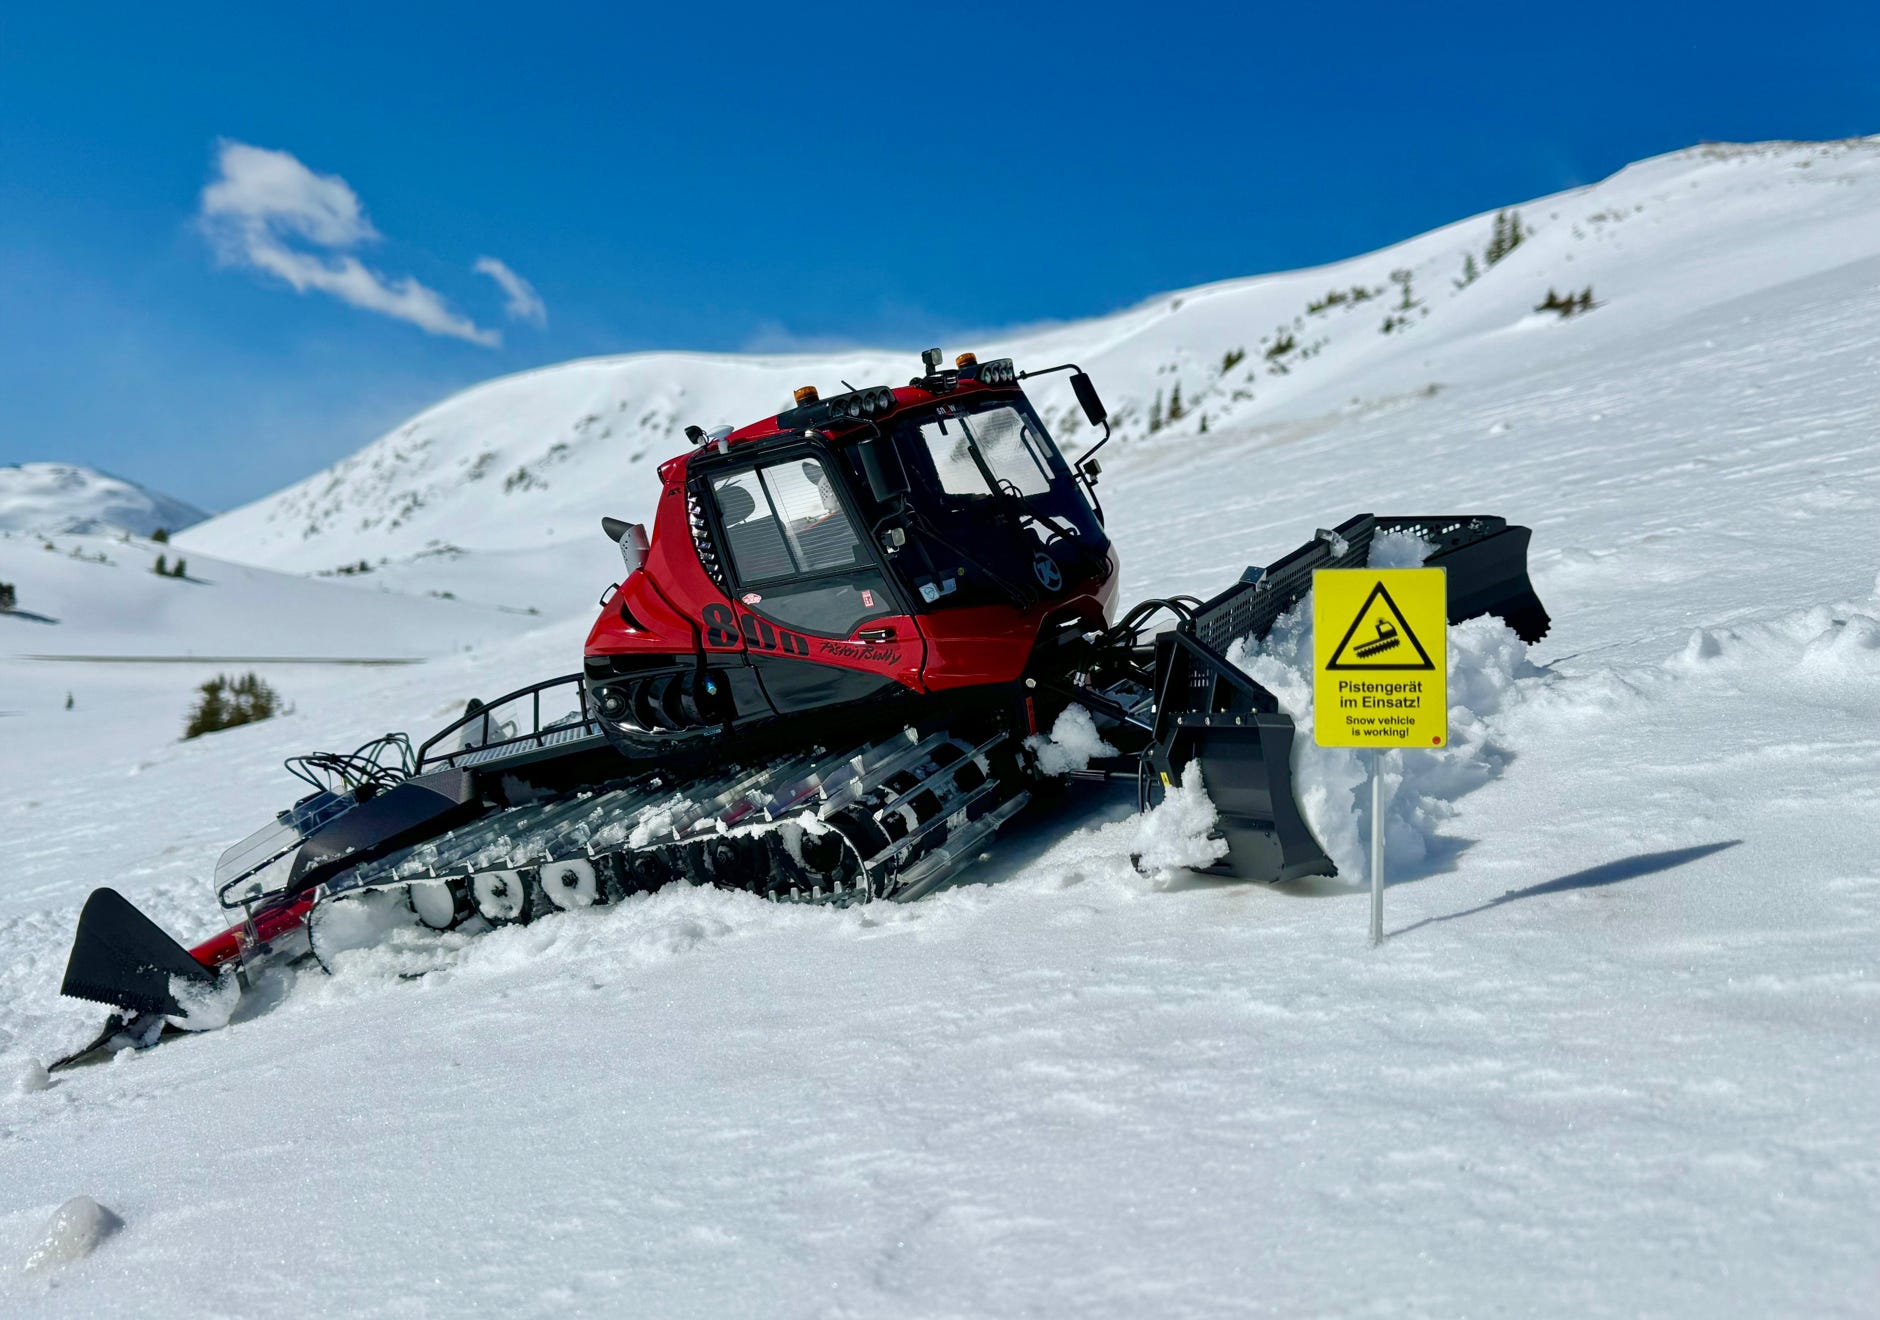
Kässbohrer's latest top model, the PistenBully 800 SIMPLY RED, was officially presented in a live stream on March 1, 2023 in Sölden. It is specially designed for pushing power and optimal slope preparation and has one more wheel than previous PistenBullys. As usual, images of the PB800 as a prototype in camouflage and later even uncamouflaged were already floating around on the internet before the event.
Pistenking received the CAD data already at the beginning of autumn 2022, of course under the strictest secrecy. As with the PB400, I took over the CAD work in order to develop parts for the model and an intended kit from the original data. We had set ourselves an ambitious goal: a prototype of the model should be ready by the presentation on March 1st, 2023. And we did it! Just three days later, Pistenking was able to present the model at the "BEST OF" function model event in the Unimog Museum in Gaggenau, Germany!
It was great teamwork with Pistenking: Adrian Humbel took care of the sheet metal parts, Andi Rieger did the electronics for the light circuit boards and Lukas Worbs printed the driver's cab parts. On February 13, 2023, Andi Rieger and I even had the opportunity to see the PB800 live during a visit to Kässbohrer.
Below are two videos, one from the product presentation at the model fair “BEST OF” (in German language), and one with impressions of the model .
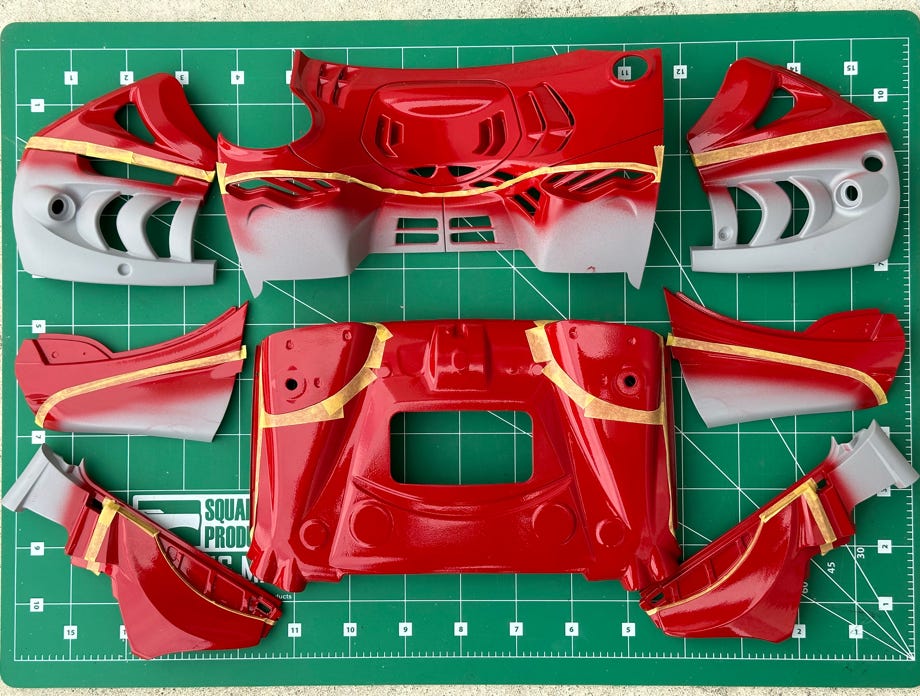
Of course I was also interested in my own model, because the PB800 looks really cool. So I bought an Anycubic M3 Premium printer and accessories. This made it possible to print the large cabin parts in one piece. The surface quality was impressive and almost indistinguishable from injection molded parts.
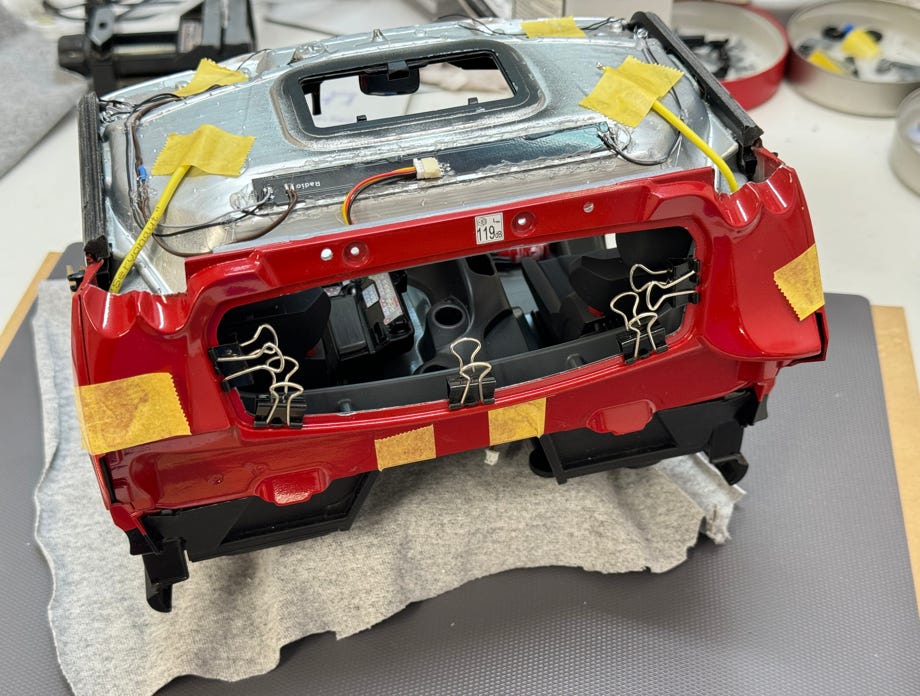
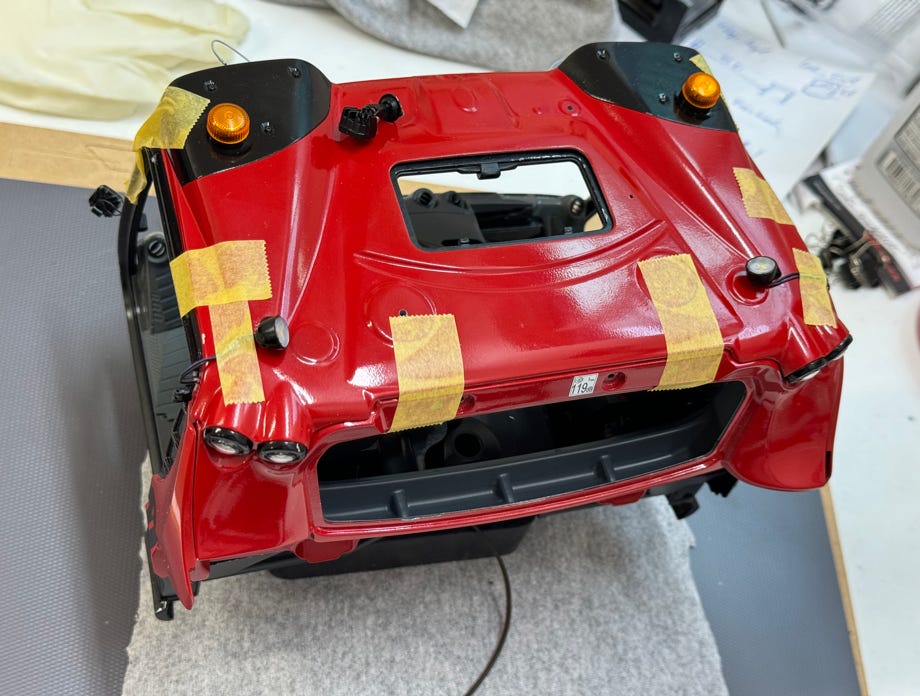
Only one pass with a filling primer and sanding was enough. Then two coats of silver paint (I use Tamiya TS-30) were applied for UV protection, over that a light gray primer, and then red could already be painted. Below are the parts as I taped them off for painting the black areas:
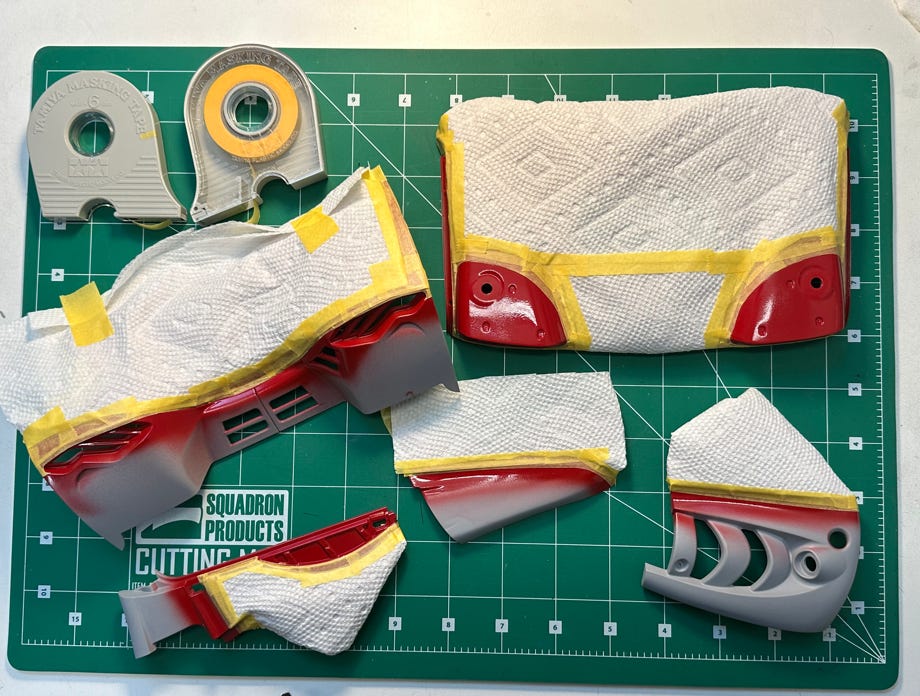
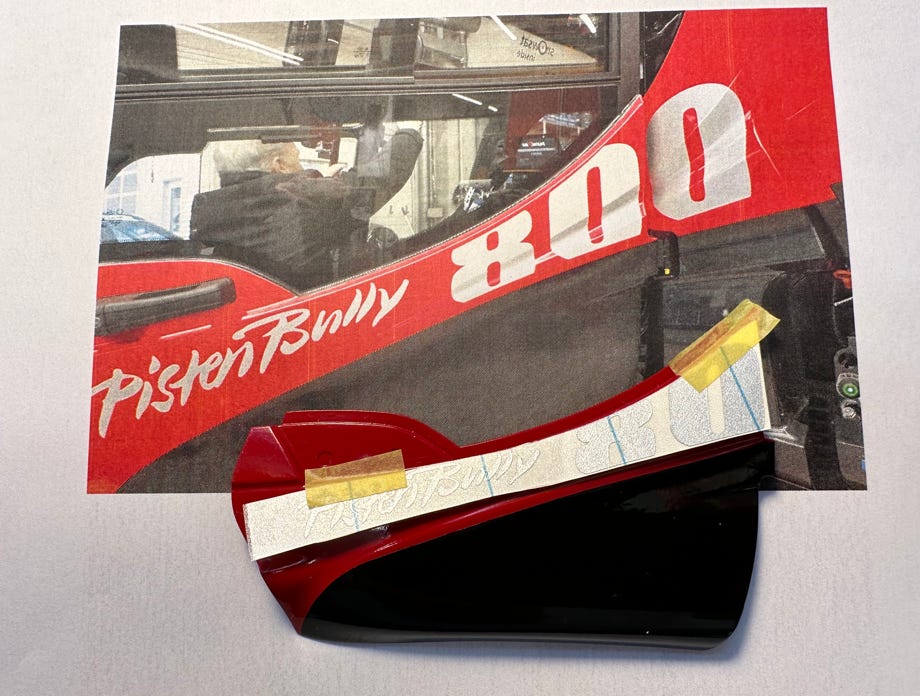
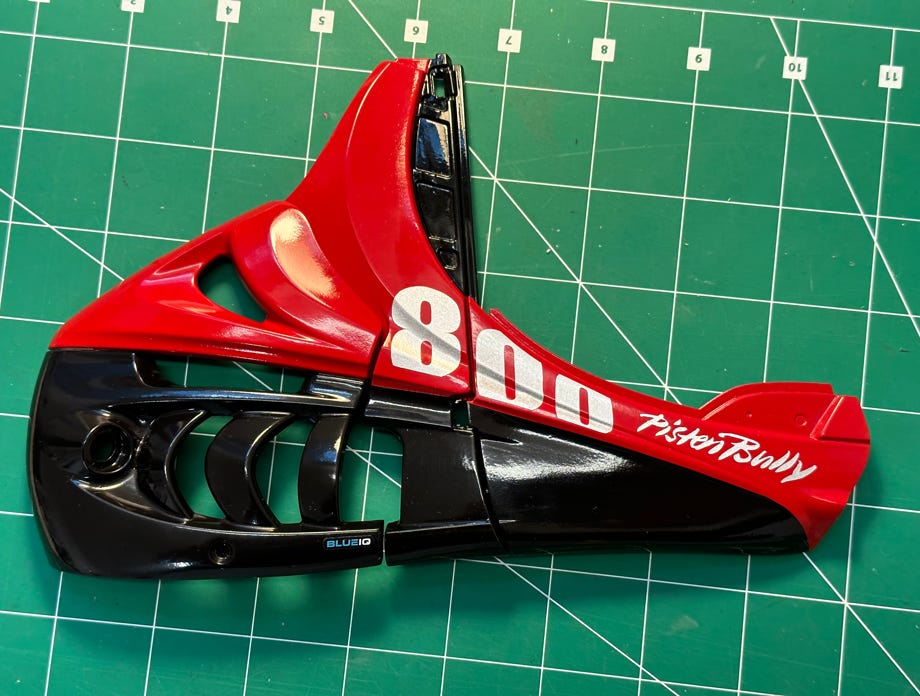
After painting, the silver logos had to be applied, which was a real challenge because of the indentation in the side panels and a rather stiff carrier film for models of this size. When the first PB800s with black lettering appeared in the winter of 2023/24, I removed the silver foils and replaced them with black ones because that suits my fleet better.
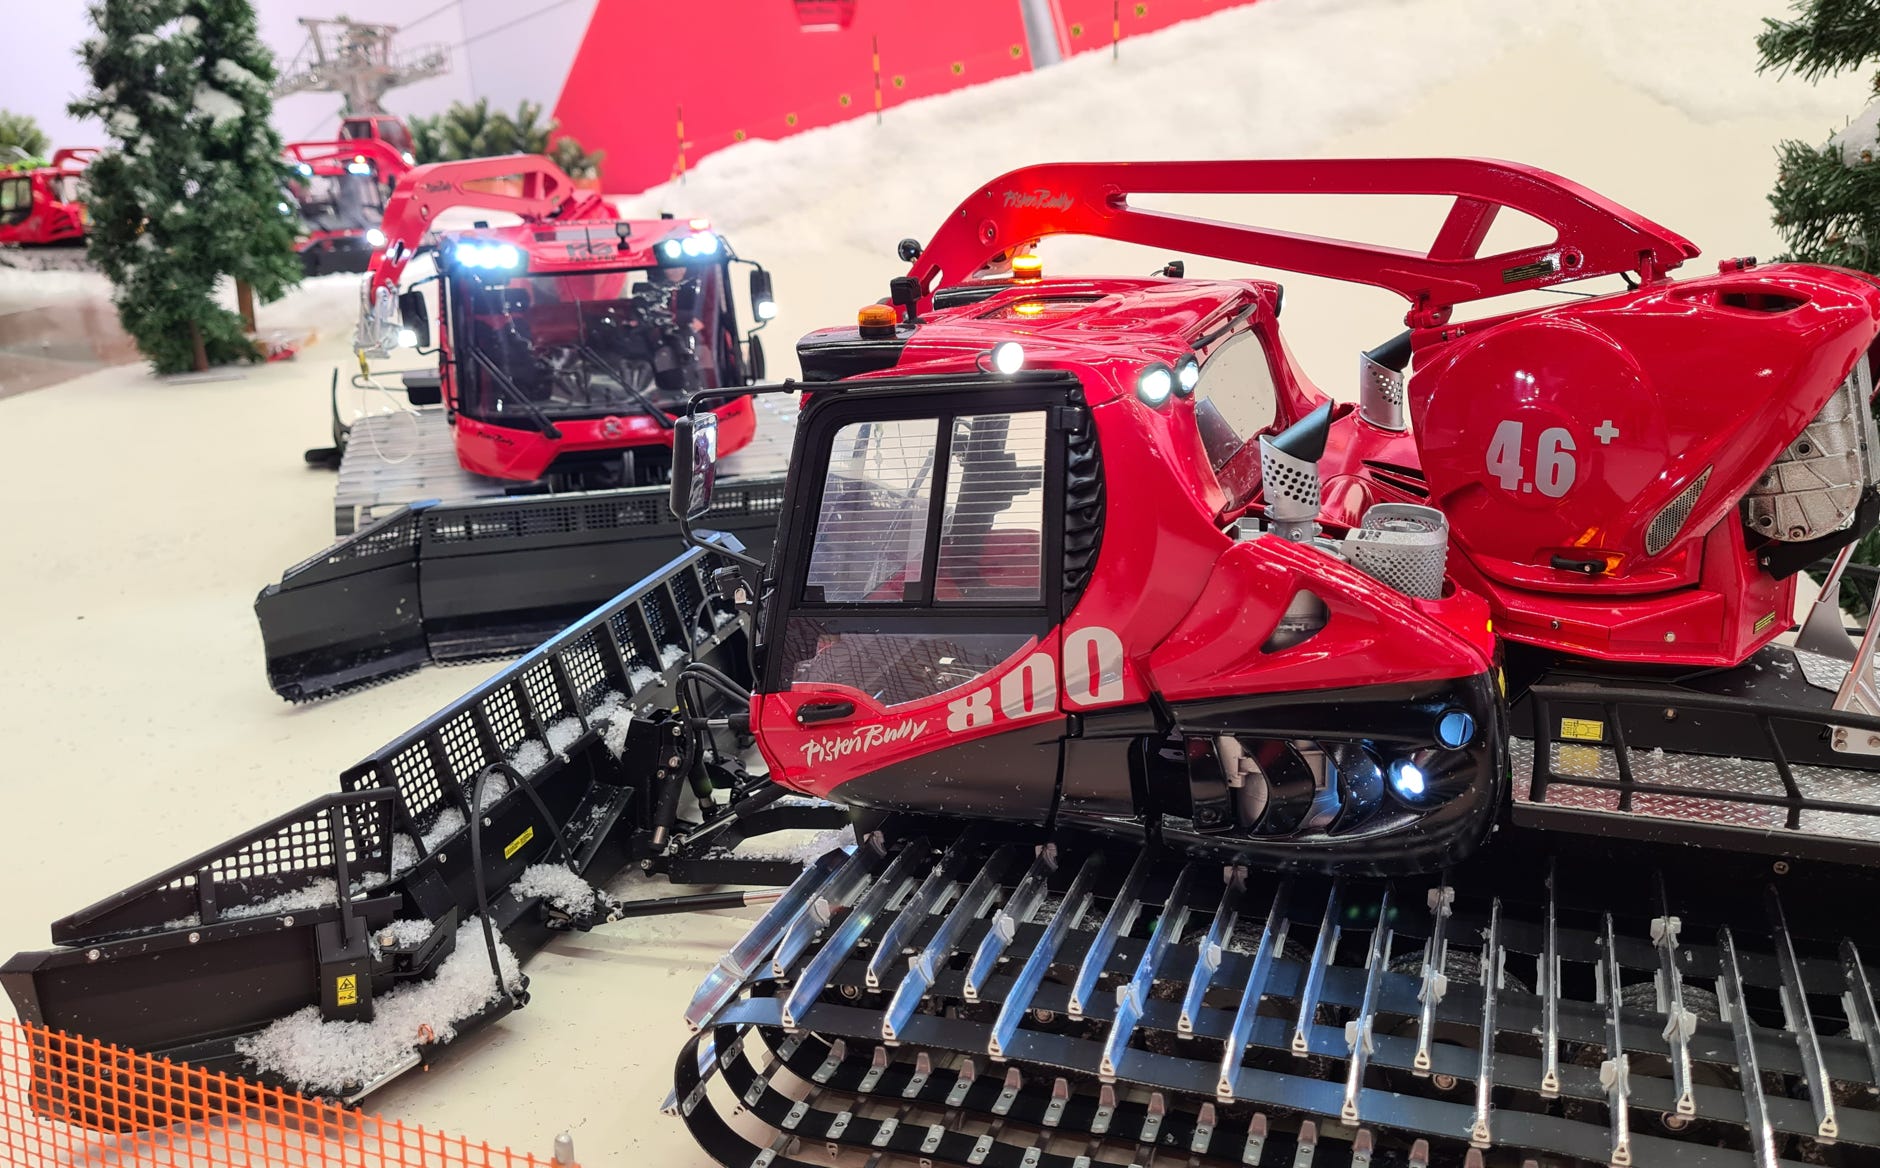
Below is the Pistenking model (built by Adrian Humbel) at the Interalpin 2023 at the PistenBully booth:
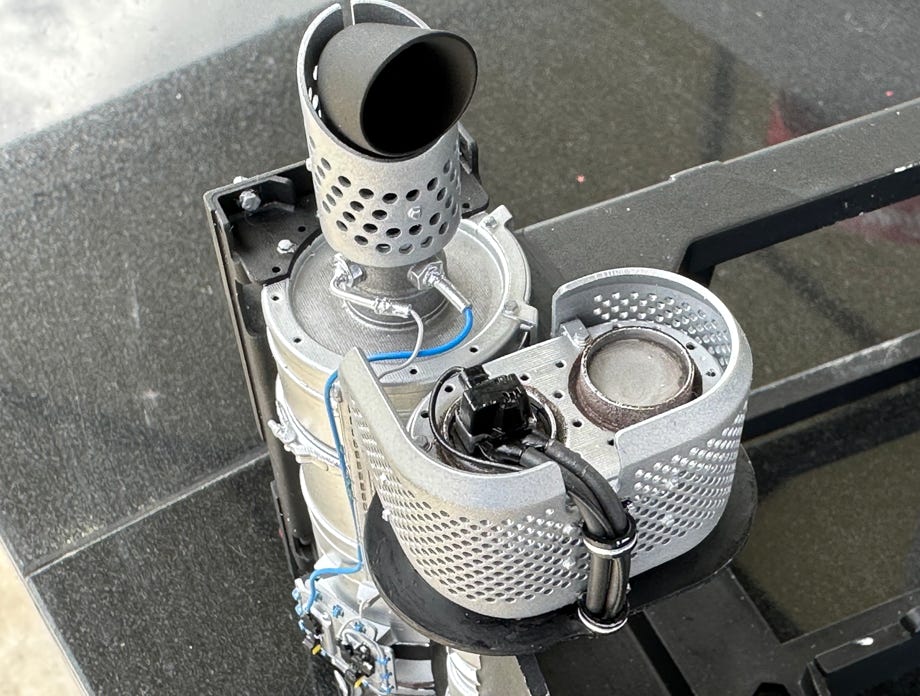
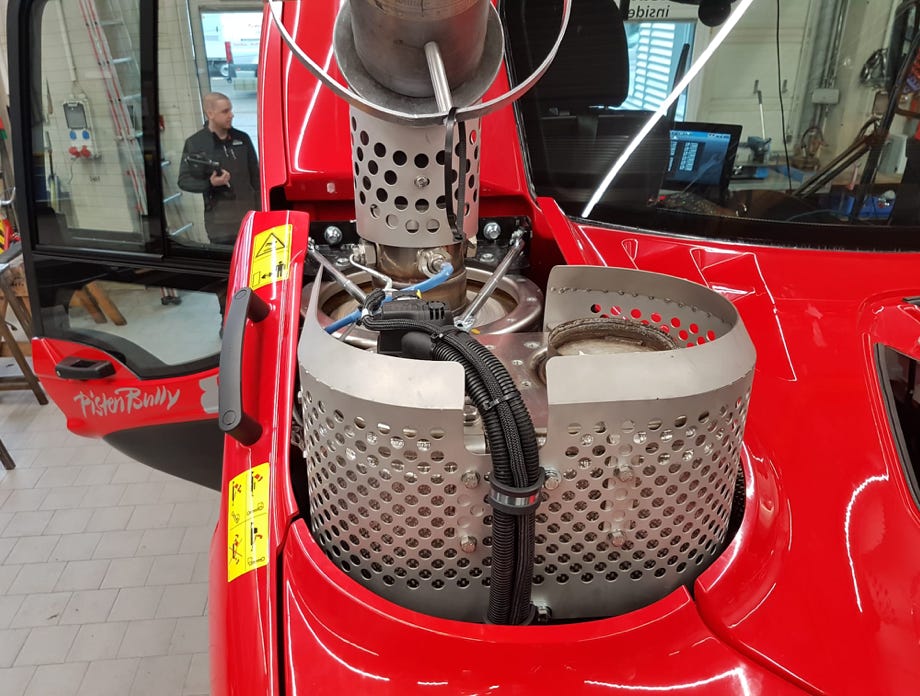
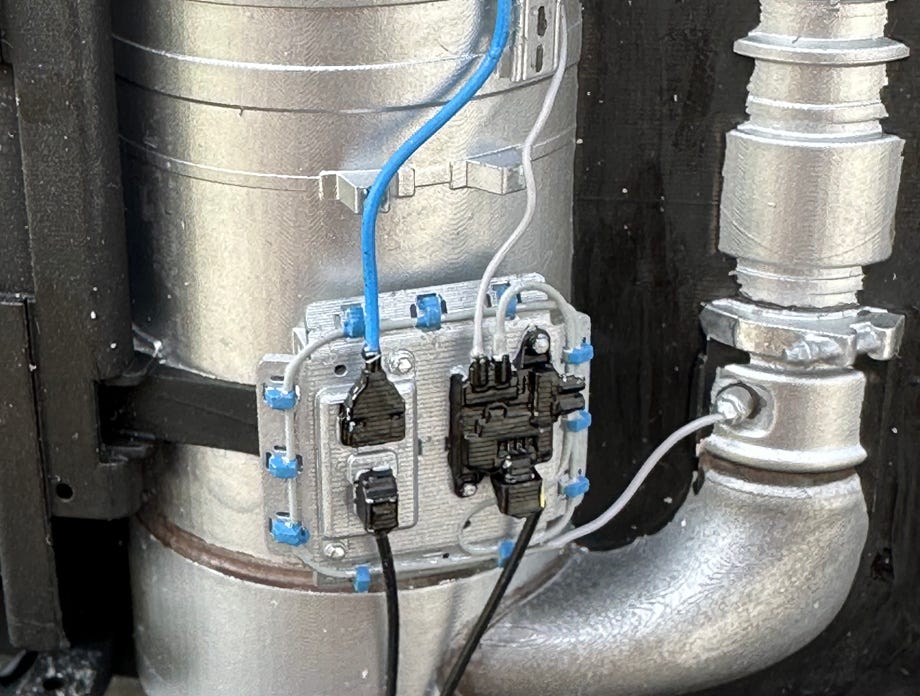
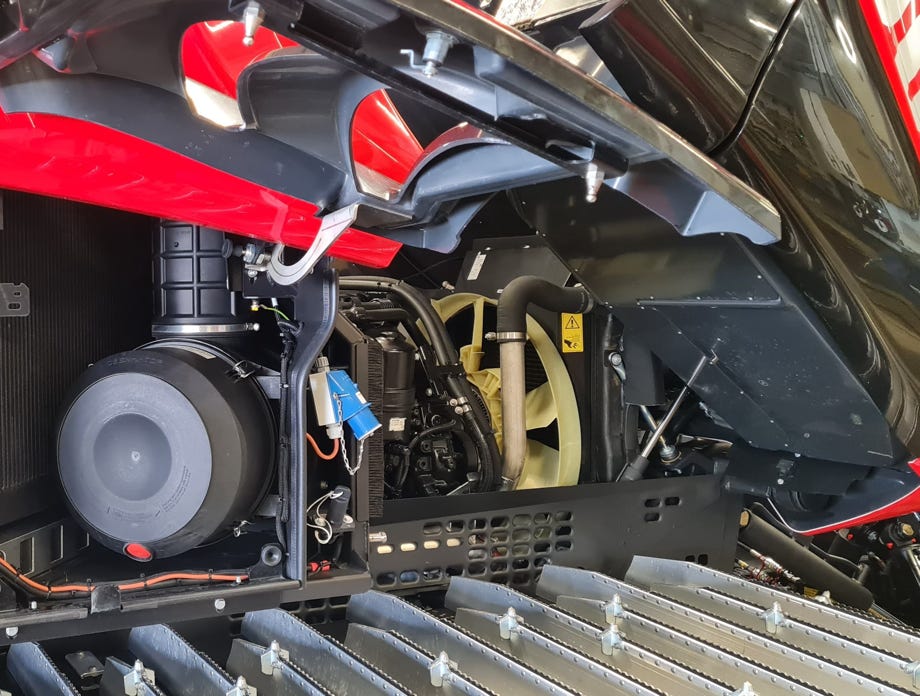
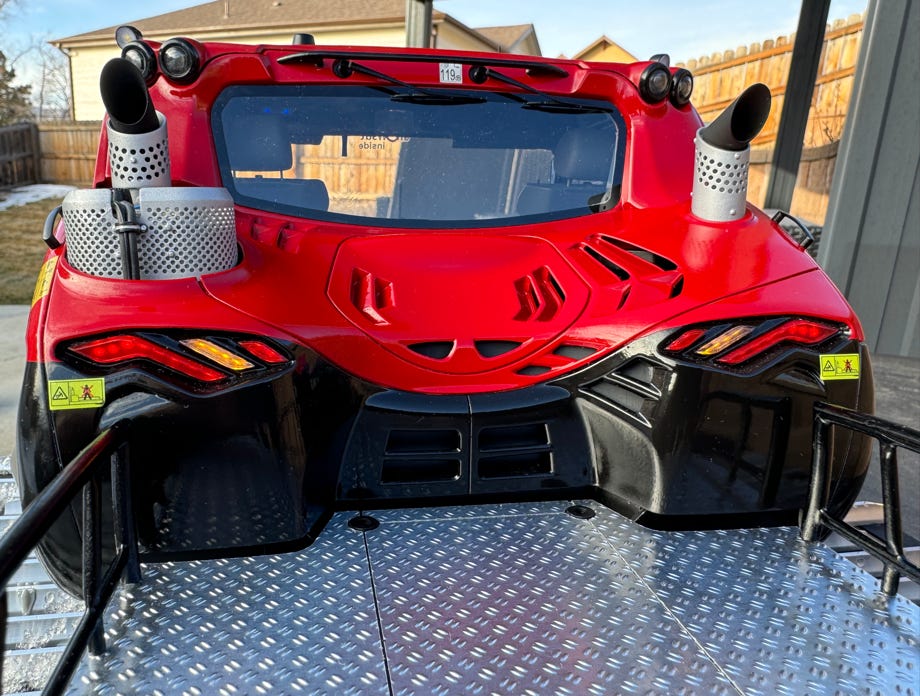
With the exhaust system, I was really able to go down to the smallest detail thanks to the CAD model. Of course, not the entire system is implemented in the model because the space in the backpack is needed for the electronics. Below are photos of the model and original respectively.
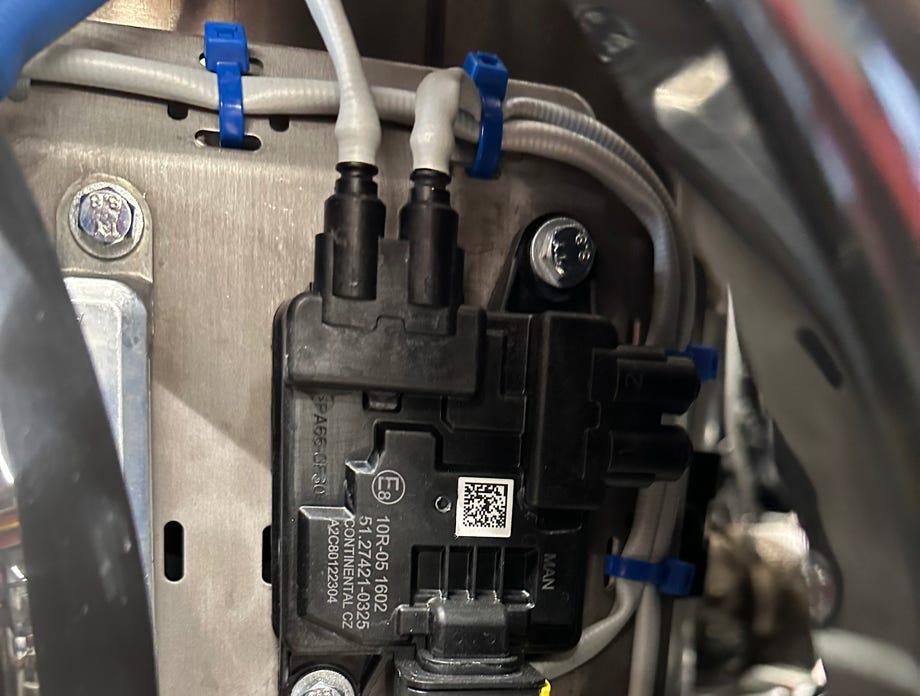
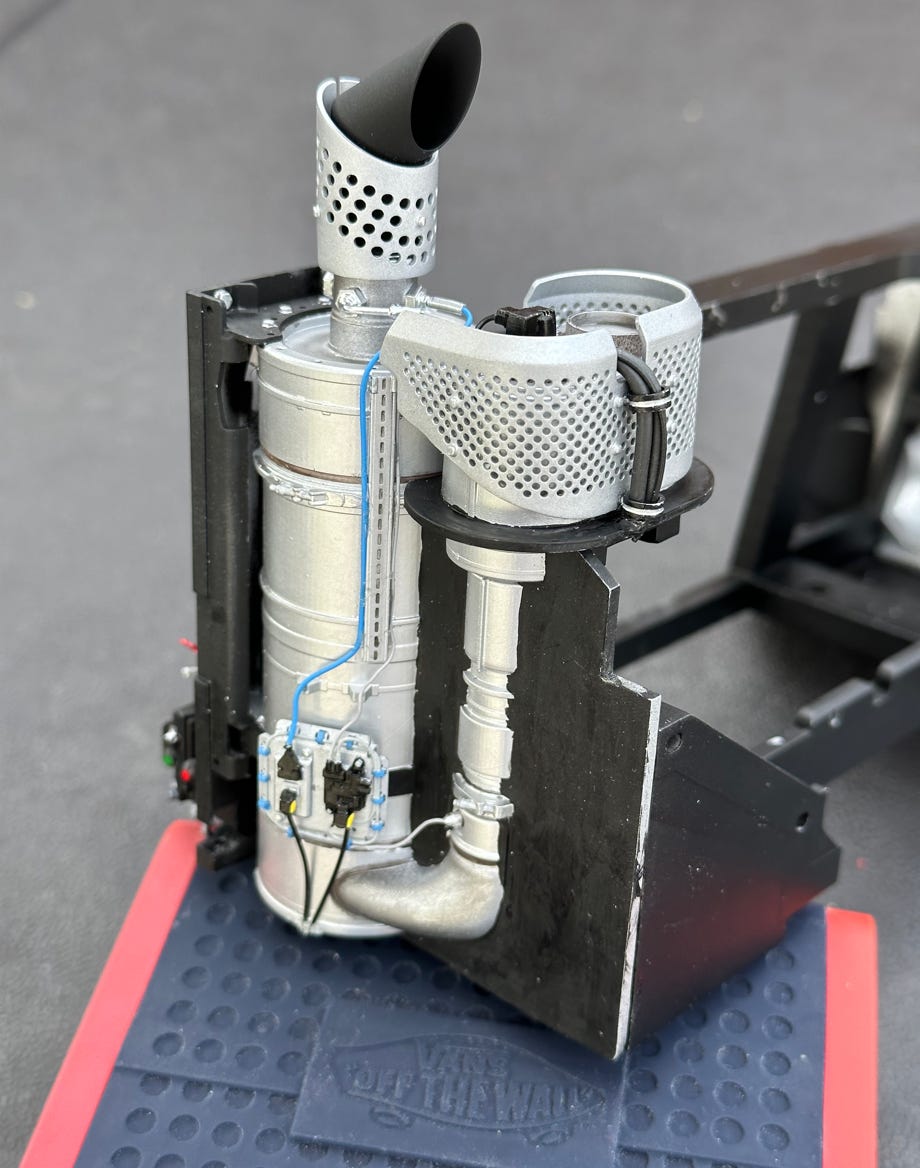
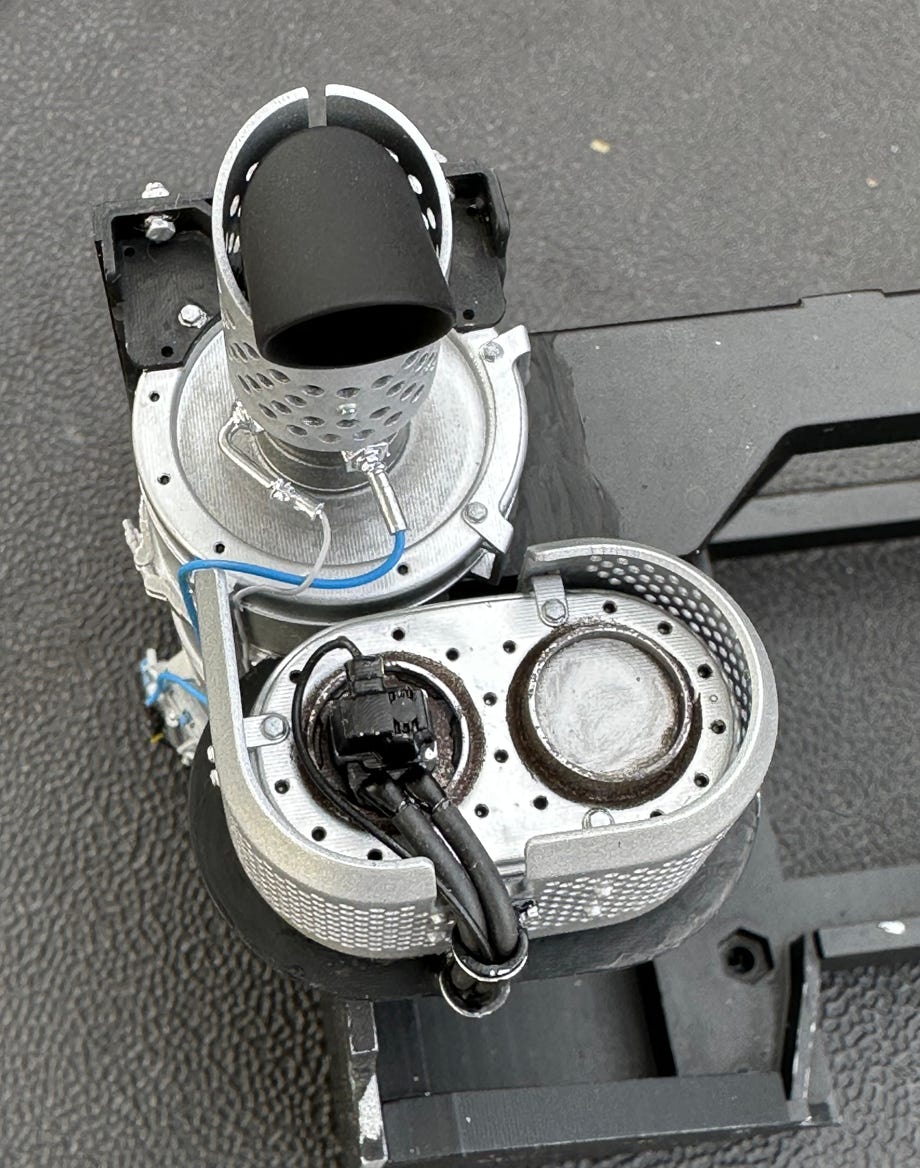
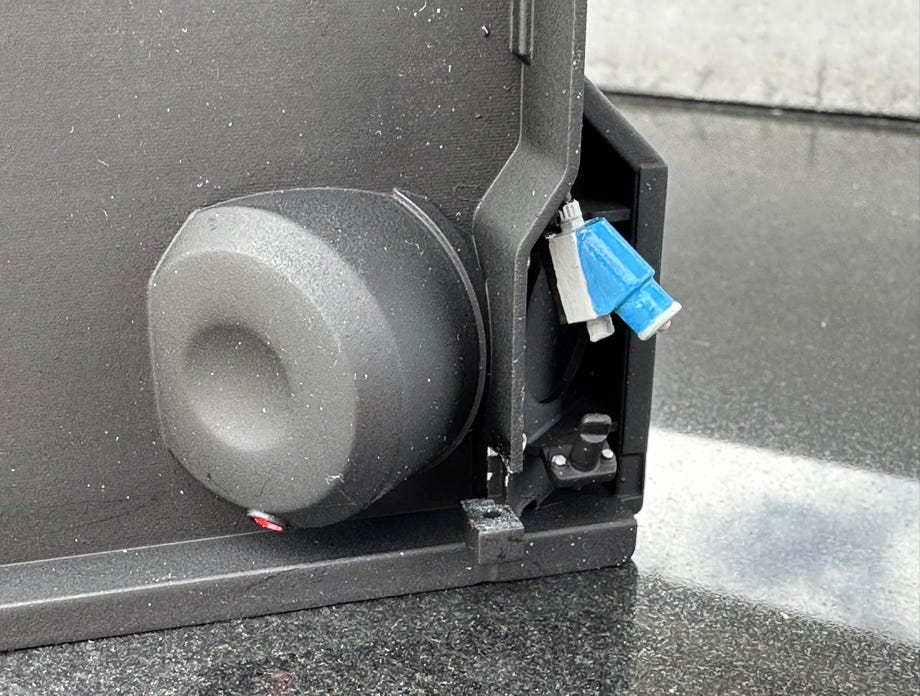
In the original, the cooler is on the right side, diagonally inwards, and would therefore hardly be visible. That's why I put in a black wall, just like with the exhaust system because of the space requirement in the backpack.
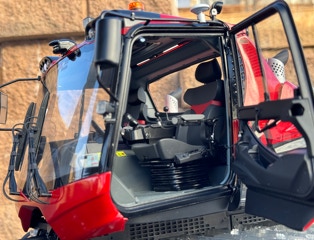
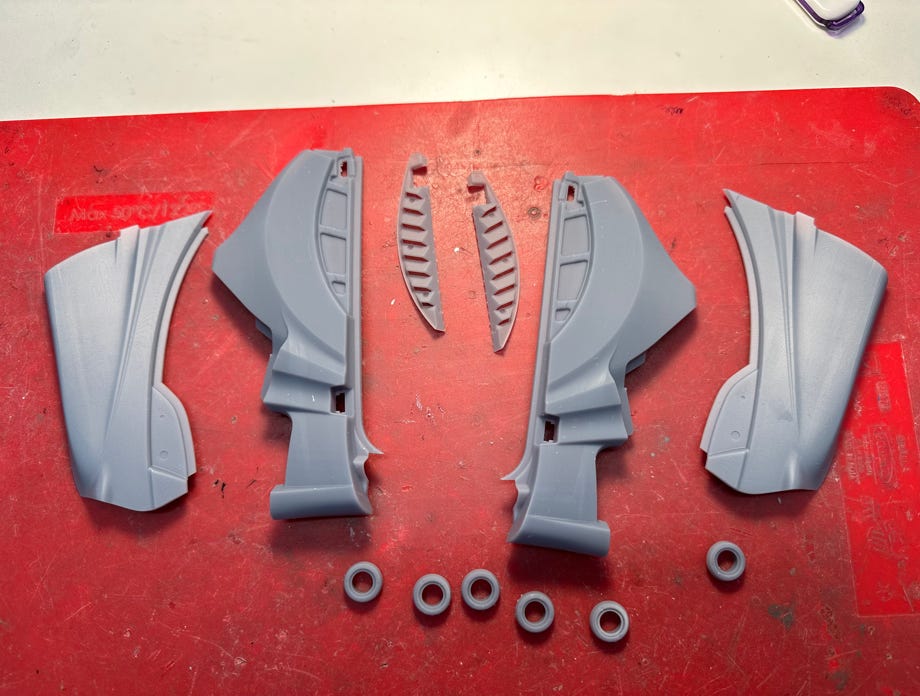
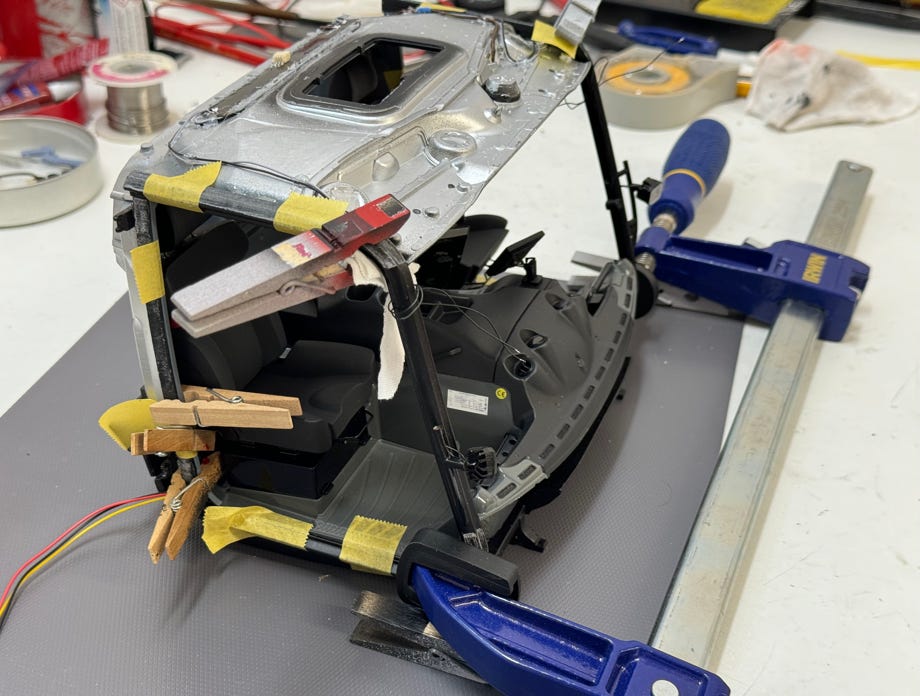
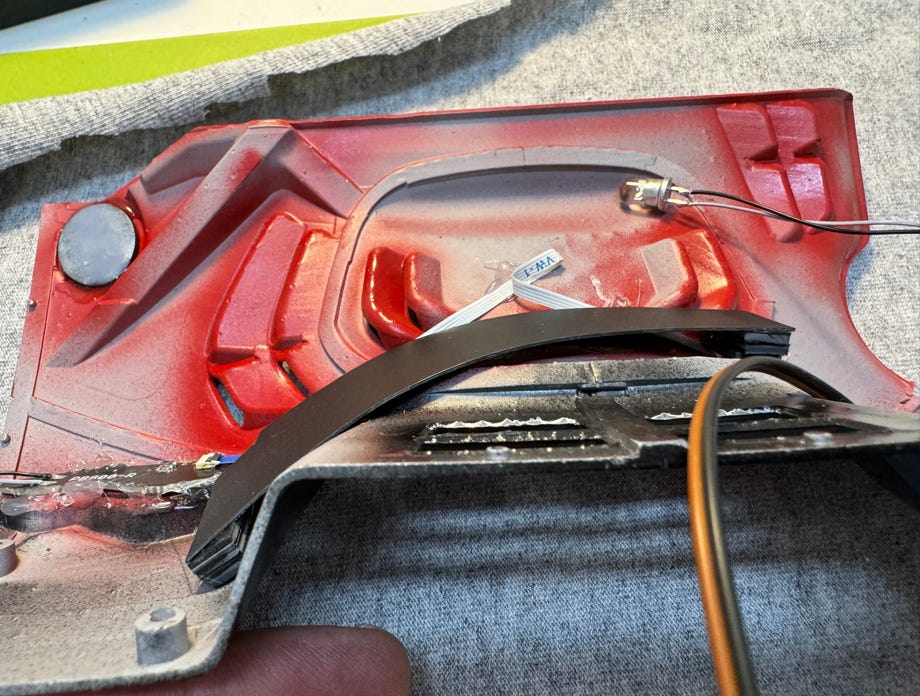
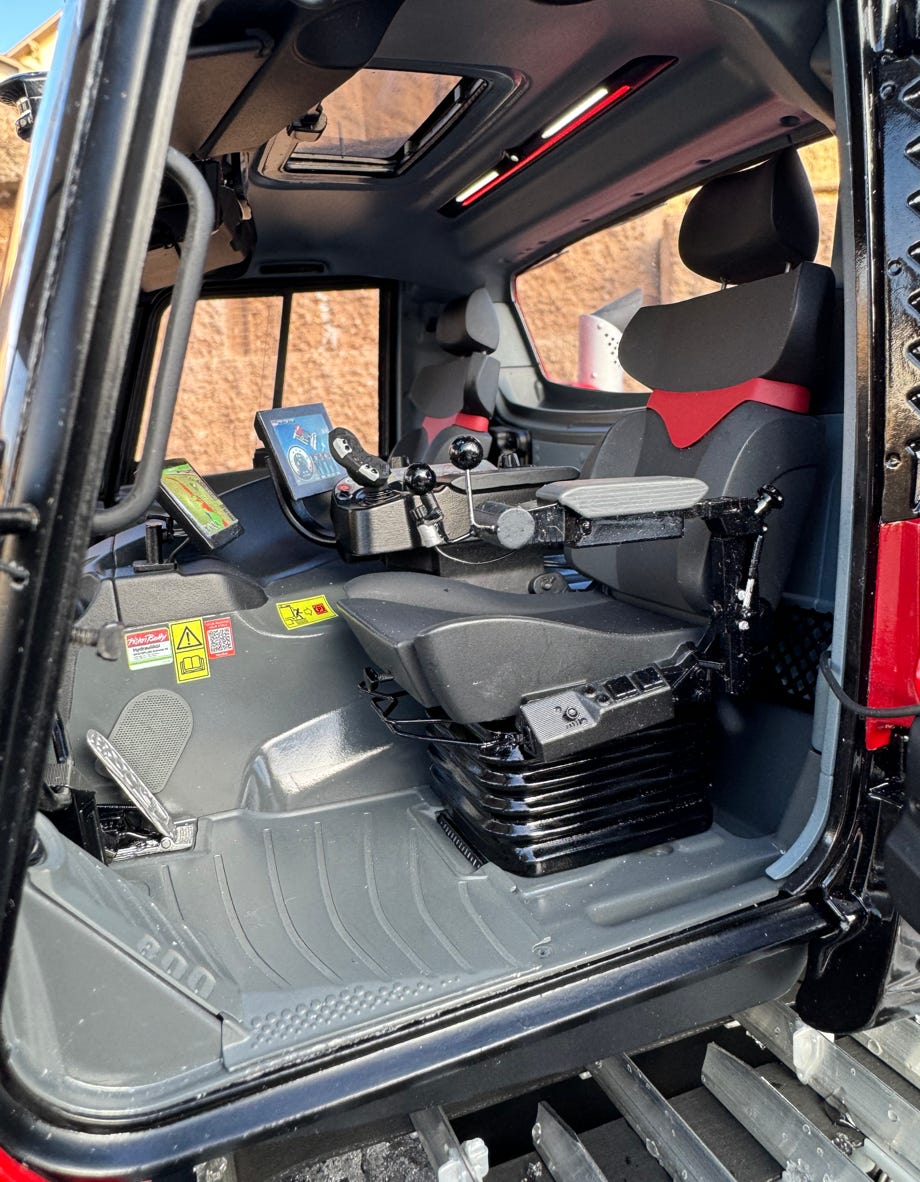
In fall 2023 I finished drawing and printing the interior panels. Shortly after Christmas the lighting boards arrived from Pistenking and I was able to start assembling the driver cabin. I started with the floor assembly, glued the door frames, the rear wall and the headliner with UHU plus endfest 300. It has over 2 hours of pot life, so there is enough time to position the parts precisely. Then let it harden overnight. Then I glued on the back wall and front apron. The roof comes last. In order to thread the Kingbus cables through the B-pillar, I pulled in the yellow cables before gluing the rear wall. I glued the delicate air outlets on with white glue (Micro Kristal Clear) as shown in the photo.

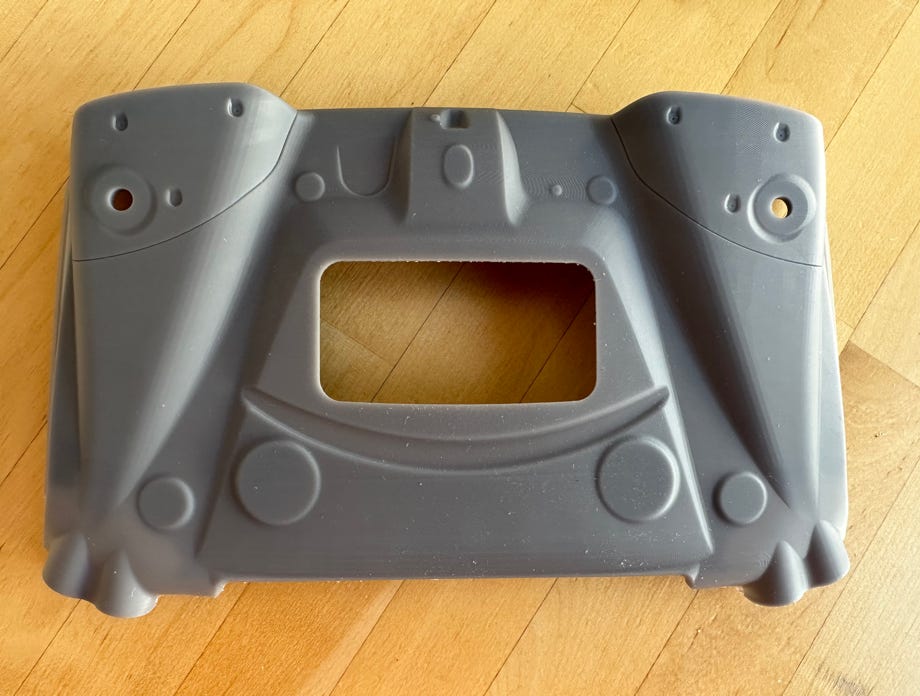
I covered the bottom ventilation slots on the inside of the backpack with a thin black polystyrene plate. Then you can't see through to the tangled cables.

A particular challenge was the interior lighting with the red ambient stripes. Andi Rieger from Pistenking has really achieved an ingenious implementation for the model. When a door is opened, the white interior lighting switches on and dims after a time delay after the doors are closed. The red ambient lighting is always on. The blue backlit radio is another eye-catcher.
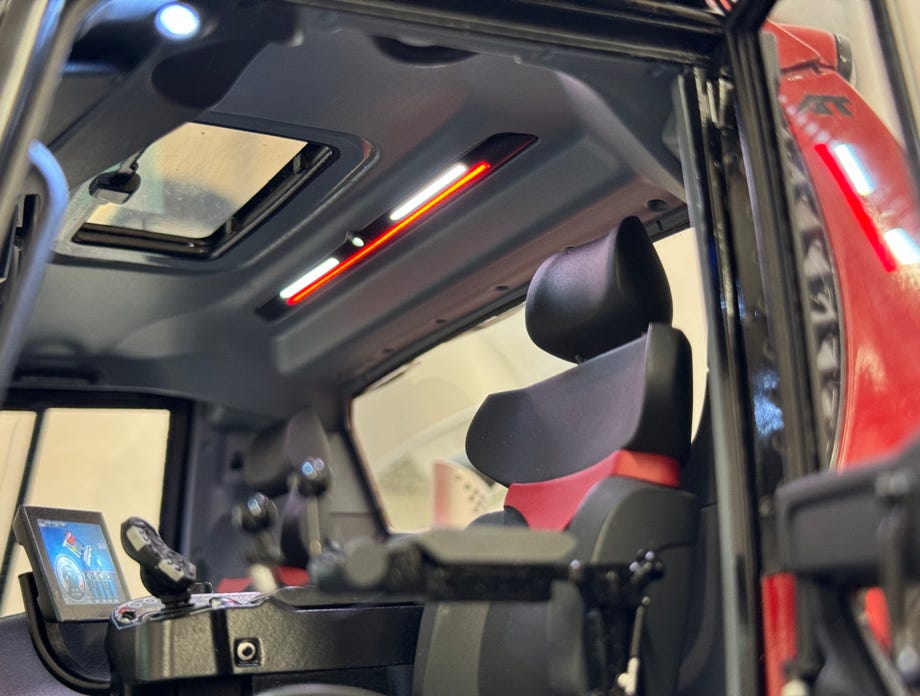
As with my PB100 and PB400, the interior corresponds to the original down to the smallest detail:

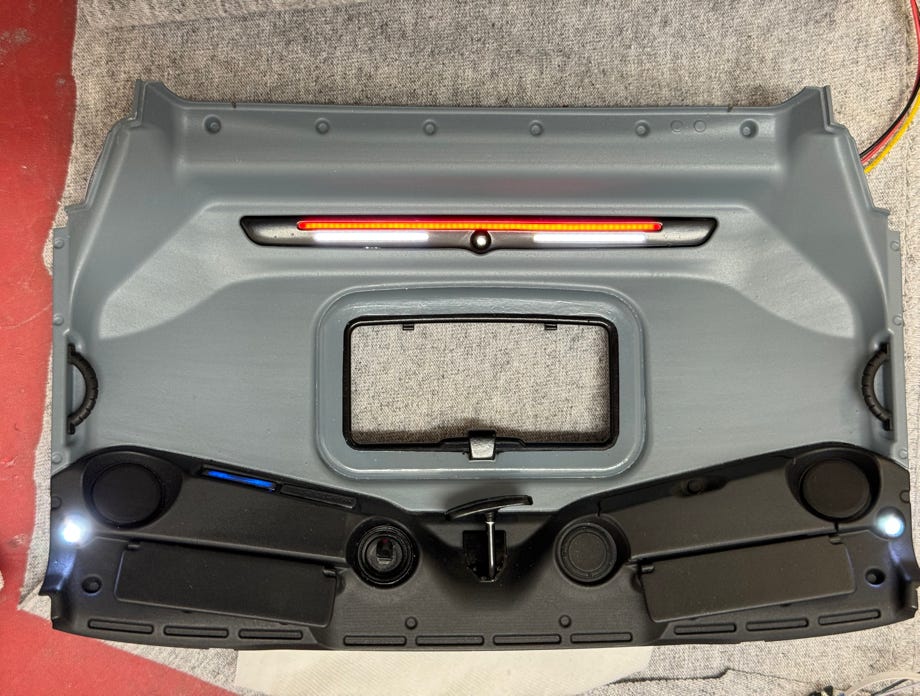
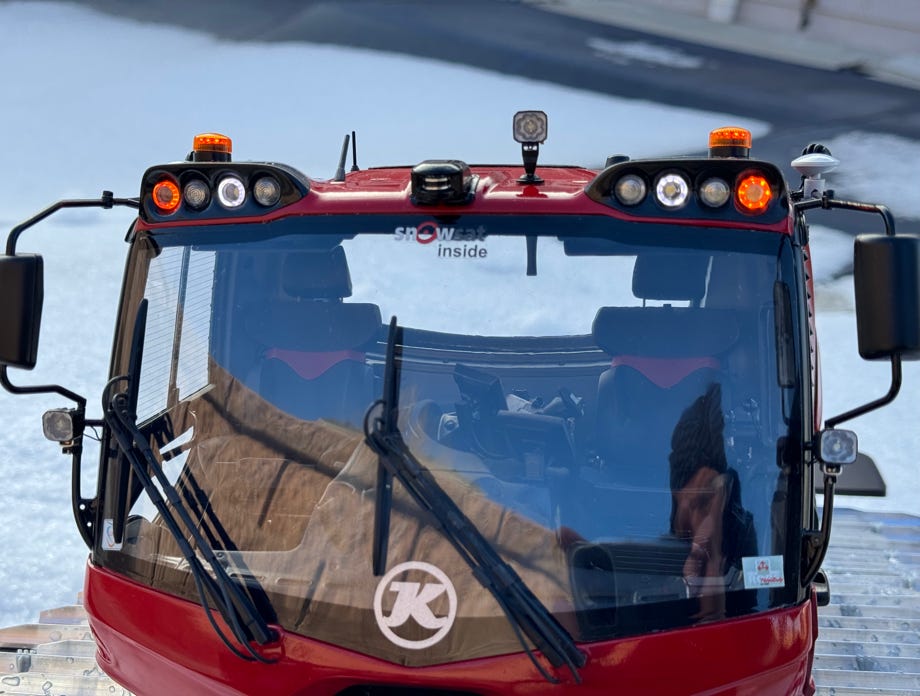
For the headlights at the front, Pistenking has perfectly implemented the ring lights for the parking lights and the indicators. Likewise the taillights and indicators at the rear:
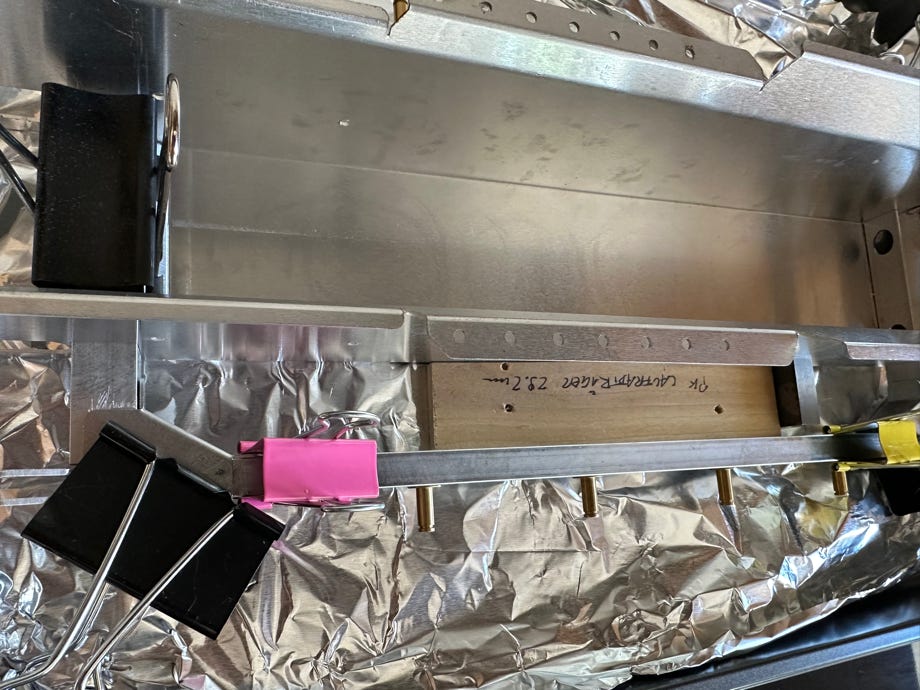
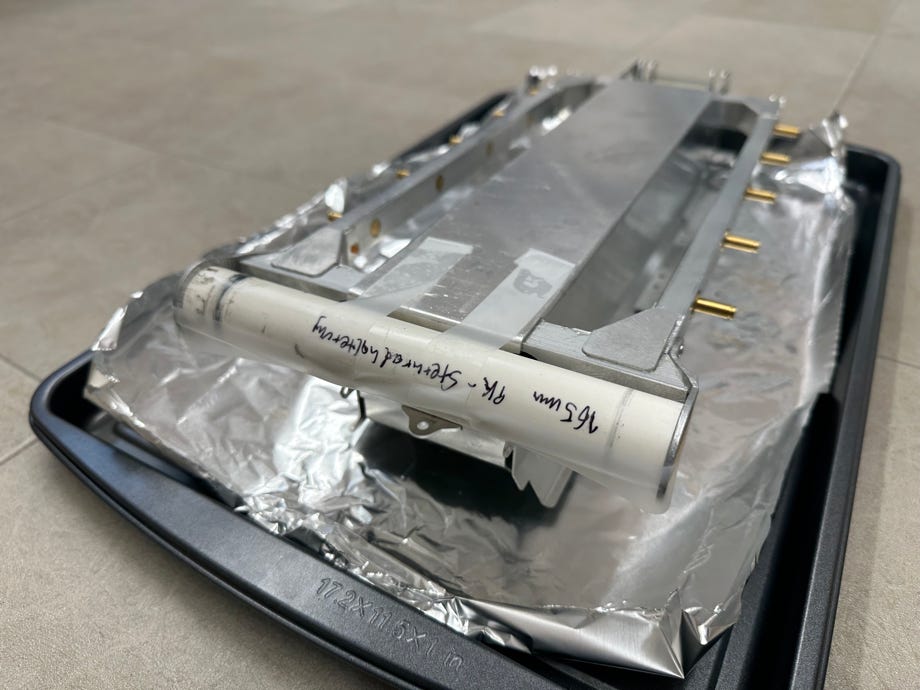
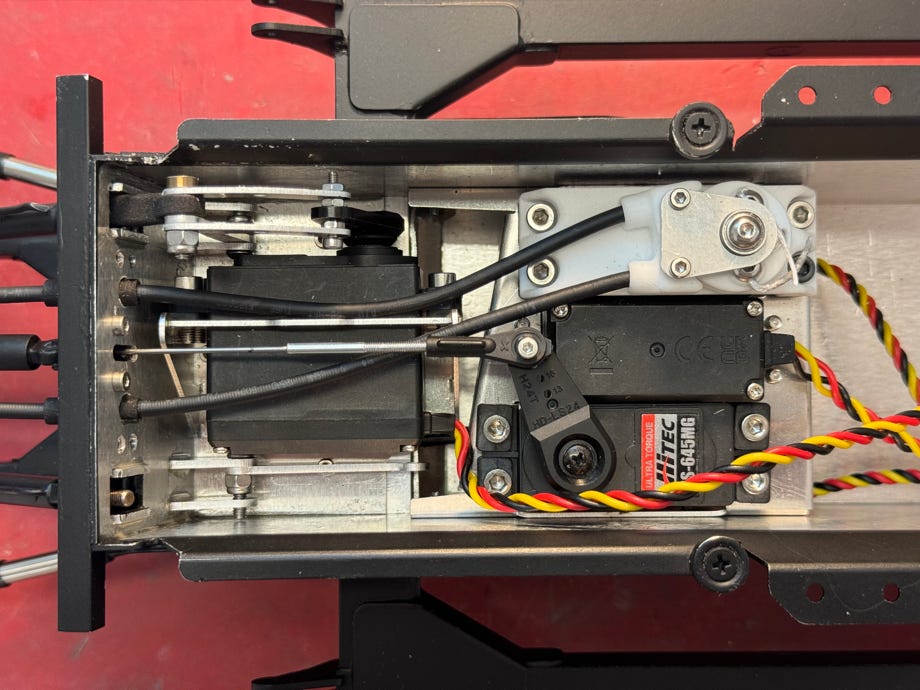
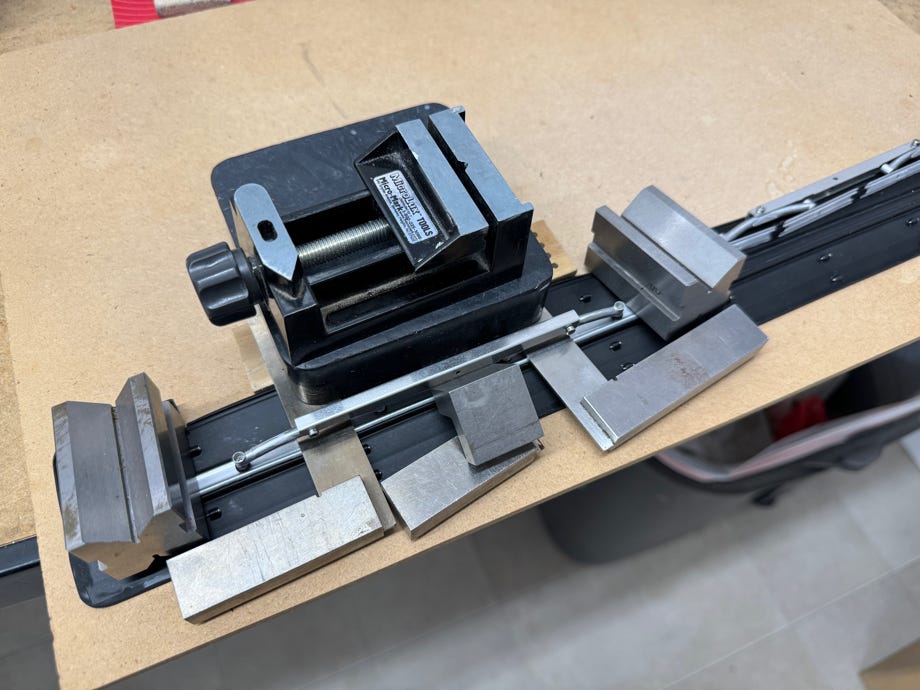
The chassis consists of the proven Pistenking chassis, which has been extended accordingly to accommodate the additional wheel. The assembly was quite quick, this time I made the appropriate gauges to precisely align the side beams and the sprocket wheel bearings:
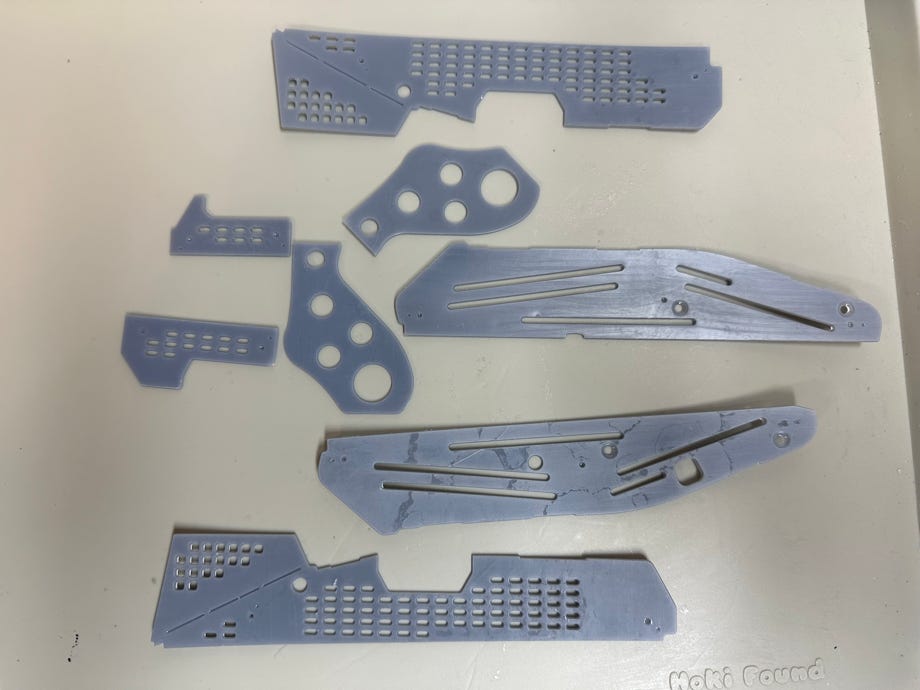
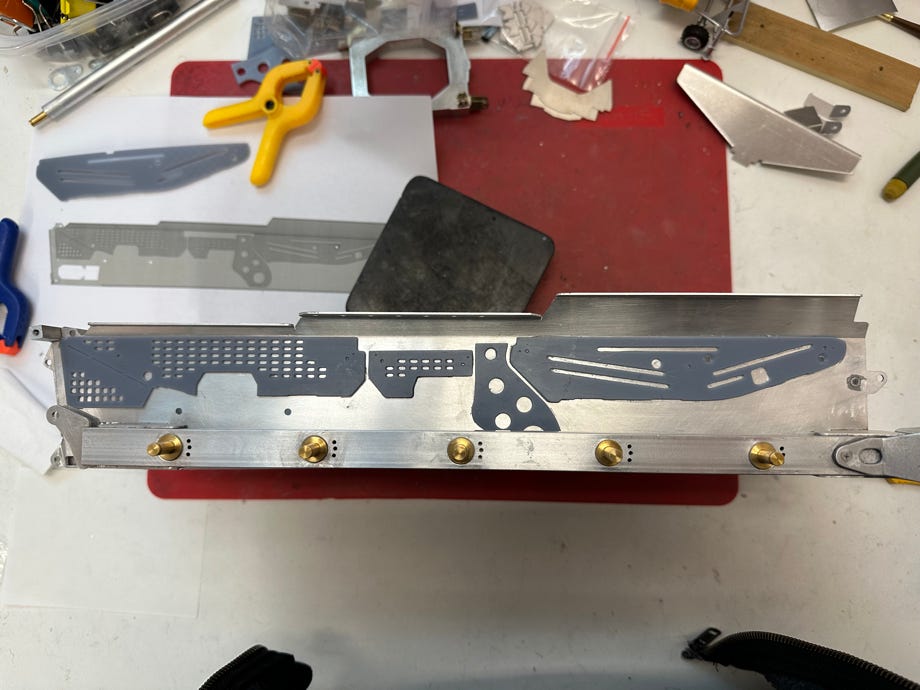
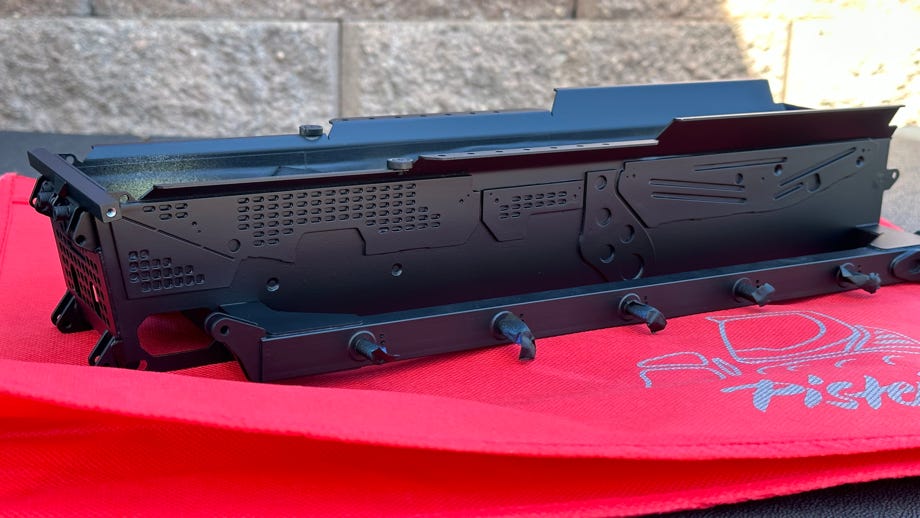
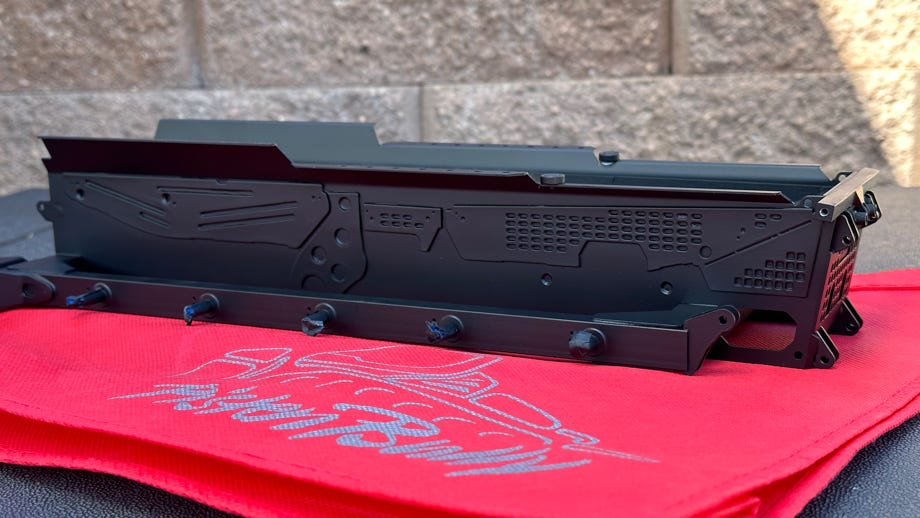
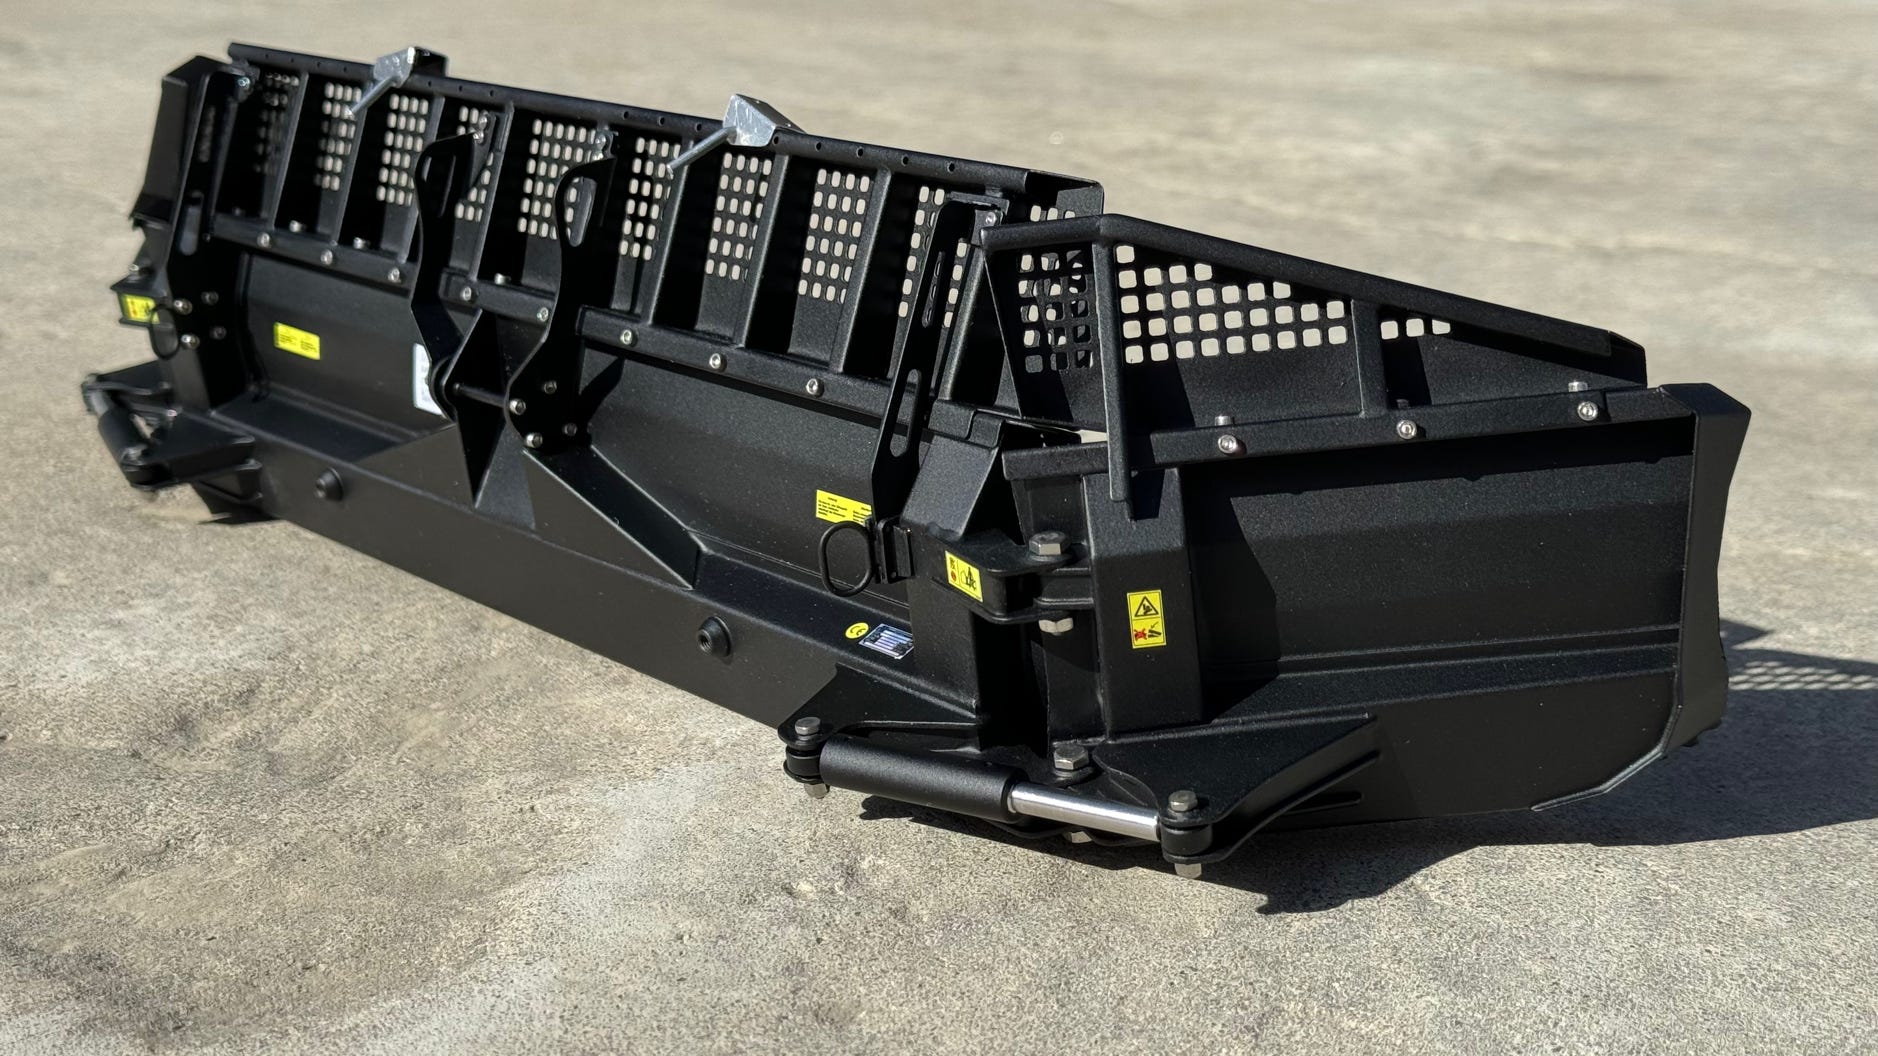
Andi Rieger (Pistenking) came up with the idea of printing the decorative sheets for the sides of the tub, which was very quick and looked just as good as the laser-cut sheet metal parts I used otherwise:
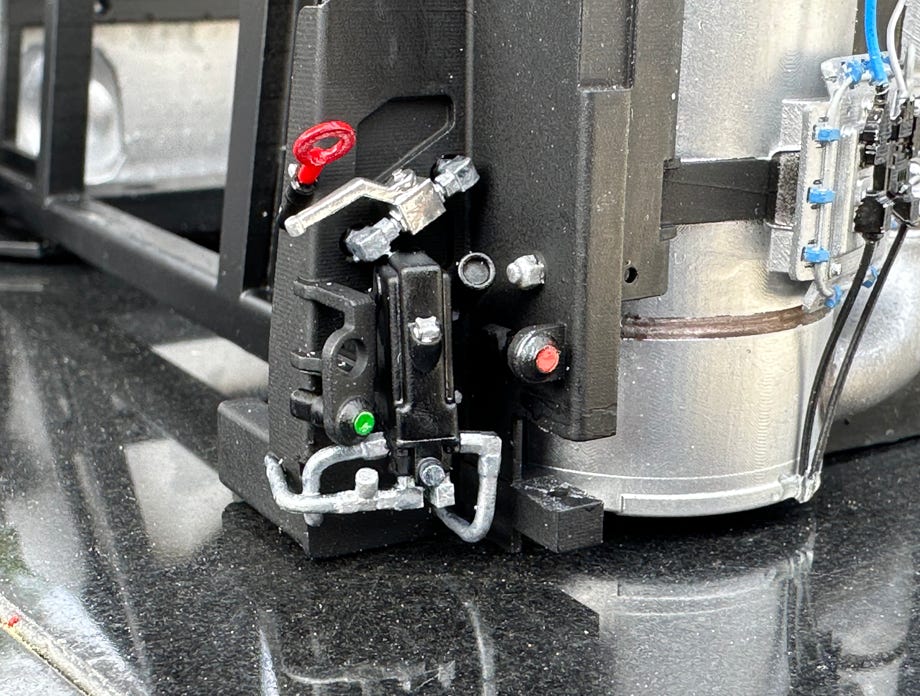
For the front equipment carrier I used the new mechanical 8-way control from Pistenking. Using hydraulics again was too complicated and too expensive for me.
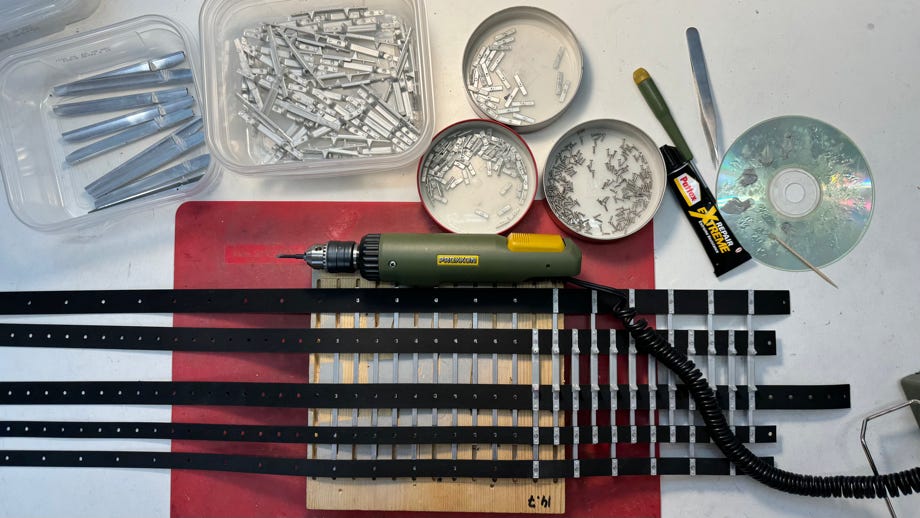
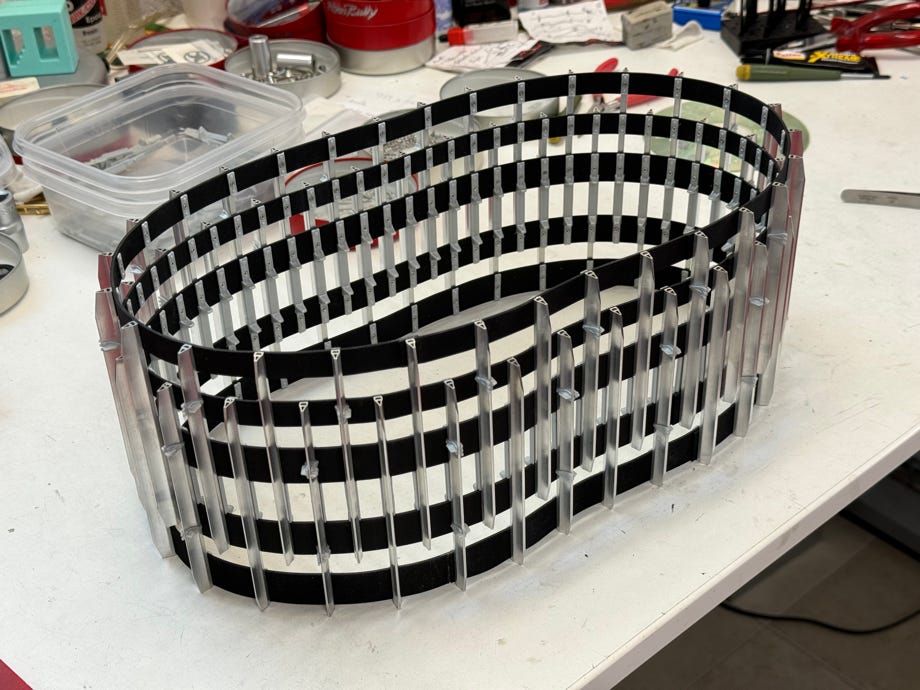
To build the tracks, I again used my tried and tested wooden template to position the track cleats. The Proxxon screwdriver was used again. I secured the counter plates against twisting with a few drops of Pattex. This track is by 6 cleats longer than the standard track.
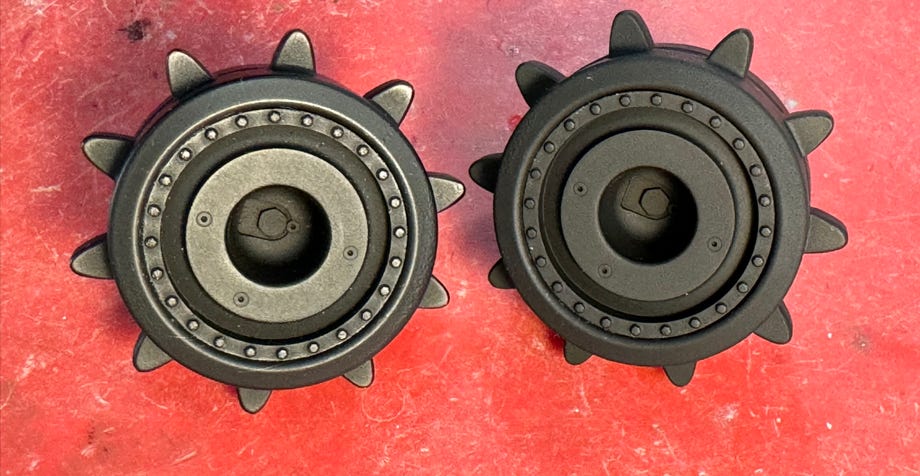
The sprocket wheel inserts are of course also the same as the original and are simply glued into the Pistenking sprocket wheels.
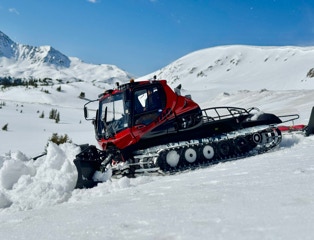
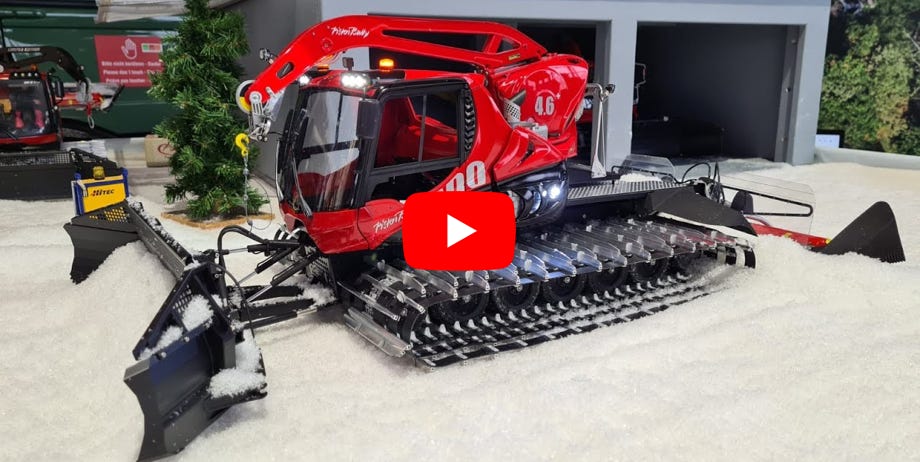
Below is a video of its first working session in snow on Feb. 10th, 2024:

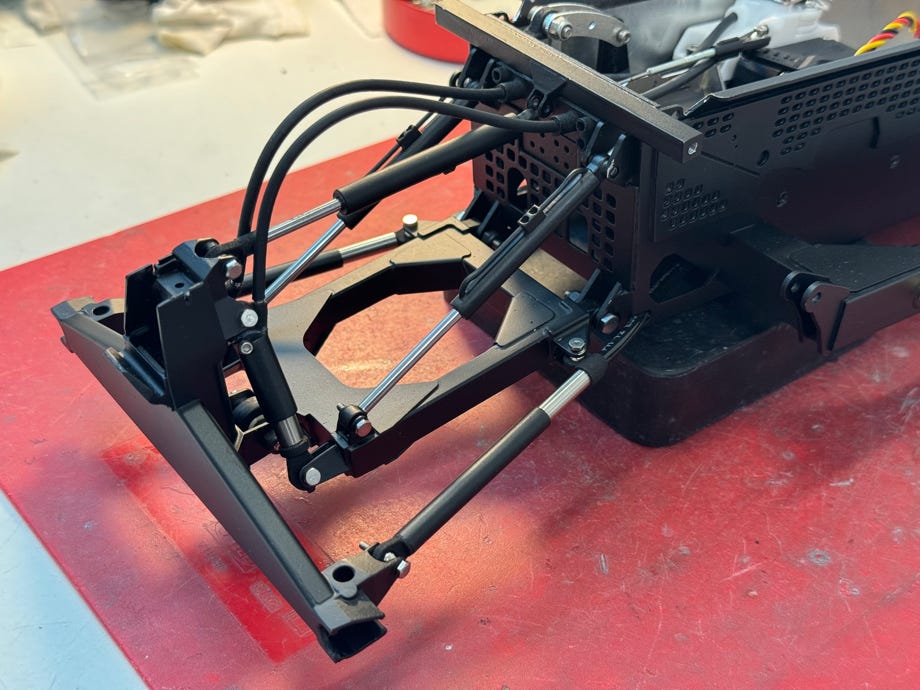
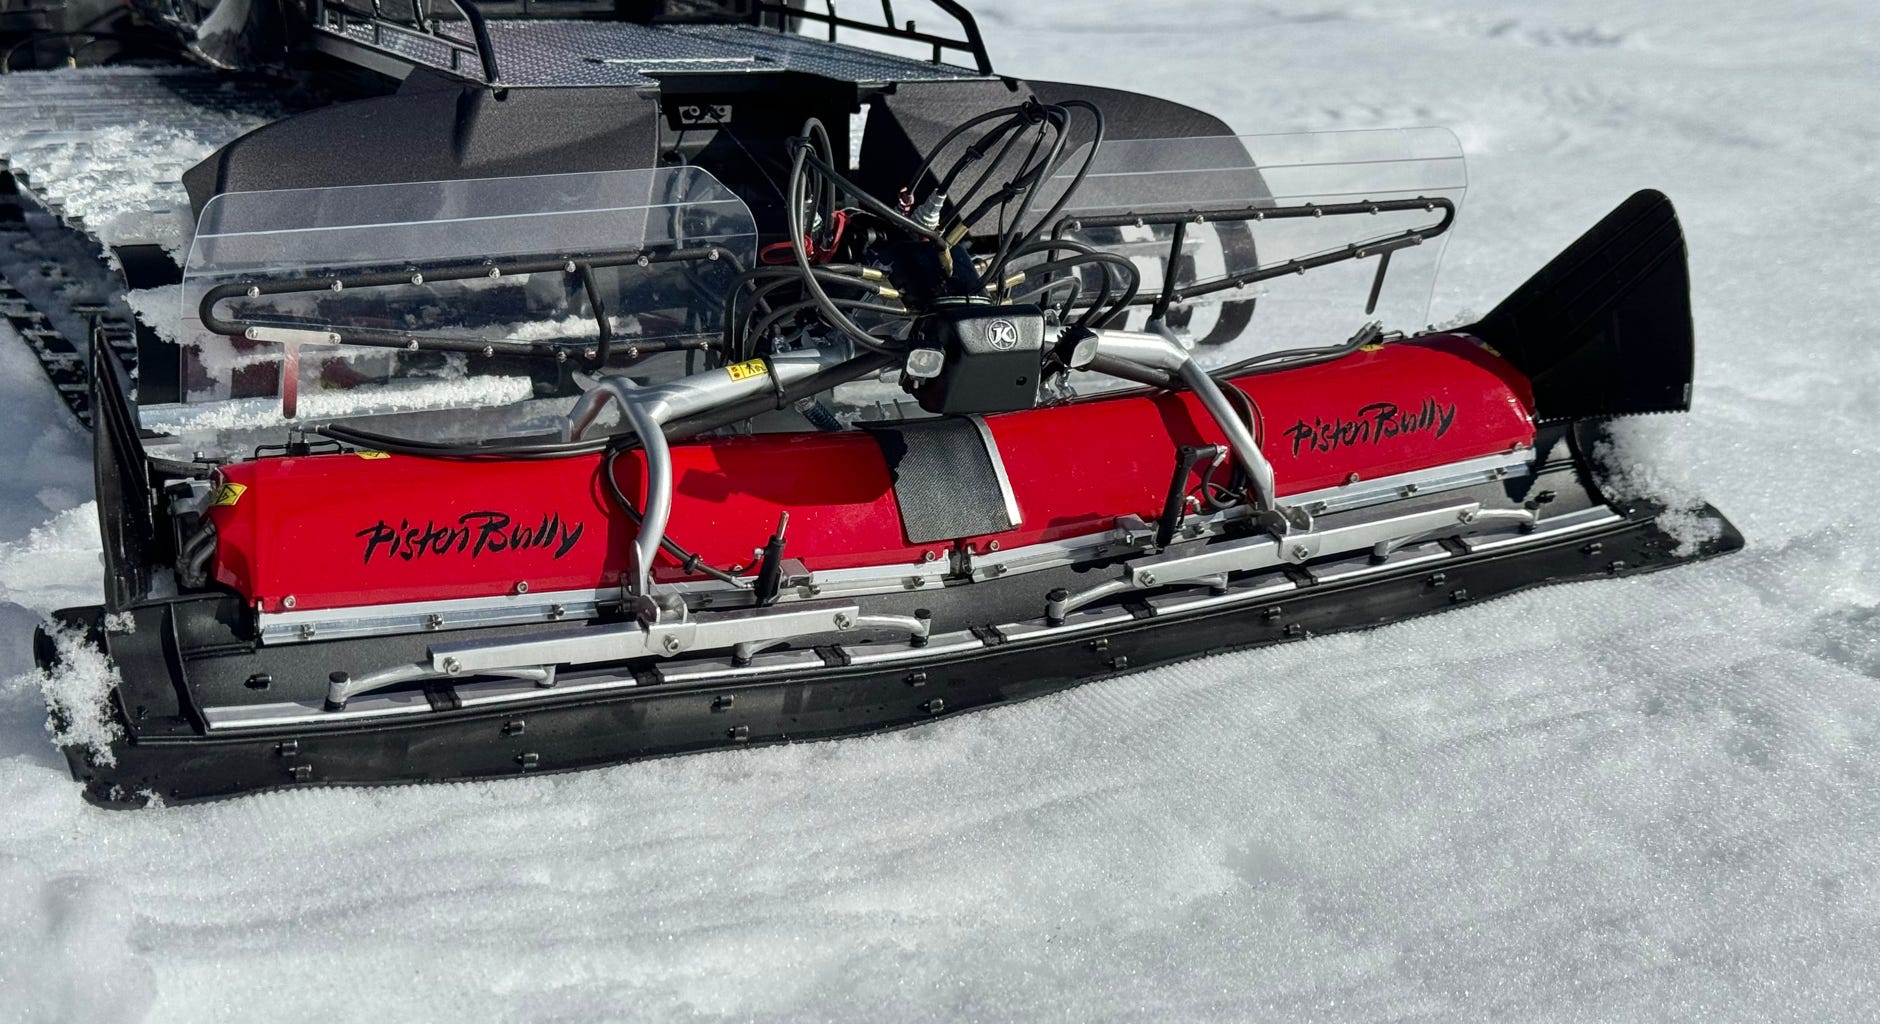
For the tiller I used the tried and tested kit from Pistenking and, as with the PB400, added a few additional details. With this kit, the complex tiller can be assembled quite quickly. The biggest challenge for me seems to be gluing the hold-down strip to the finisher. Here you should use the glue (Pattex Extreme) sparingly to avoid ugly squeezing of the glue. I weigh down the glued areas and let them harden overnight. The lower dampers for the tiller boxes are not included in the Pistenking kit, but can be made yourself using a lathe (see also “Detailing the AlpinFlex tiller”)
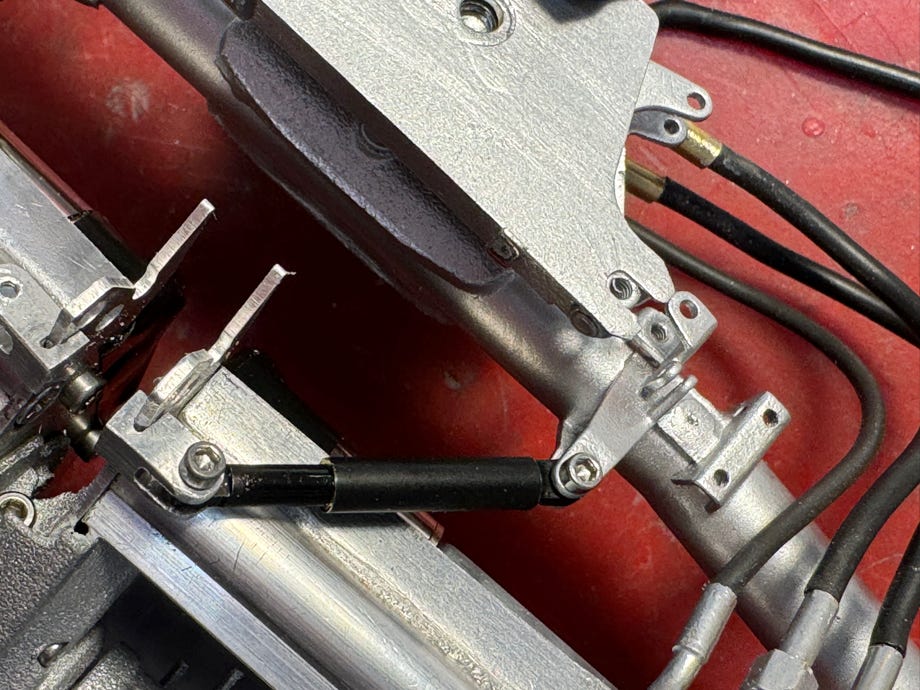
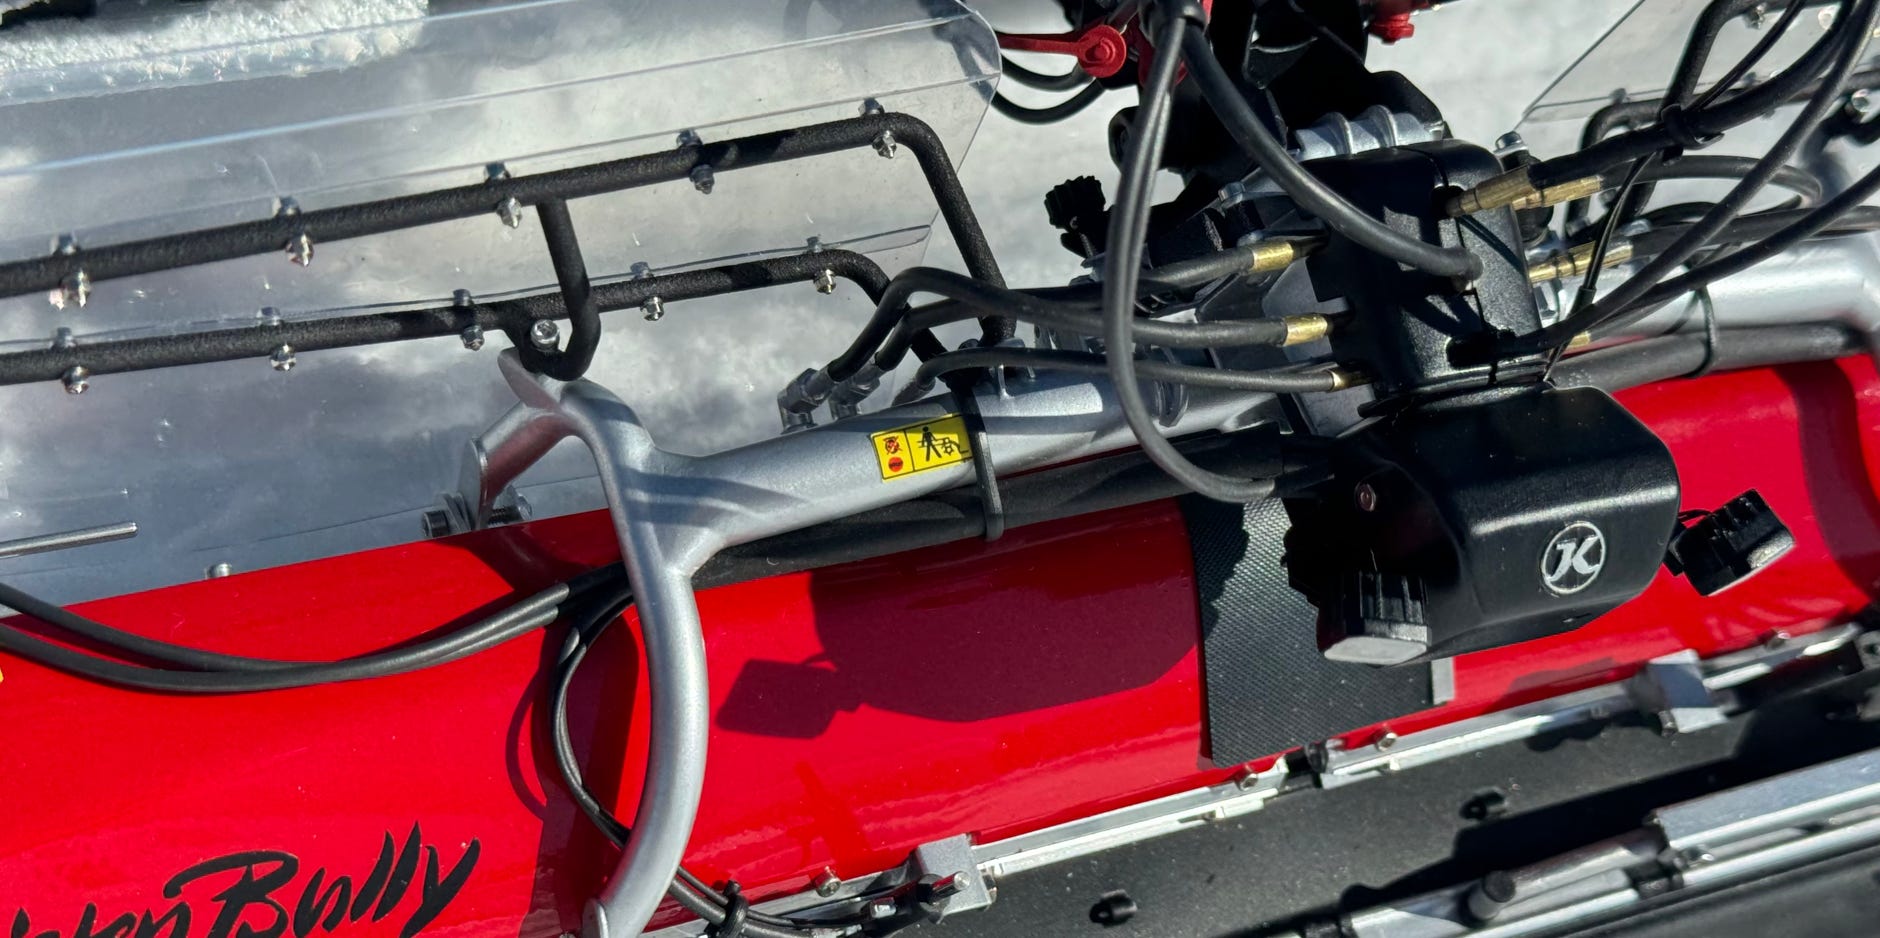
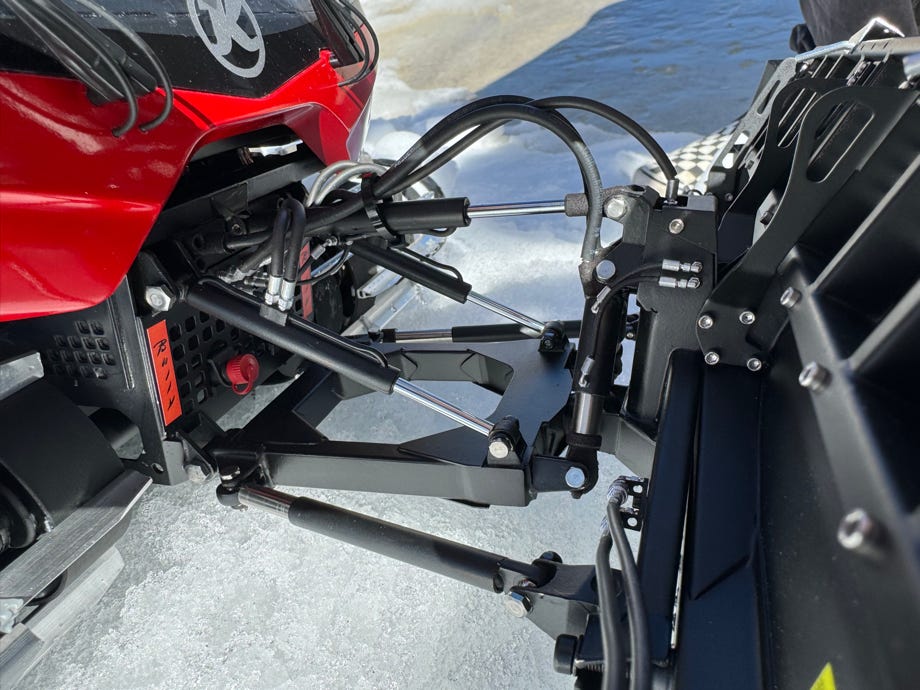
The flap cylinders are a clearly visible detail. These are now available including the mounting brackets as printed parts from AT modellbau. The printed parts also include true-to-scale hydraulic connections for the flap cylinders, side finisher cylinders and the rear lifting cylinder.

The current tillers have a central hydraulic distributor with two beam lights. This eliminates the two side humps. To do this, the hump holders on the frame must be filed down neatly, and of course the adhesive joints there should also be sanded cleanly, as they are now clearly visible.
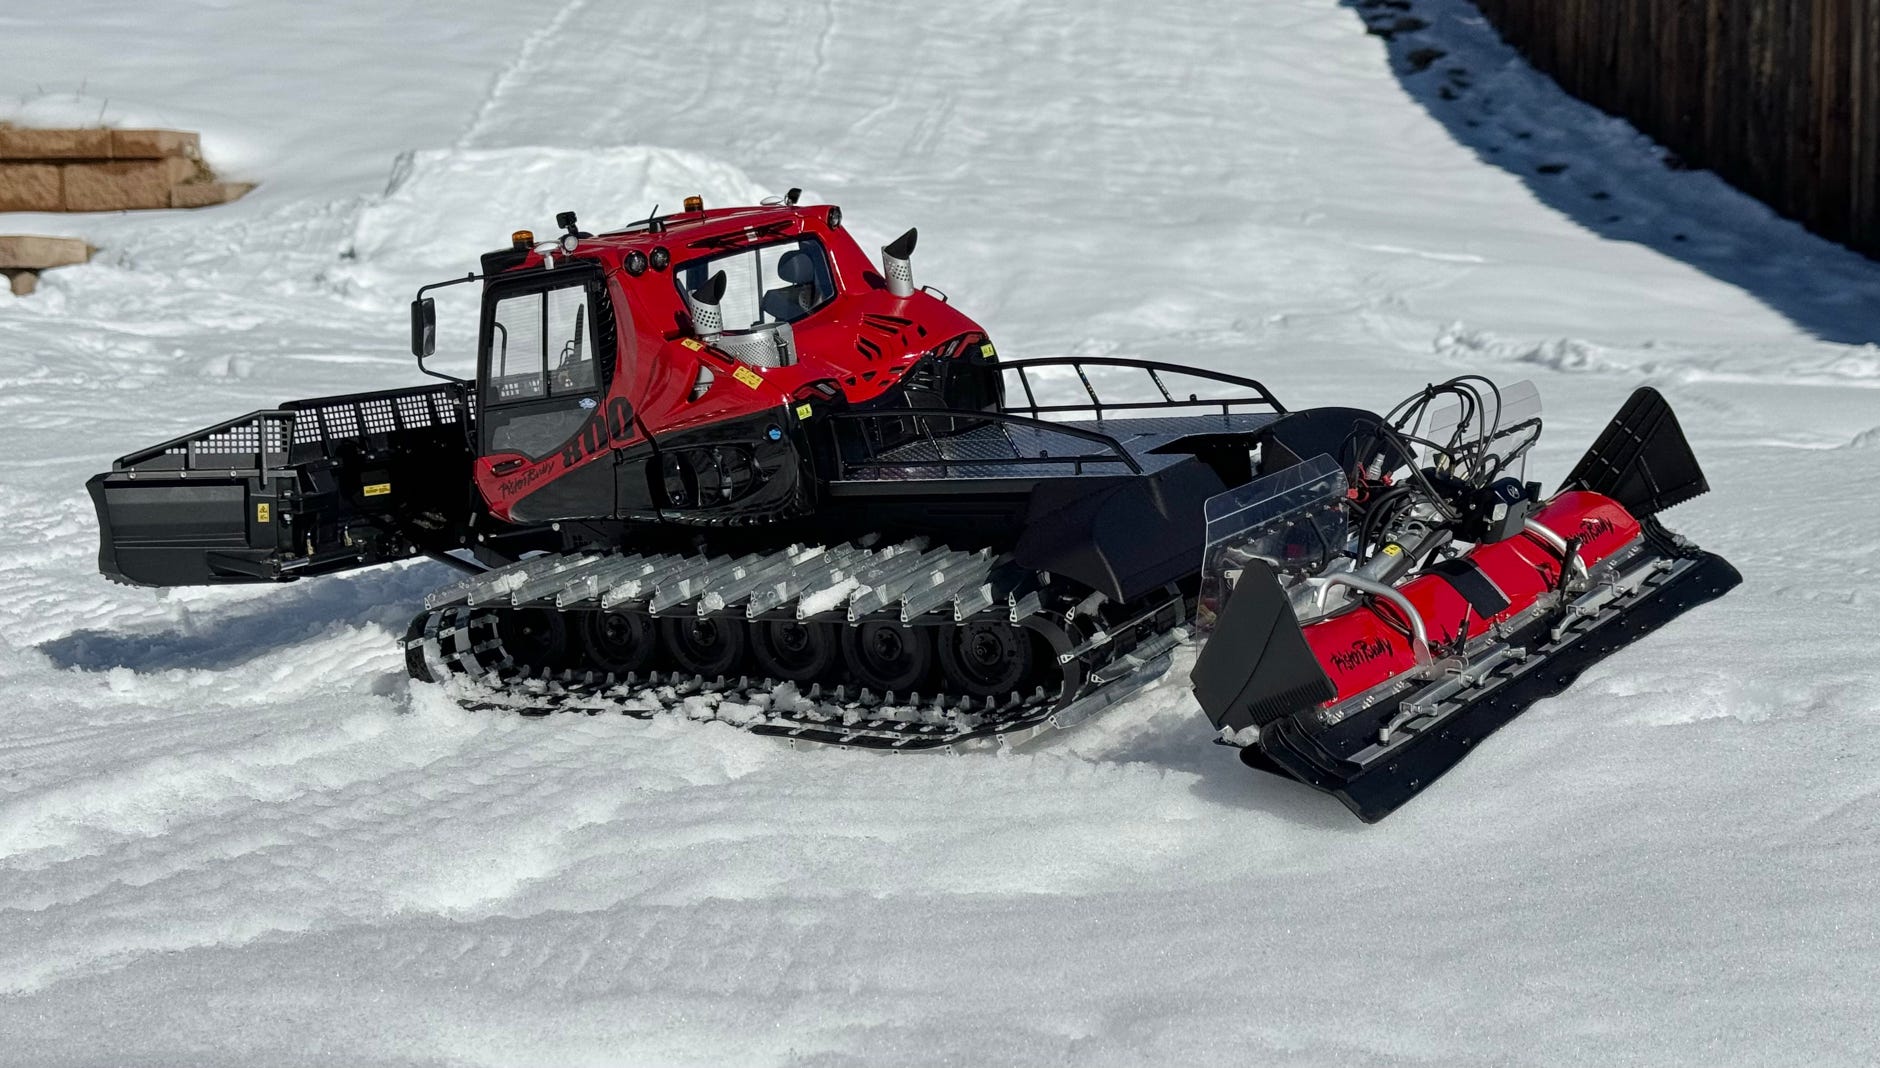

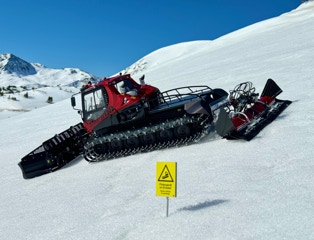
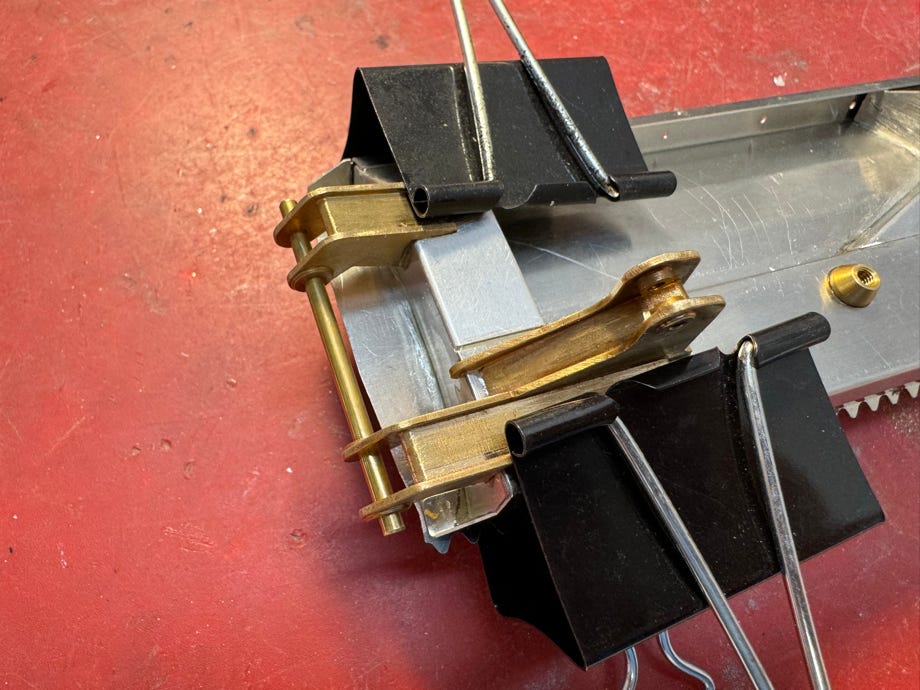
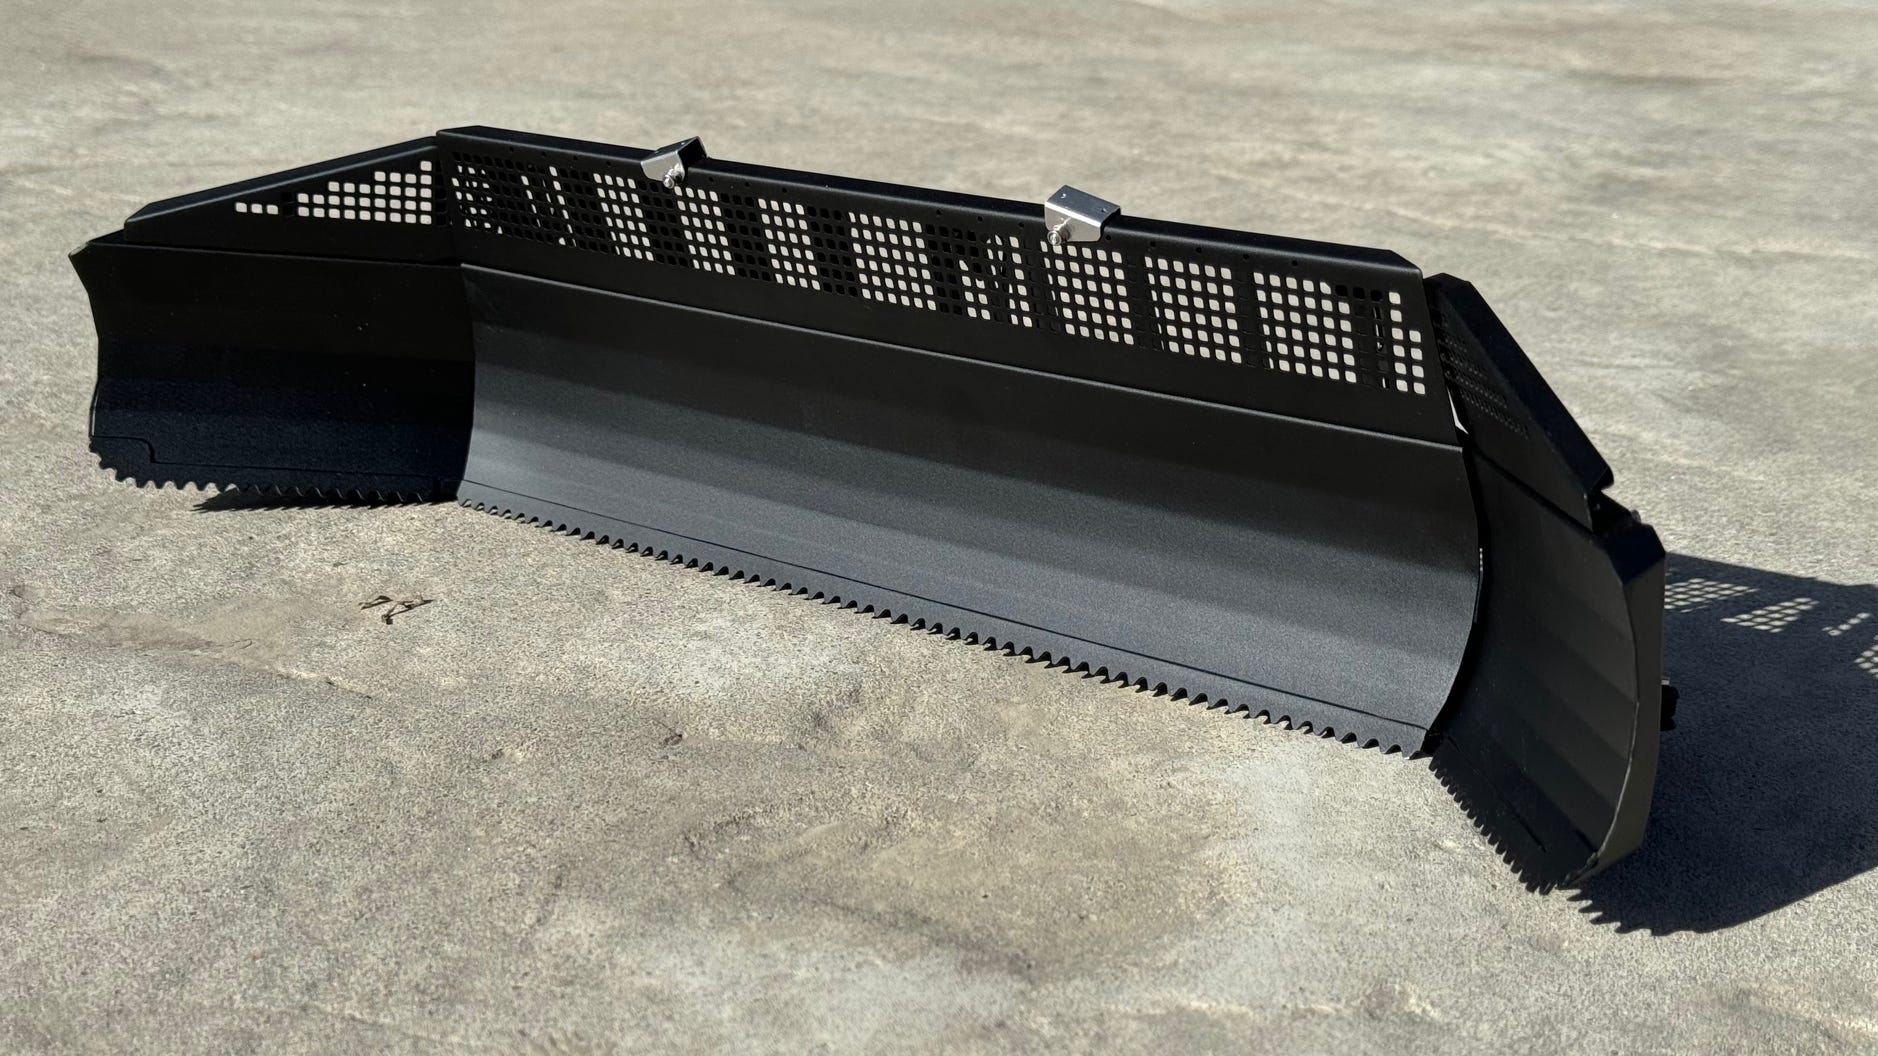
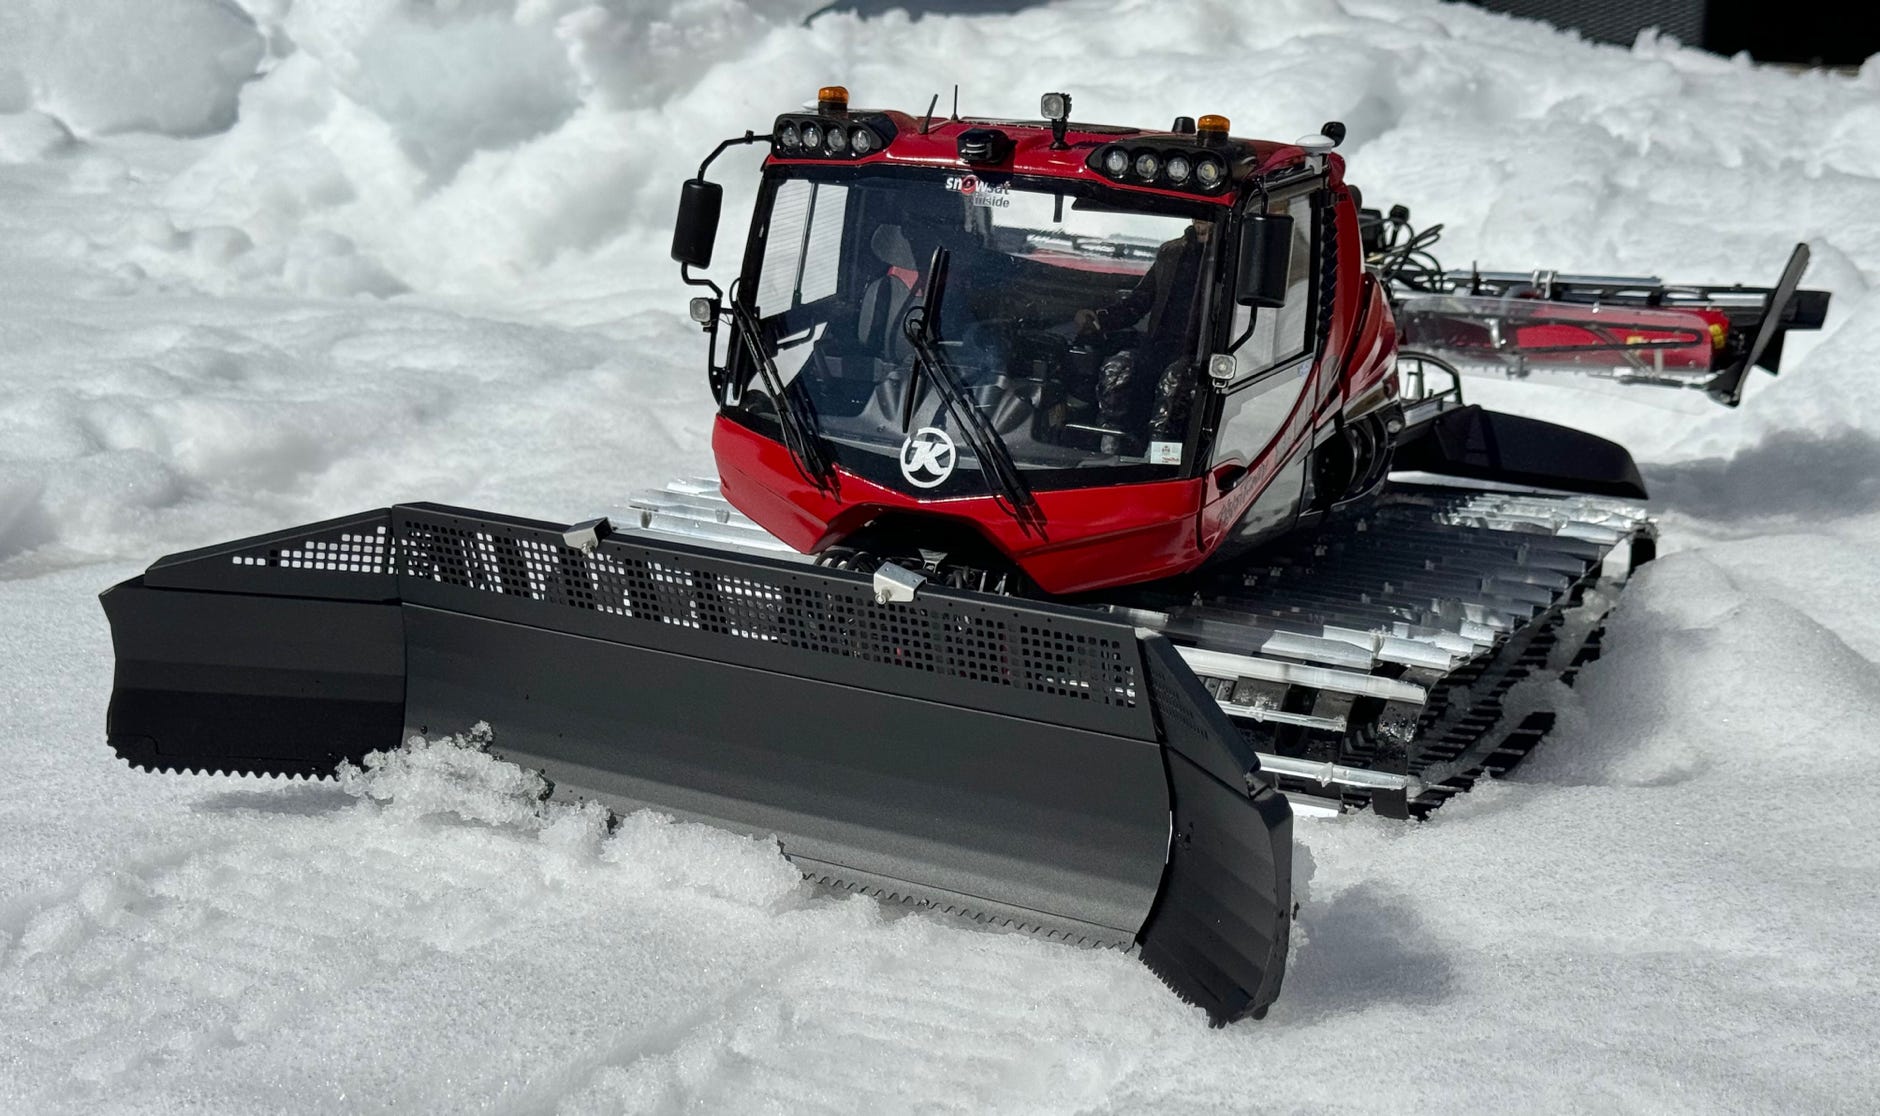
The PB800 got a wider snow blade, although actually only the middle section has become wider. In the model this is a good 50 mm more. The middle snow grid has also become higher. And the hinges for the side panels are now designed differently at the bottom. Adrian Humbel drew the new parts for it. I had the hinges 3D-printed from brass, no cheap affair with these large parts. There will be casted parts for the series, but I didn't want to wait for that.
The blade was the last part I completed, so most of the photos show the PB600 Polar sign that I “borrowed”.
When gluing the hinges I always use a 3mm brass round bar to ensure they are aligned (see photo).
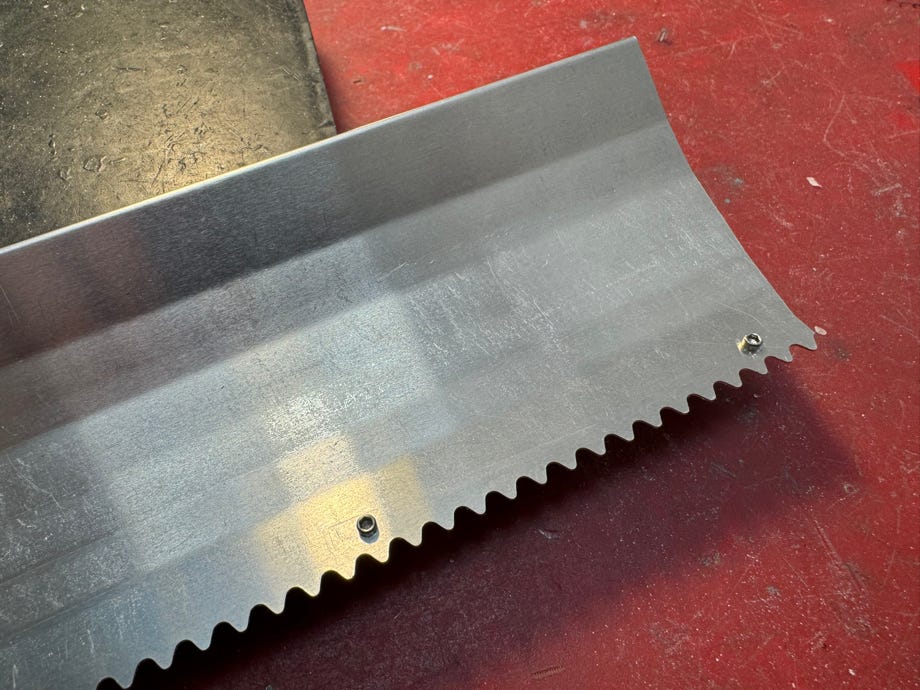
For the first time, screws are now used to precisely position the skid, which are removed after gluing. The holes are covered by the stainless steel toothed strip.
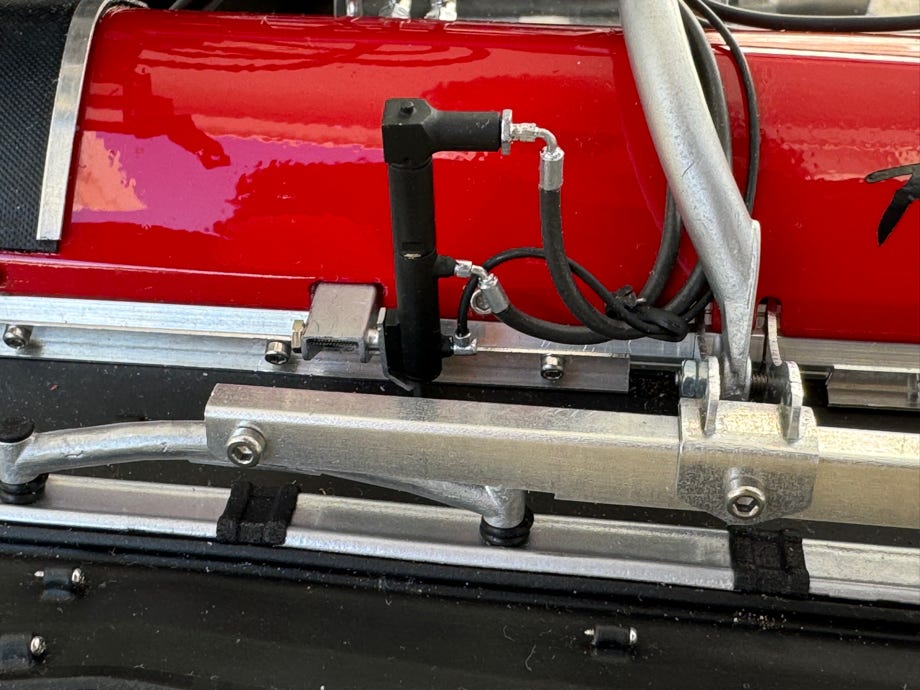
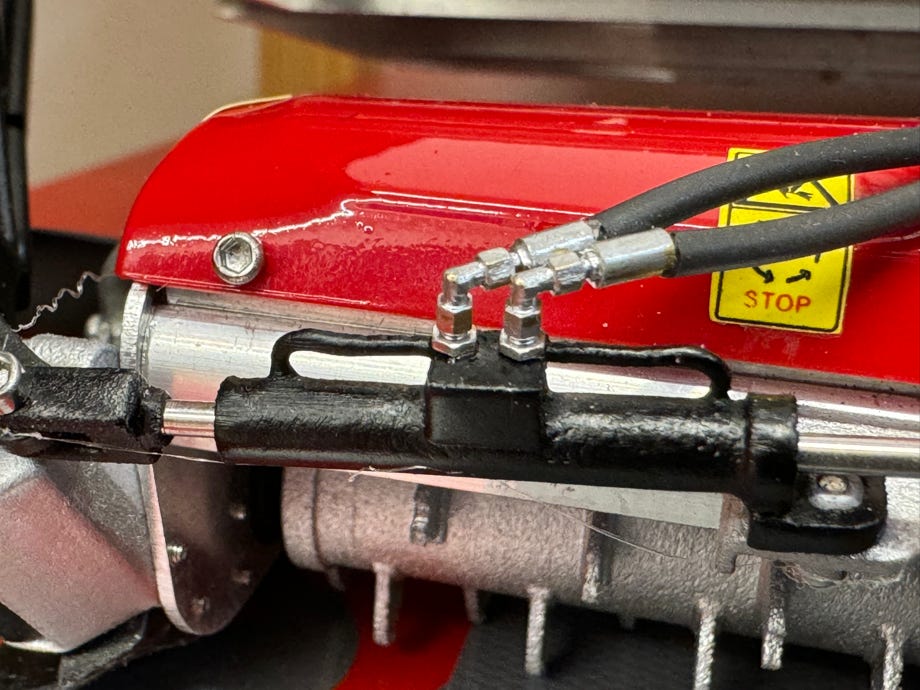
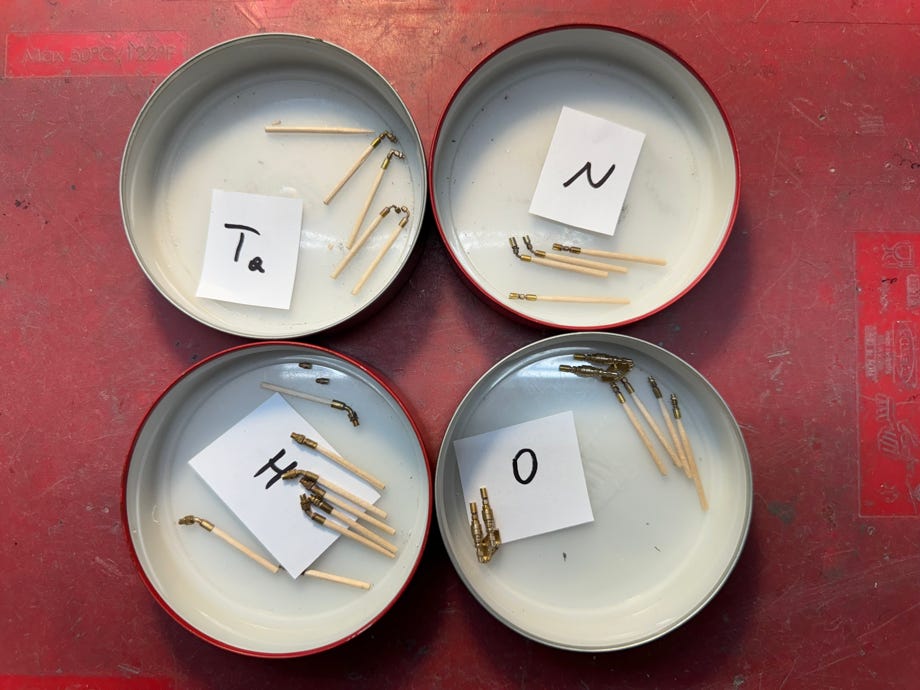
Finally, the hydraulic hoses were installed. To do this, I had the connectors 3D-printed as brass parts according to the original CAD data. Short pieces of brass tube are then soldered onto these: for the thick hoses of the lifting cylinders there are approx. 3.5 mm long pieces made of 2.5 mm brass tube, for the thin hoses approx. 3 mm long and 2 mm outer diameter. I skewered them on toothpicks for painting; the important thing is to keep them tidy. Some of them look quite similar.
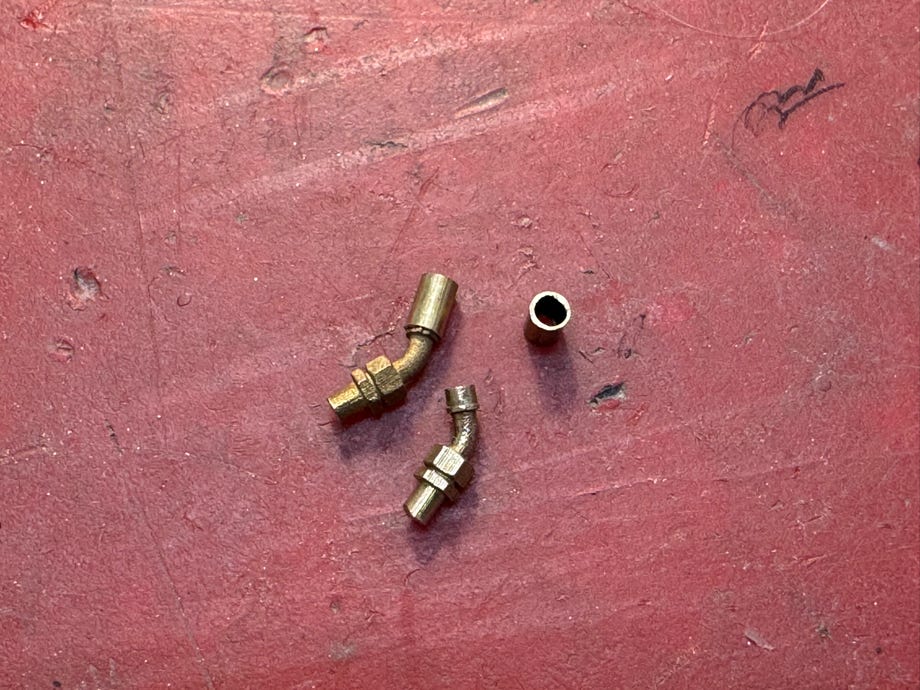
The quick couplings for the side cylinders are also brass printed parts. These are attached to the device carrier with an M1.6 screw because they must be removable to remove the blade.
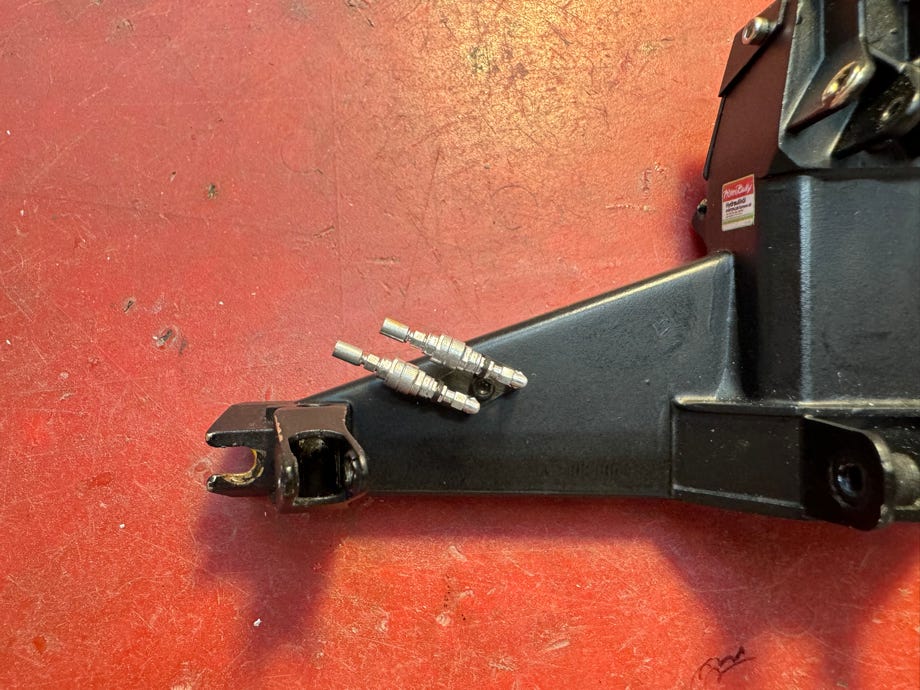
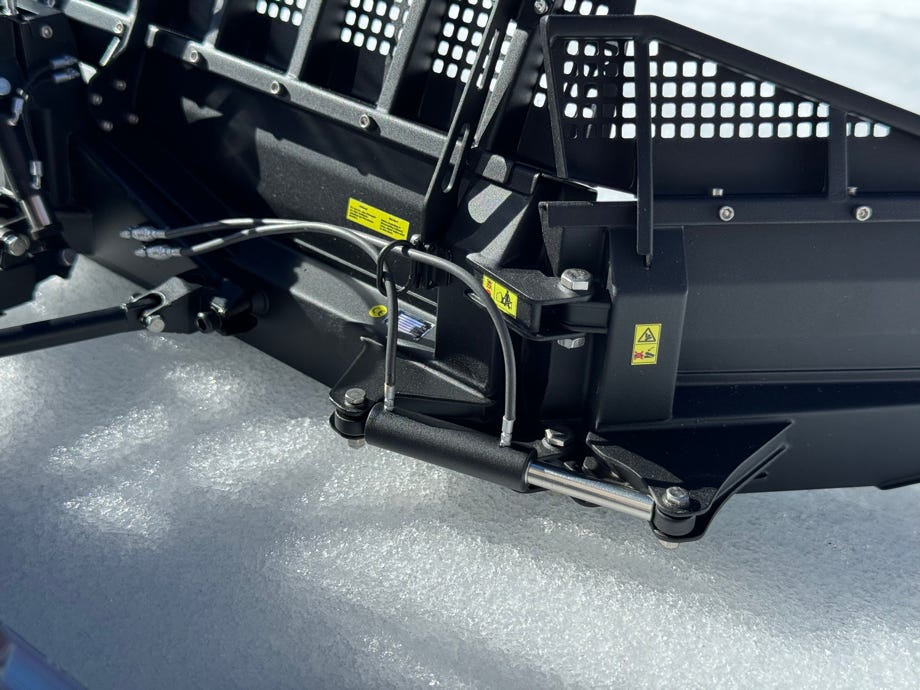
To connect them to the tub, I cut out the grid part and glued in a rectangular block with 2 mm holes. The positions are not really true to the original, but the entire front of the tub with the thick hoses for the tilt cylinders is not anyway. In my opinion that was the best compromise.
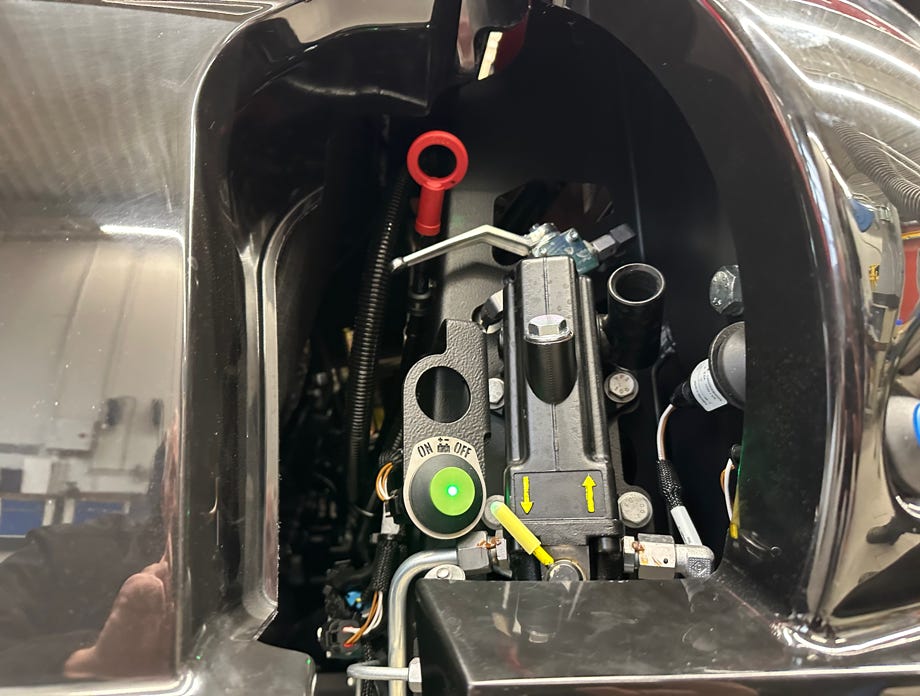
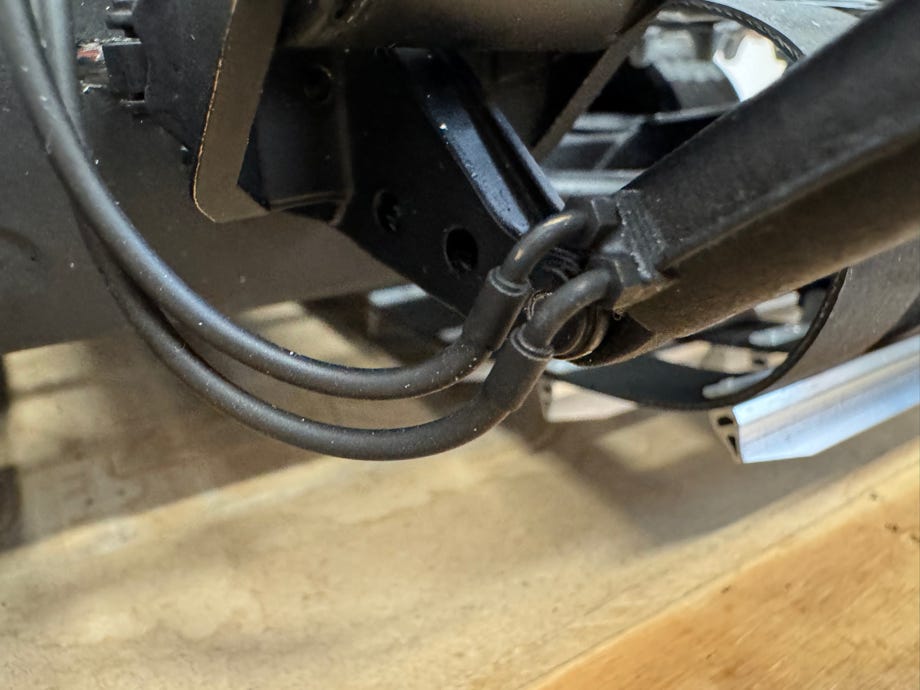
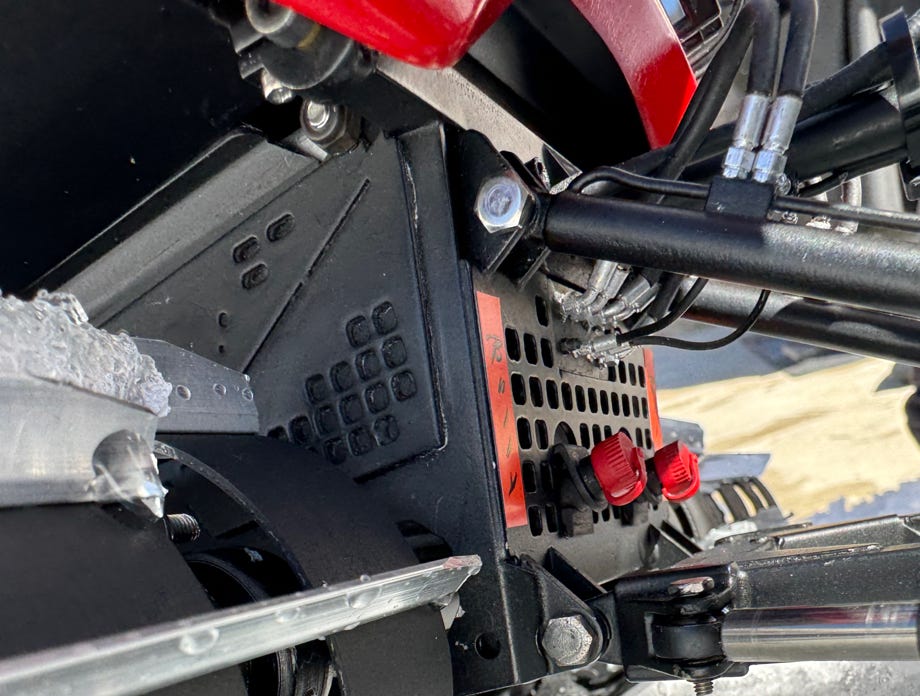
With the new equipment carriers, only 3 thick hoses go to the hydraulic distributor. At the model two of them are for the tilt cylinders, so only one hose remains. In the original, these are on the side of the hydraulic distributor, but this is not possible with the 8-way equipment carrier. That's why I led the third hose into the middle of the hydraulic distributor.
Translation result
The connectors for the tilt cylinders on the right side are true to the original. Inside they are cross-connected, but I didn't do that because the already assembled tilt cylinders are difficult to drill into. I also haven't installed the hoses for the swivel cylinders (yet), so I would first have to make printed parts for the cylinders.
General:
- Scale: 1:12
- Tub, chains, drive, equipment carrier, clearing blade, rear tiller: Pistenking
- Self-made body, soon available from Pistenking
- Weight: 6.0 kg (including battery)
RC Functions:
- Drive
- Stear
- Blade lift (mechanical)
- Blade tilt (mechanical)
- Blade cutting angle (mechanical)
- Blade swivel (mechanical)
- Tiller lift (mechanical)
- Tiller wheel on/off
- Light functions by Pistenking Kingbus
Electronic Components:
- RC system ScaleArt Commander SA-1000 with CM-5000 receiver
- Tiller wheel directly by CM-5000 speed controler
- Battery Turnigy nano-tech LiFePo 4s, 13.2 V, 2100mAh
- Pistenking Kingbus Modules for the lights
- Back-up warning beeper by Pistenking
- Rotating beacon by Pistenking modified to match Comet S
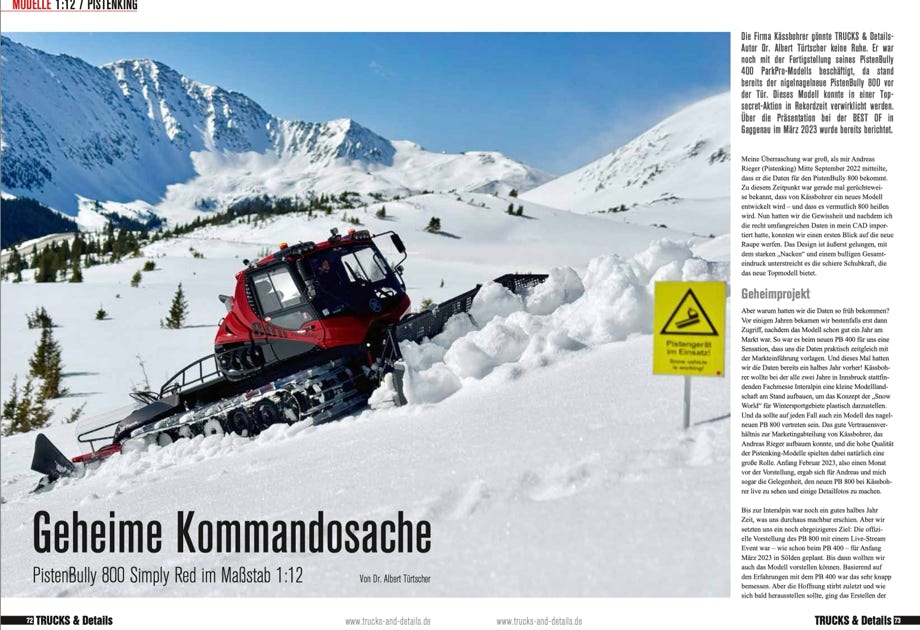
The german magazine TRUCKS & Details 1/2025 issued a detailed article by me about building model of the new PB800 Simply Red. They are in German language.
The articles can be downloaded as PDF file, with friendly permission by the magazine. Just click on the picture for downloading.
Diese Seite verwendet Cookies. Sie stimmen der Verwendung von Cookies durch Anklicken von “OK” zu. Nähere Informationen finden Sie in unseren Datenschutzbestimmungen.
This page is using Cookies. You are permitting the use of cookies by clicking on “OK”. More information can be found at our Privacy Protection.