Walser
Pistenraupen
Modellbau
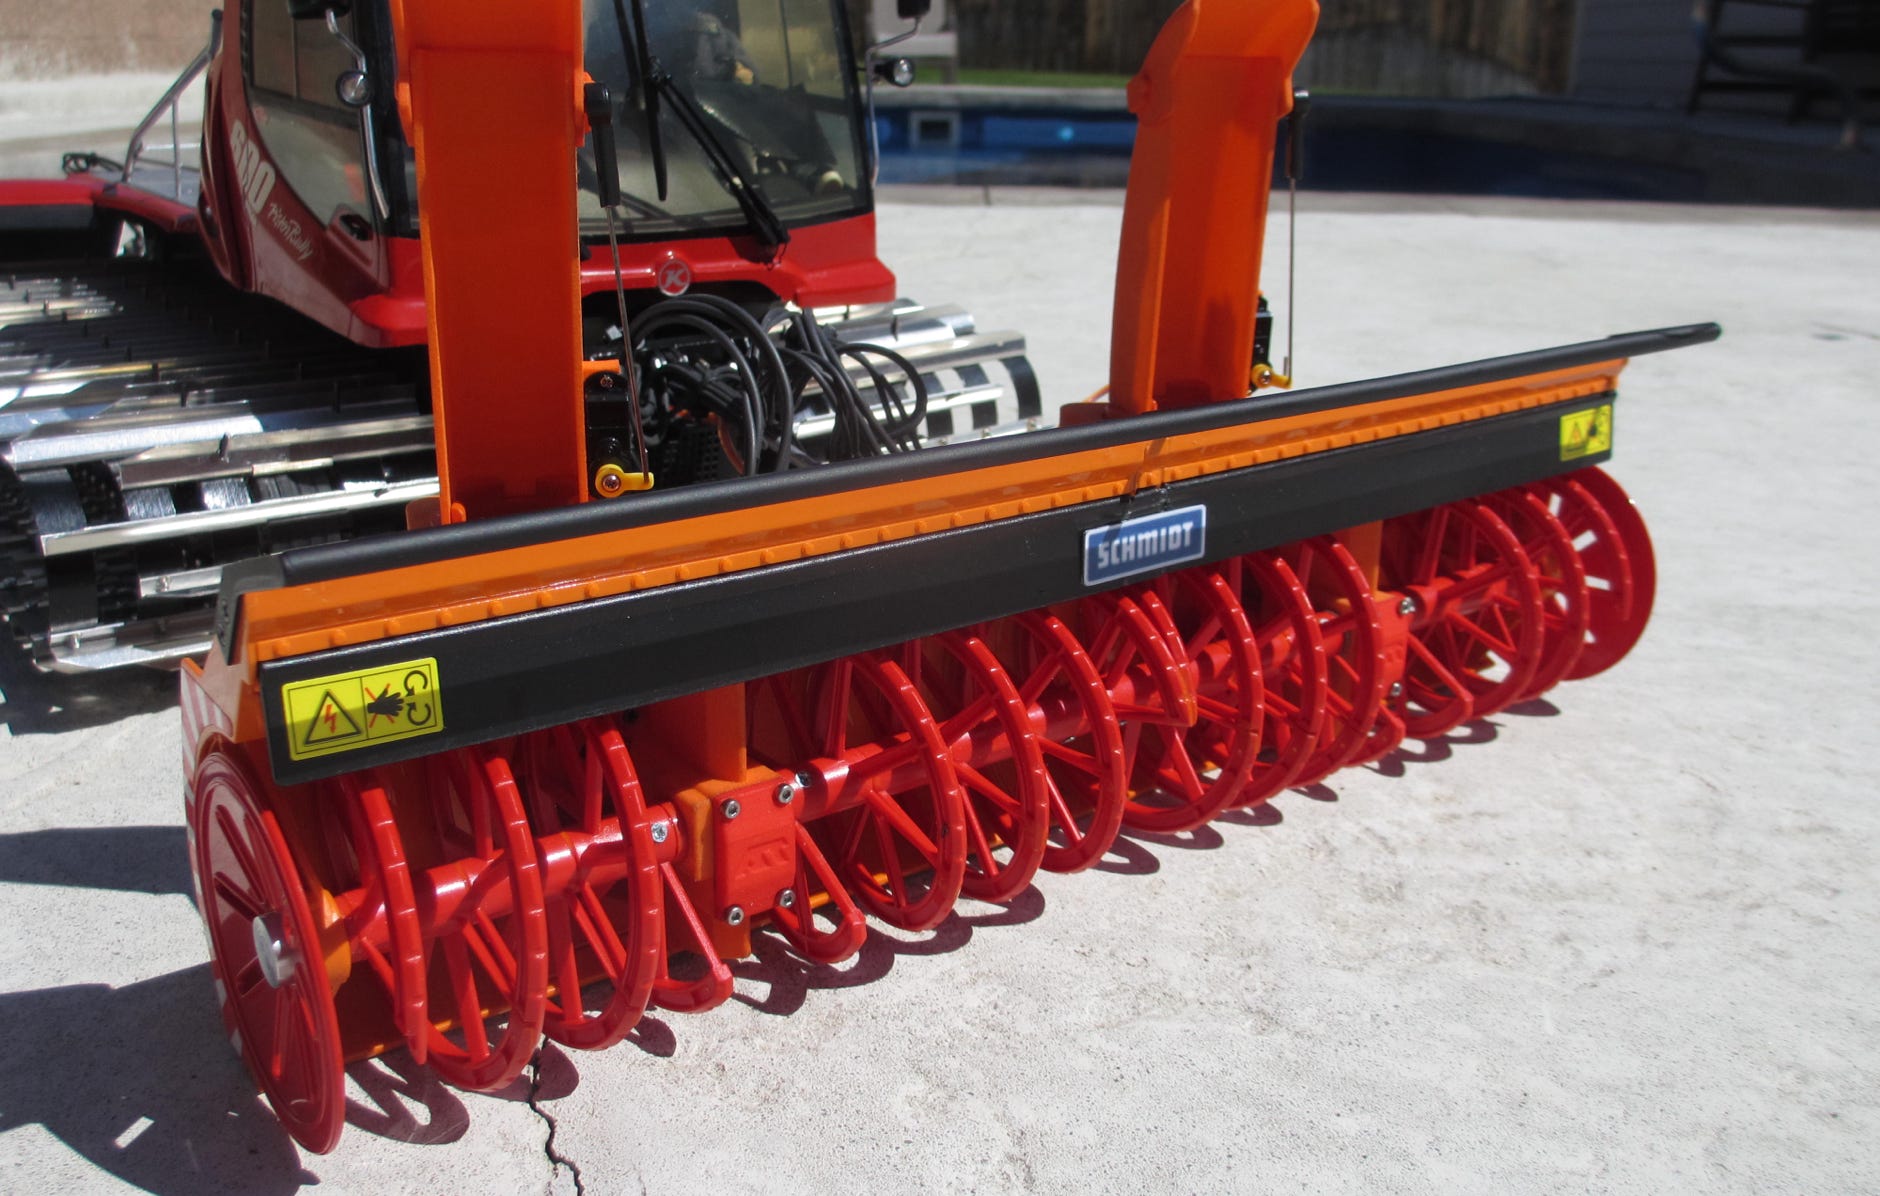
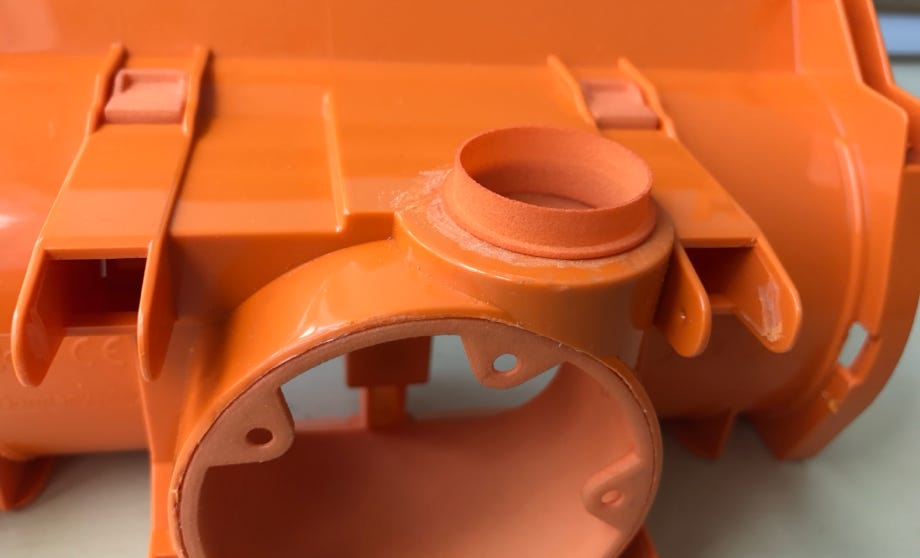
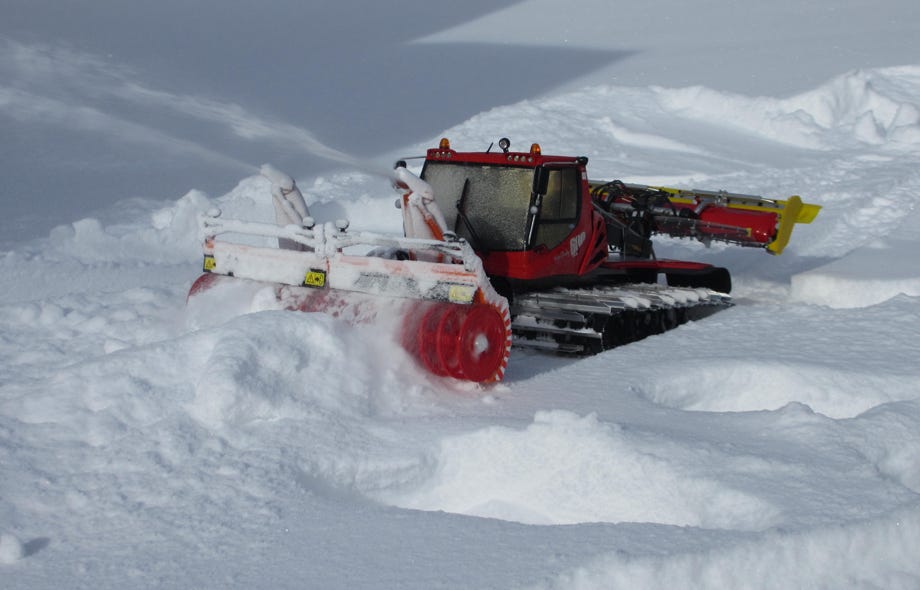
The company Bruder brought a snow blower (part no 02349) on the market in 2016, which is only a toy and not functioning at all. But it can serve as a low-cost base for a conversion and in the end yields an optical appealing snow blower.
Some colleagues already did a conversion, and Klaus Bergdolt wrote about it in detail in the German magazine Truckmodell 2/2017. Motivated by his article I decided a conversion as well, but it should be a double snow blower which by chance fits perfectly to the width of my PistenBully model in 1:12. Klaus made the blower fan and housing out of thin sheet metal.
As I don't have this specific knowledge and tools I designed the parts in CAD and had them printed.
My first version had a bevel gear box, which is quickly built, but has some disadvantages in regards to rotational speed of the drum and durability. Therefore I made a second version with a worm gear box. The necessary precise position of the gears is no problem with printed parts. I even went one step further and designed the entire center part new. This is now simply clipped in instead of the original center part. This makes the conversion easy even for not so skilled hobbyists.
As it is almost impossible to get fitting motors with a 3 mm shaft (they all come with 4 mm shafts now), the printed parts will no longer be offered.
Warning: For enlarging the bore of the worm gear a lathe is absolutely necessary because this cannot be made reliably centric on a drill press.
The high speed rotating parts with the powerful motor represent a considerable risk of injury with improper handling and use.
We assume therefore expressively no liability for damage resulting from the reproduction or injury! The reconstruction is done at your own risk.
First the snow blower needs to be disassembled: the parts are connected by clips which can be opened by using a screw driver to push them apart. The clips of the drum end disks are not needed later, so I simply cut them off. After the drum has been disassembled the clipped in center part can be removed.
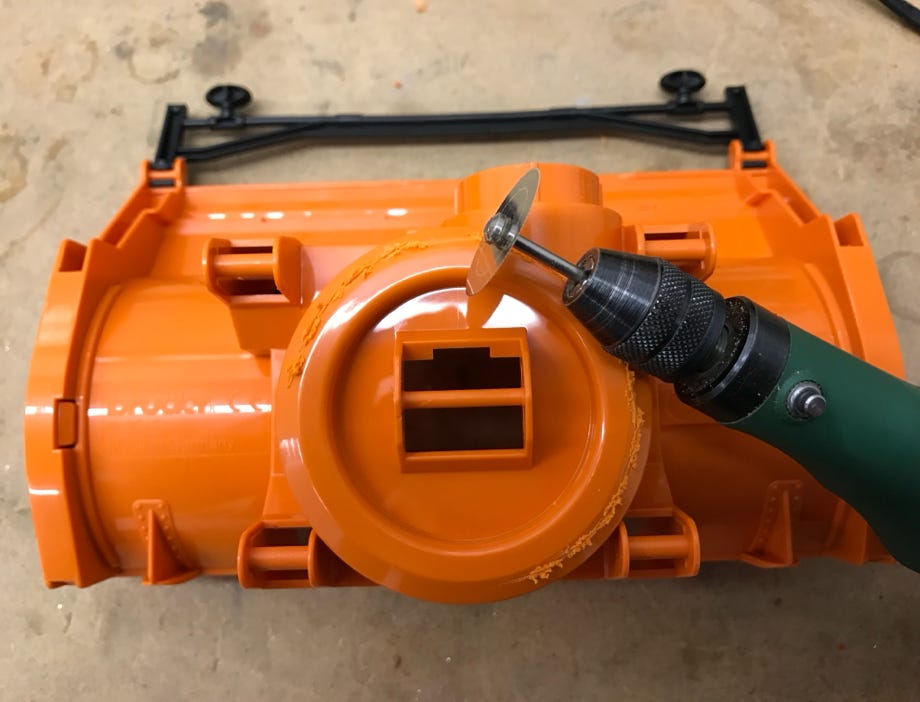
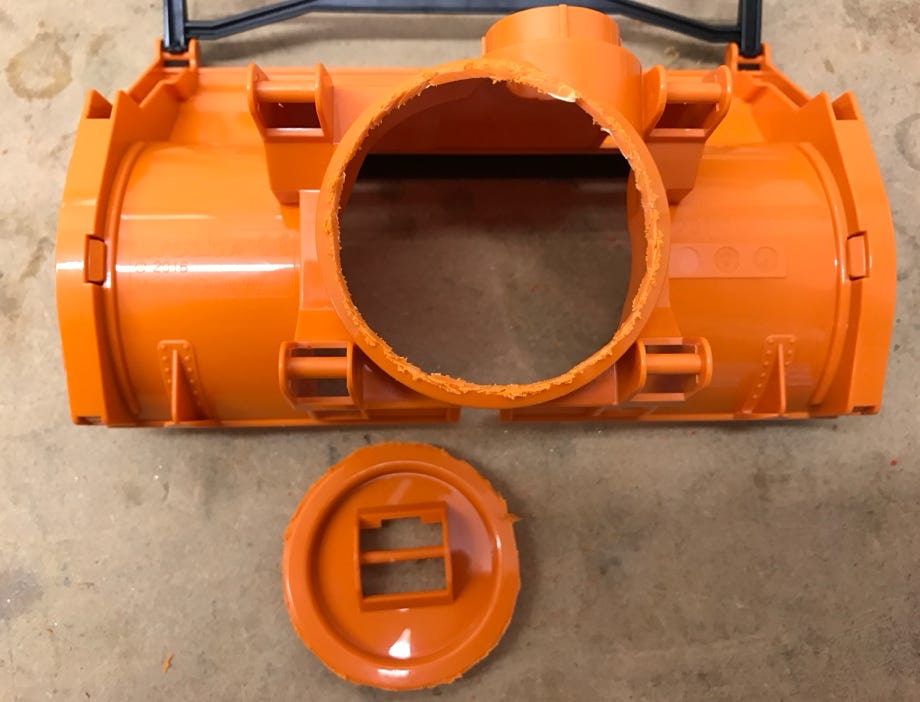
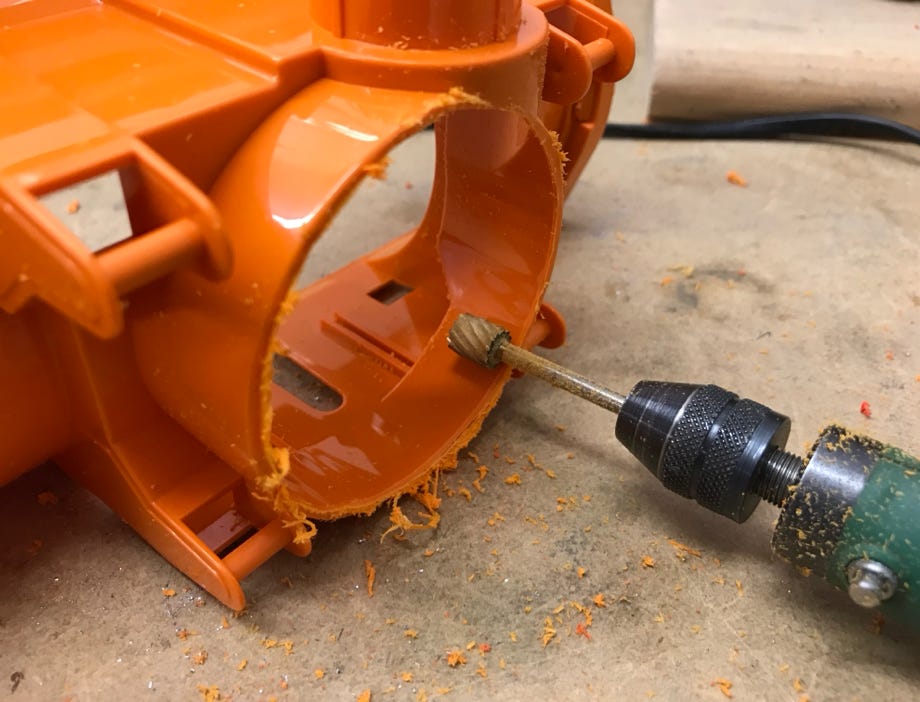
I hollowed out the housing with my Proxxon Micromot tool and proper cutting and grinding bits, see pictures:
Removing the rear cover with a sawing blade
Rear cover removed
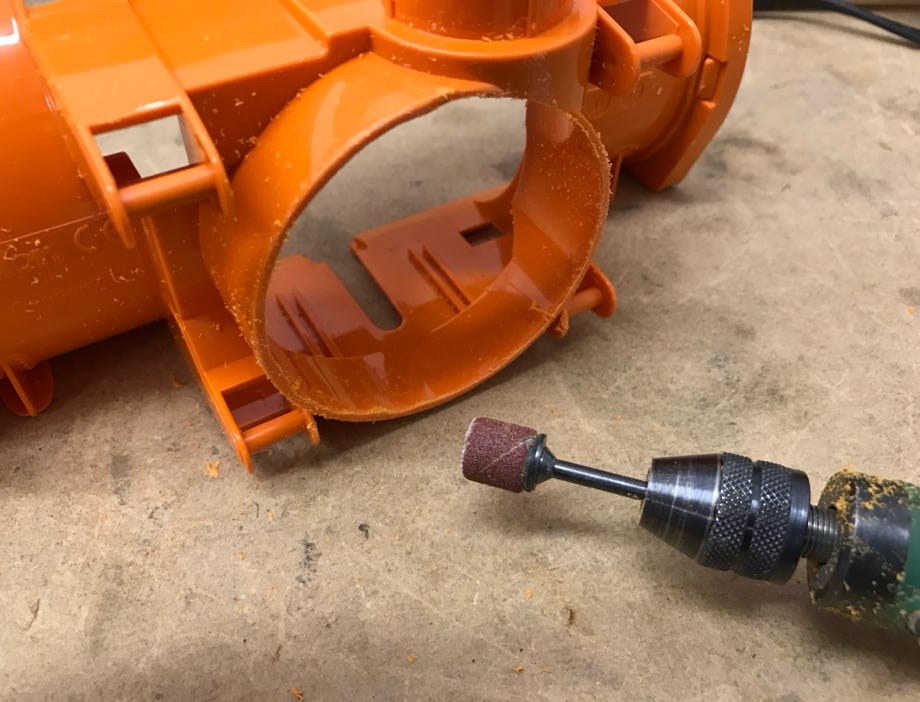
Grinding out the housing with a milling bit
Finishing with a sanding bit
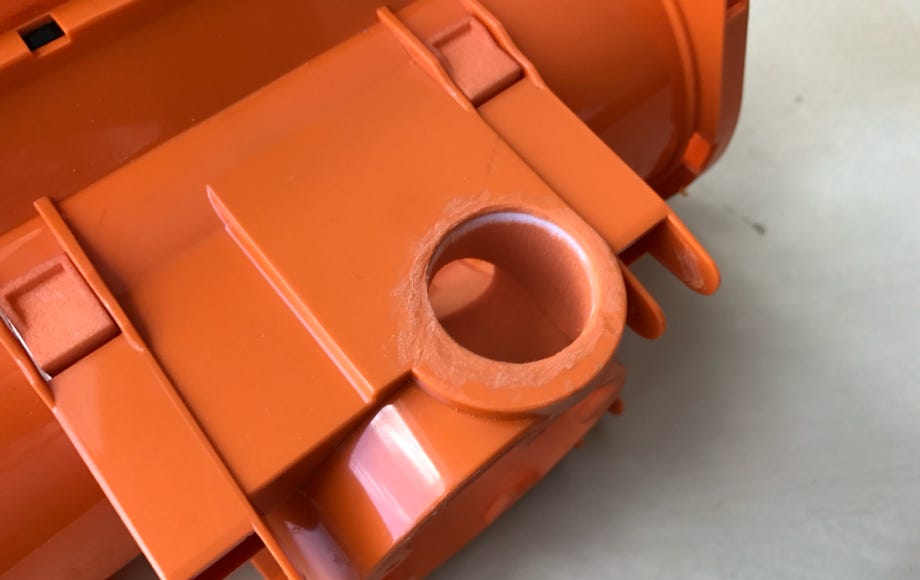
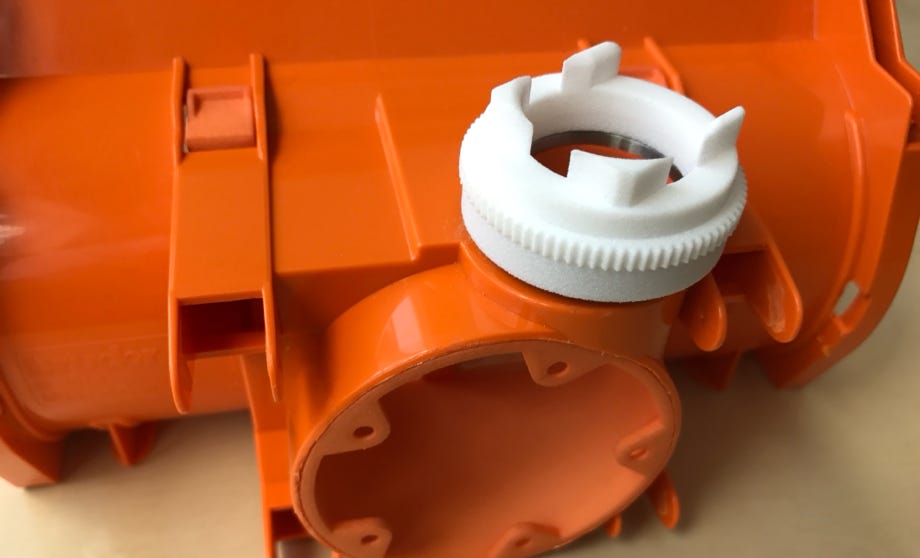
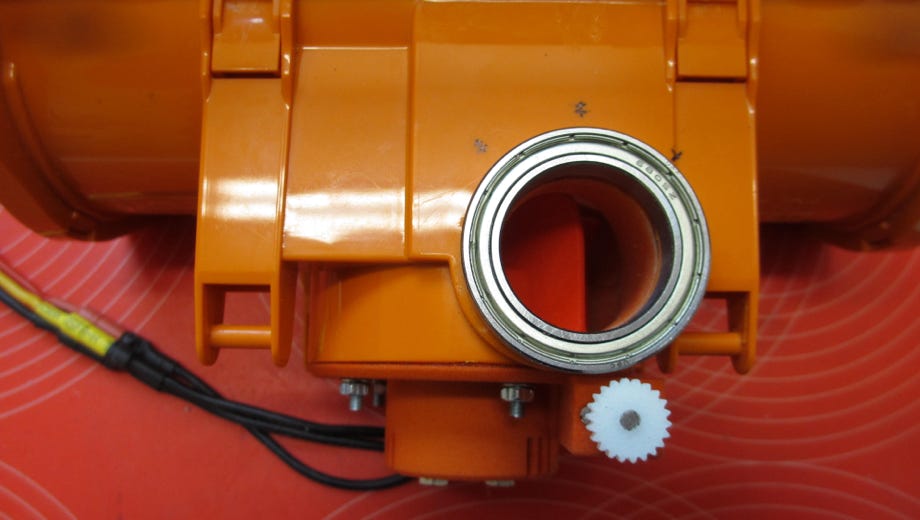
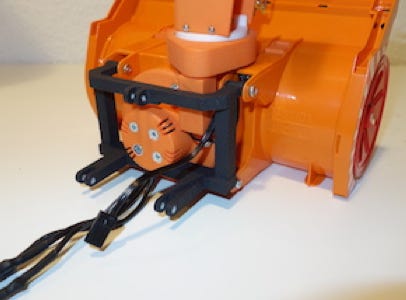
The socket for the chute is replaced by a roller bearing and a printed part and can thus be removed completely. The original center part will be replaced completely and can thus be disposed.
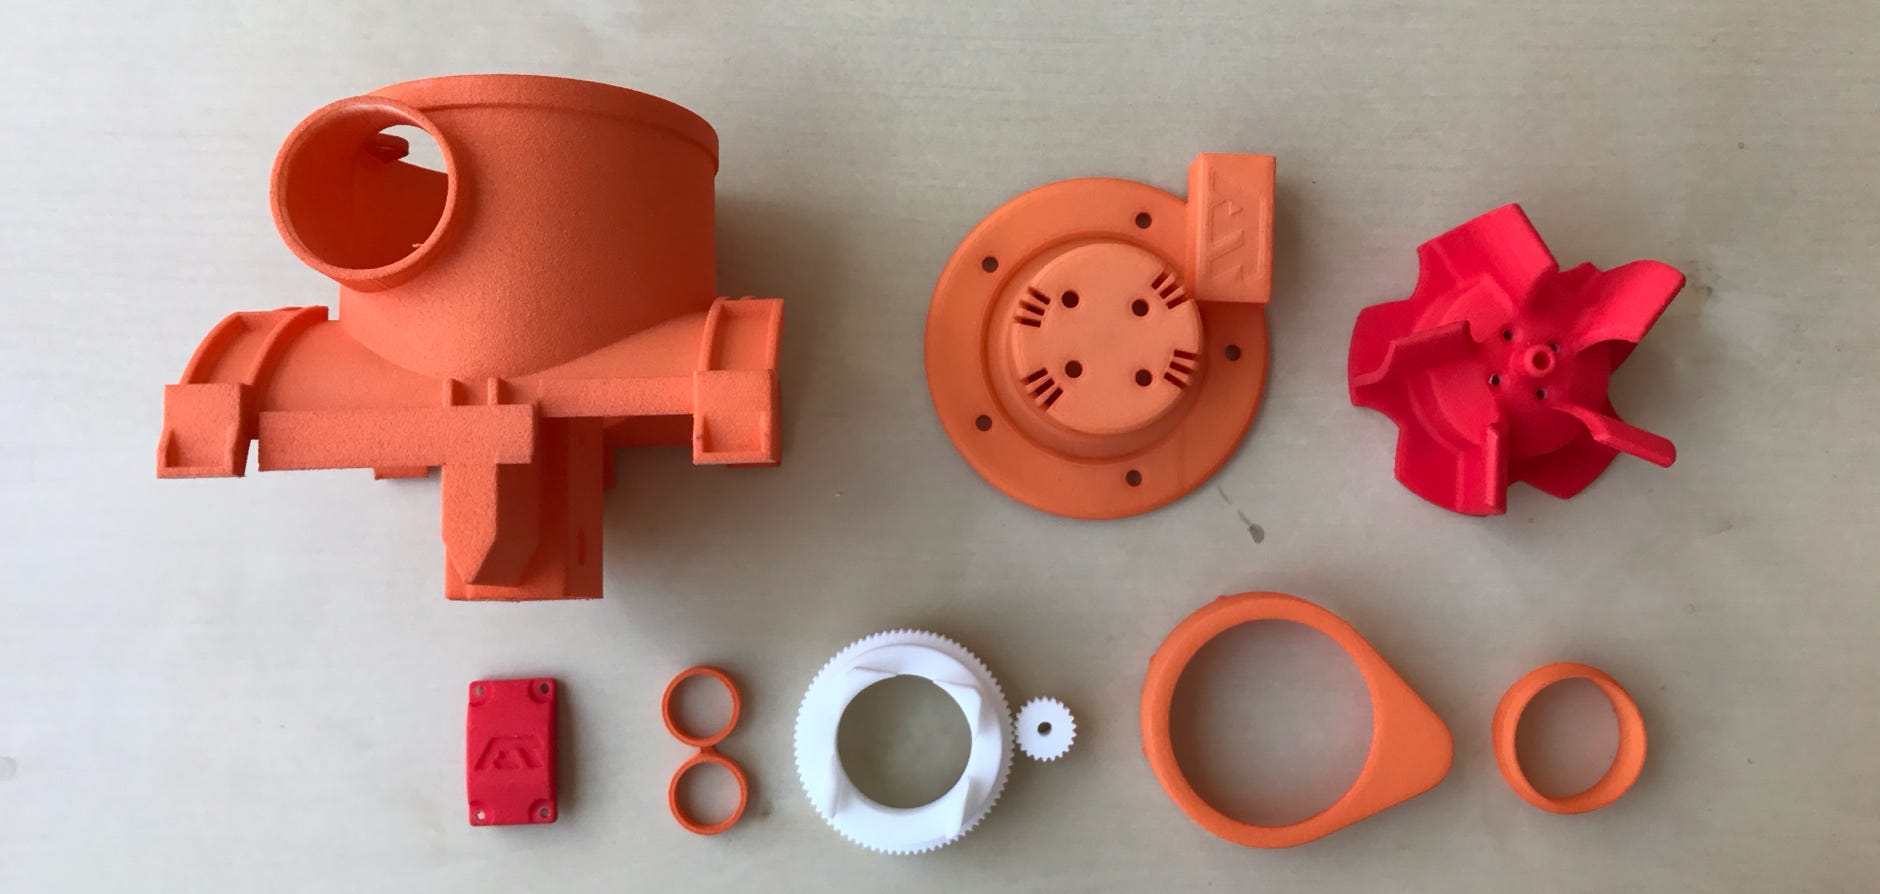
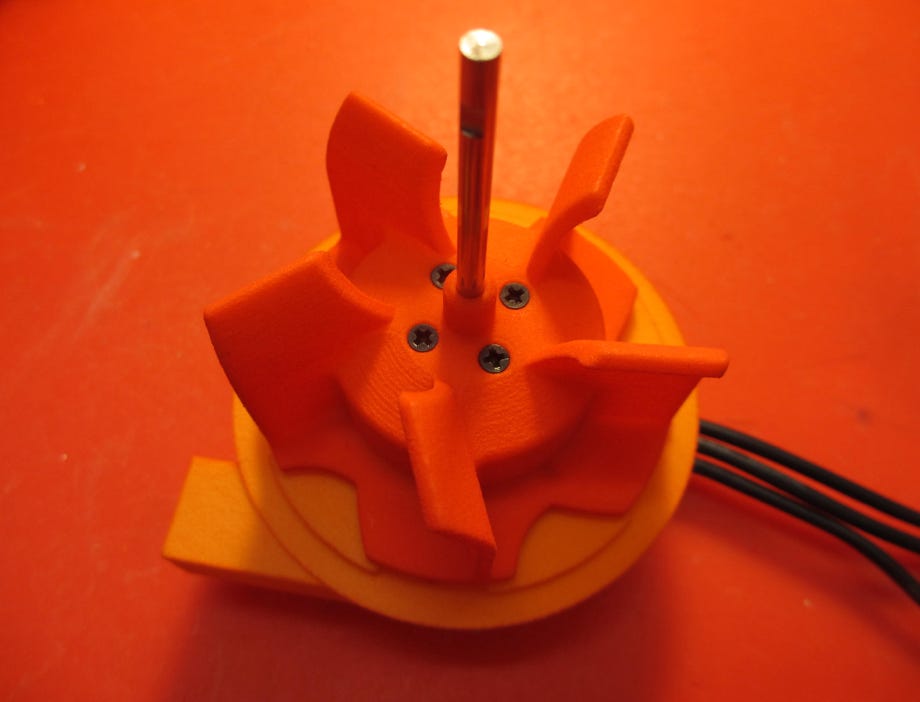
I created all needed parts in CAD with precise fit: blower housing with worm gear box, engine mount, blower fan, gear box cover, distance rings, chute socket with sprocket and cover. I ordered them as Nylon laser sinter printing and already colored accordingly:
The correct position of the printed blower fan housing is guaranteed by the clipping it in. For optical reasons the rear edge of the clipped-in center part should be flush with the rear edge of the snow blower housing. Who wants to be on the safe side can glue the parts together, but only after a correct fit of the drum shaft has been achieved (see further down).
The opening for the chute is enlarged such that it is flush with the chute part of the blower housing, see picture to the right.
I used a 6 mm aluminum round rod for the drum shaft. To install the two outer ball bearings to the snow blower housing reduction sleeves are necessary. These are available as printed parts, too. I glued these together with the ball bearings with super glue.
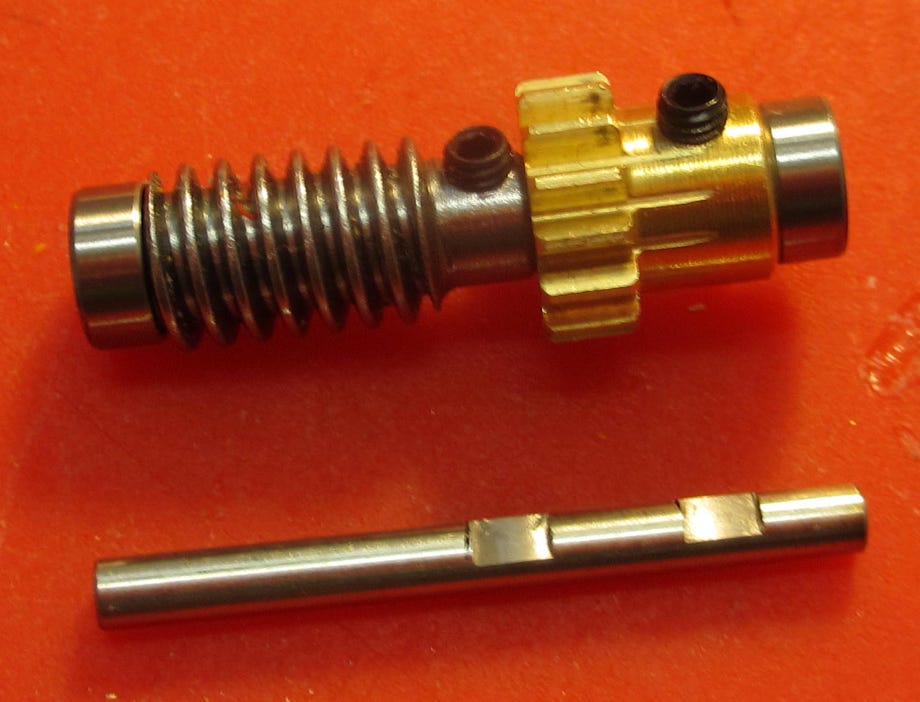
I had to extend the bore of the worm gear to 6 mm, and to make sure that it is absolutely centric I did this on the lathe with an inside cutting bit.
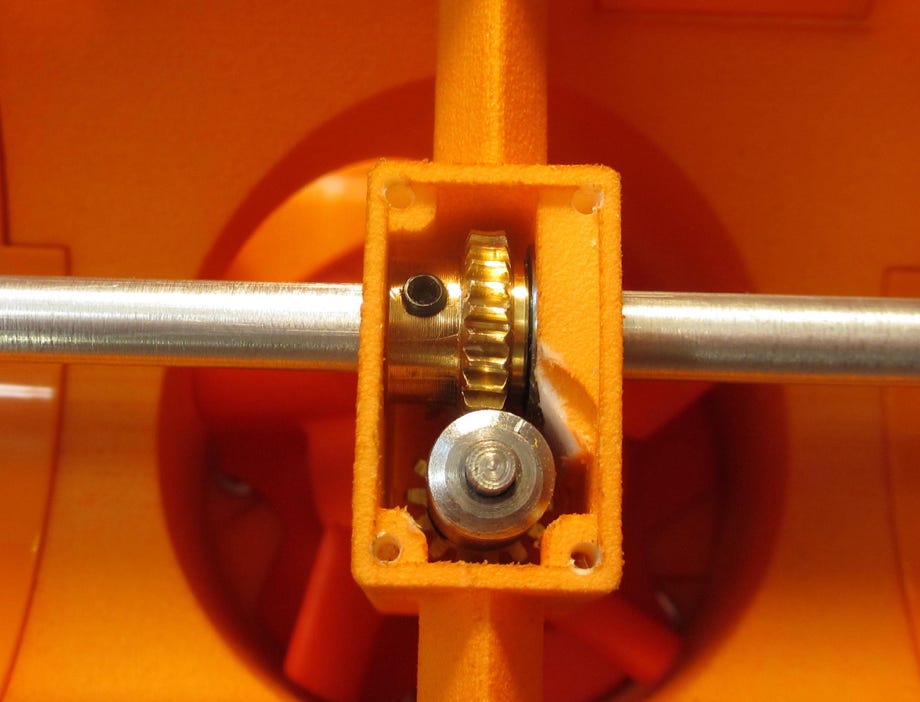
For the gear box I pressed ball bearings 7x3 mm and 12x5 mm into the respective bearing positions. Also the gear box cover gets a ball bearing for the second bearing of the worm shaft. The worm shaft is mounted as shown in the photo. The shaft is 31 mm long. For fixation I used M3x3 worm screws. To position the gears I also used the ball bearings and made sure that the shaft is equally set back in both bearings.

Ball bearings in the gear box
Worm shaft 31 mm long (top shown with ball bearings)
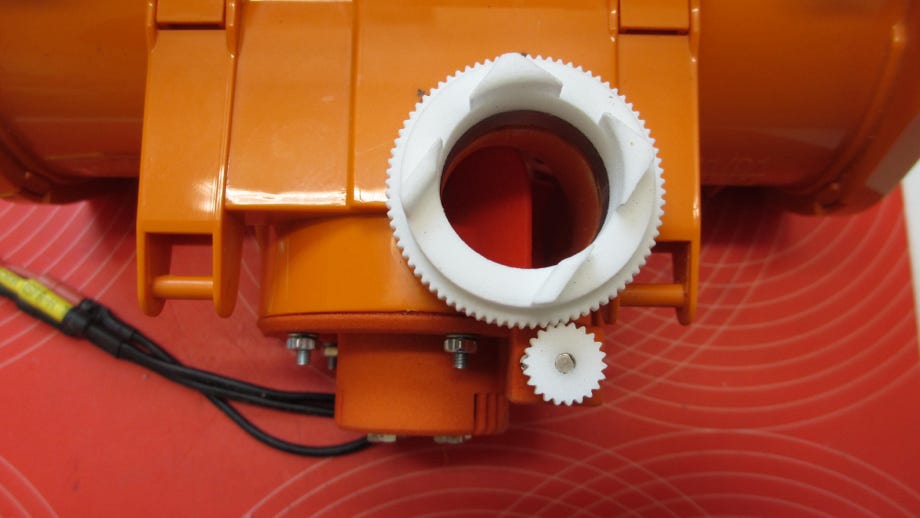
To install the gear box cover M2 threads need to be tapped into the housing. For this pre-drill with a 1,5 mm drill bit with the cover in place. Afterwards the holes on the cover can be enlarged to 2 mm. Now the engine pinion can be put into place. A small bore is in the housing to tighten the worm screw on the motor pinion. Afterwards the worm shaft and finally the worm gear is put into position. Between worm gear and ball bearing a 1,2 mm washer needs to be inserted.
Don't forget to grease the gears well!

Pre-drilling with 1,5 mm
Installed gears
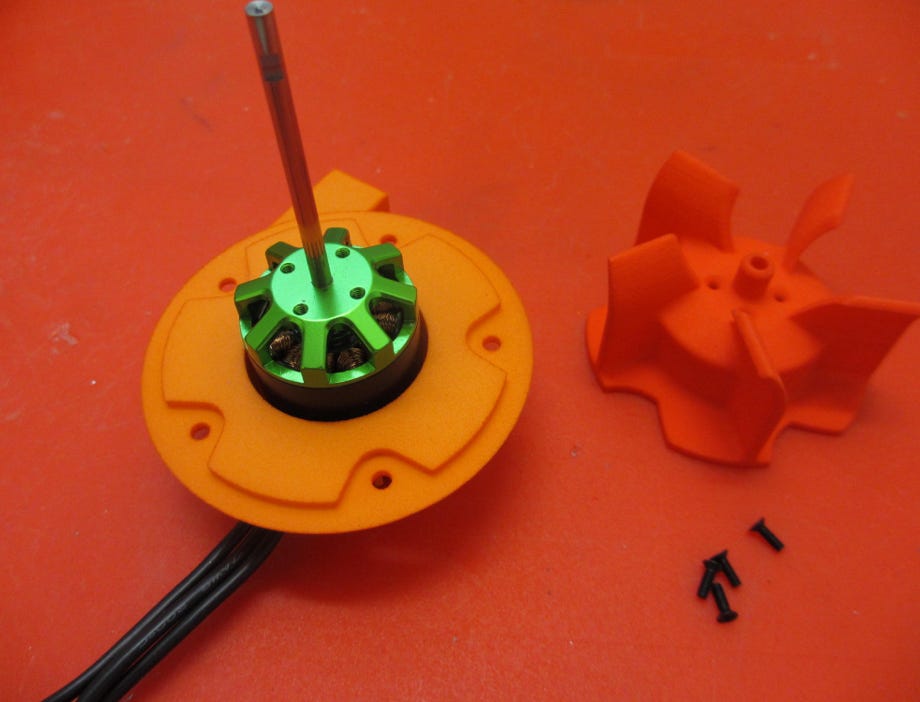
I used a relatively slow running and high torque brushless motor to drive the blower fan and drum. I designed the printed parts fitting for this specific motor. The green Turnigy motor shown in the pictures is no longer available. The new motor is similar. The shaft needs to be replaced by a longer shaft, which is fortunately possible with brushless motors. To remove the socket set screw I heated the shaft with a soldering iron to soften the thread locker.
After removing the e-clip I could remove the shaft on the drill press by placing the housing on the machine vise and pressing down with a 3 mm shaft (of course with the drill switched off). I made a groove for the e-clip on the new longer 3 mm stainless steel shaft on the lathe. I also milled flat parts on the shaft for a better bite of the socket set screws for motor and sprocket. Then I screwed the motor to the printed part, and I used the flat head screws which come with the motor to install the blower fan (see photos).
Tipp: If the motor turns into the wrong direction, simply switch 2 of the 3 wires.
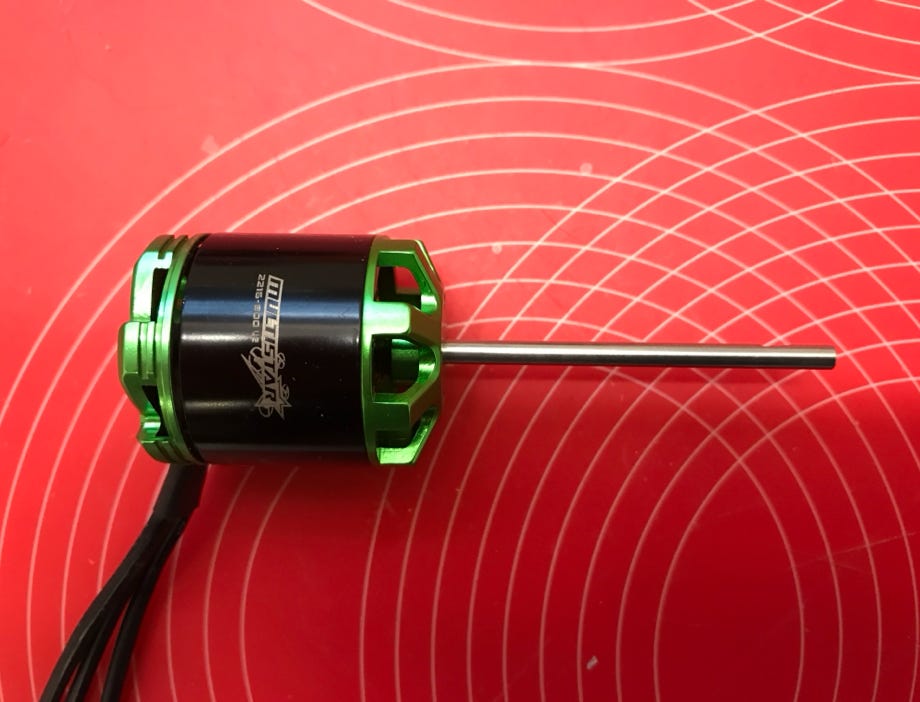
OLD Motor with extended shaft (77 mm long), the new motor is similar and black (73 mm long shaft!)
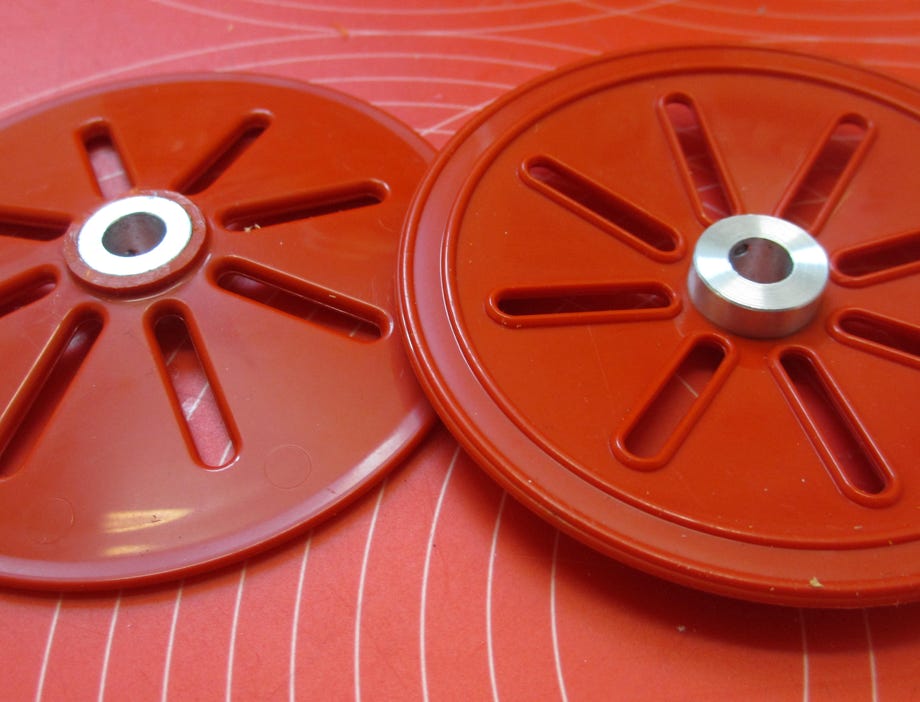
End disks with fitting hubs. The hubs are also available as printed parts.
Motor installed in the motor housing
Installed blower fan
I glued the drum rakes to each other. The left and right rakes can not be mixed up because the connections have either one or two inside teeth. Now the left and right drum have to be adjusted so that they fit exactly without any clearance. For this I carefully adjusted the end parts on the lathe. I fixed the drums with M2 flat head screws to the shaft, the screws going through the shaft. As they cannot be tightened a (removable) thread locker is absolutely necessary.
To attach the end disks I shortened their hubs and glued fitting turned aluminum hubs in place. These hubs are also available as printed parts. The hubs have a M2 socket set screw. To ensure concentricity the turned hubs have to fit tightly and need to be pressed to the disks while glueing them with super glue.
Following the recommendation of Klaus Bergdolt I enlarged the chute to 25 mm to avoid possible snow block up. For the first version I enlarged the existing chute myself, but for version 2 and the kit the enlarged chute is available as a printed part. To change the throwing distance the black part of the original chute is used.
Chute as printed parts
Cartridge for mounting the chute bearing
Chute socket
Roller bearing for the chute rotation
Chute socket with gears
I carefully enlarged the throw out hole so that it is flush with the chute part of the blower housing. A thin roller bearing with an inner diameter of 25 mm enables the chute rotation. The adjustment is done by RC with a 1:50 motor gear box combination which is installed into the perfectly fitting housing. With the printed cartridge the ball bearing is positioned exactly in the correct position. The cartridge is glued to the chute part of the blower housing and to the inner ring of the ball bearing.
The speed controllers for the chute rotation are really small and they have the advantage that they can be plugged in directly to the receiver. Only wires with a servo plug have to be soldered to them (see picture below).
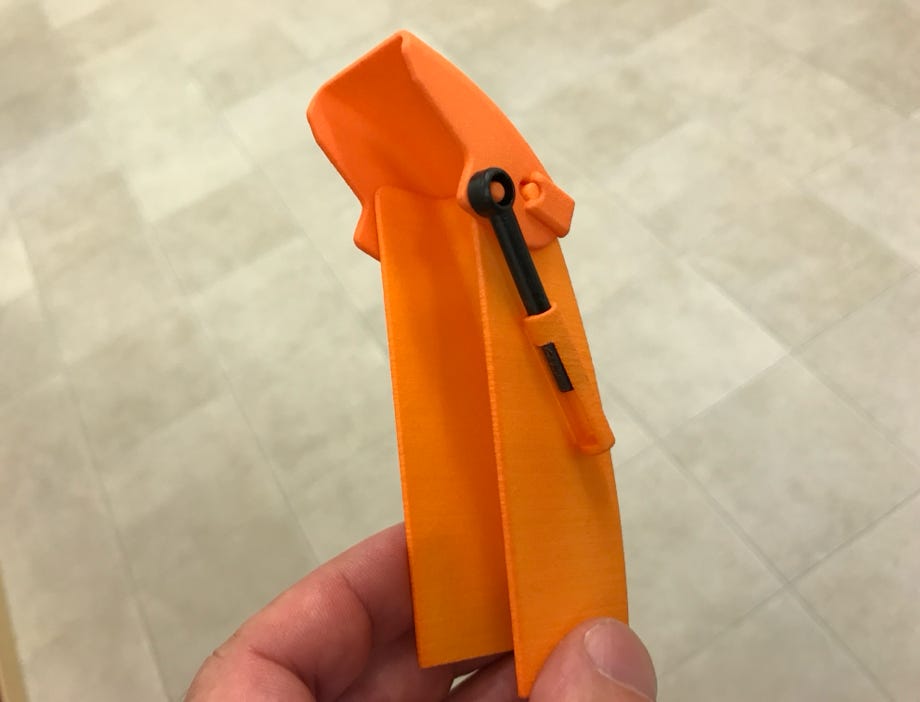
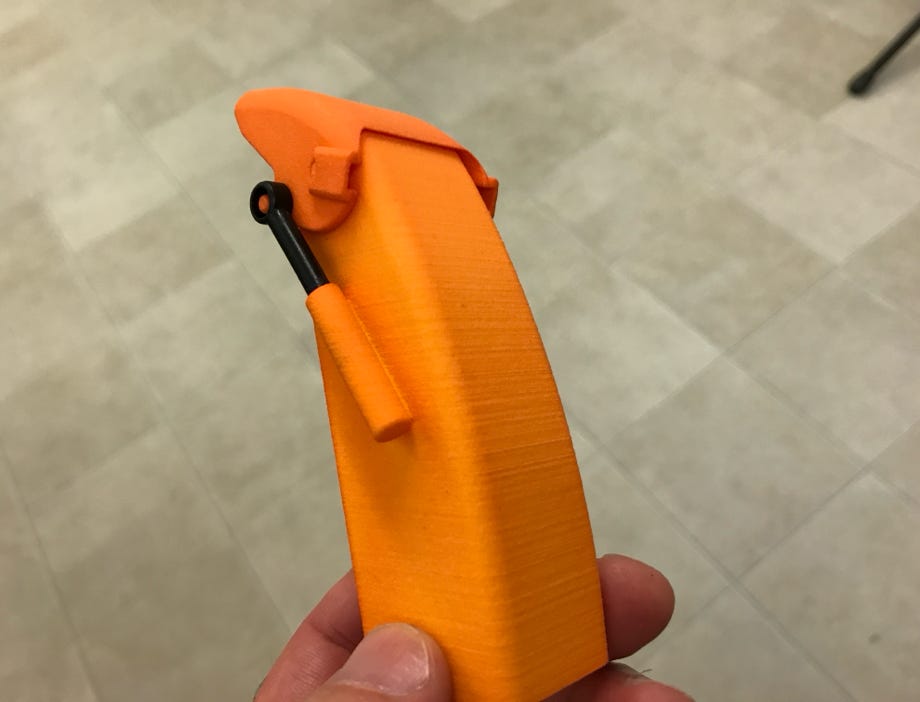
For version 2 I realized a simple RC adjusting of the throwing distance with a servo which is directly mounted to the chute. I glued the 1 mm steel wire into the groove of the rod of the Bruder chute. Of course this can be made nicer and hidden with a dummy hydraulic cylinder. Maybe I'll do this later.
The chute socket is glued to the outer ring of the ball bearing, and finally the chute is glued to the socket. Now the snow blower is ready for the first test run.
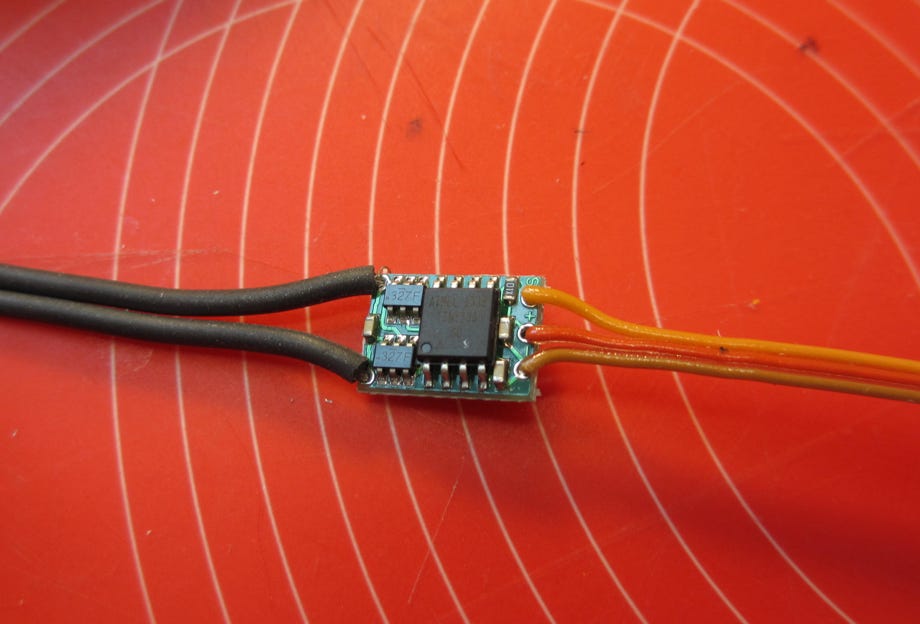
Speed controller for the chute rotation
Servo for changing the throwing distance
To combine tow blowers to a double blower there are basically two versions:
- two separate single blowers (as I did it for version 1)
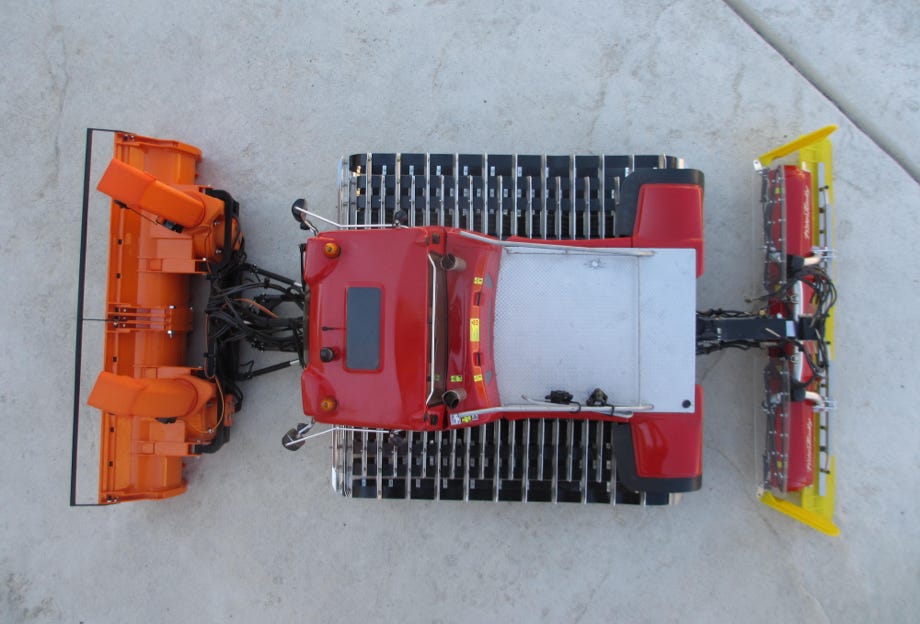
- combined blowers with a single center drum, like the original (my version 2)
This is the easier version. Two identical snow blowers are built, each with end disks on boht sides, which function completely indepent. With the mounting frame they are positioned side by side
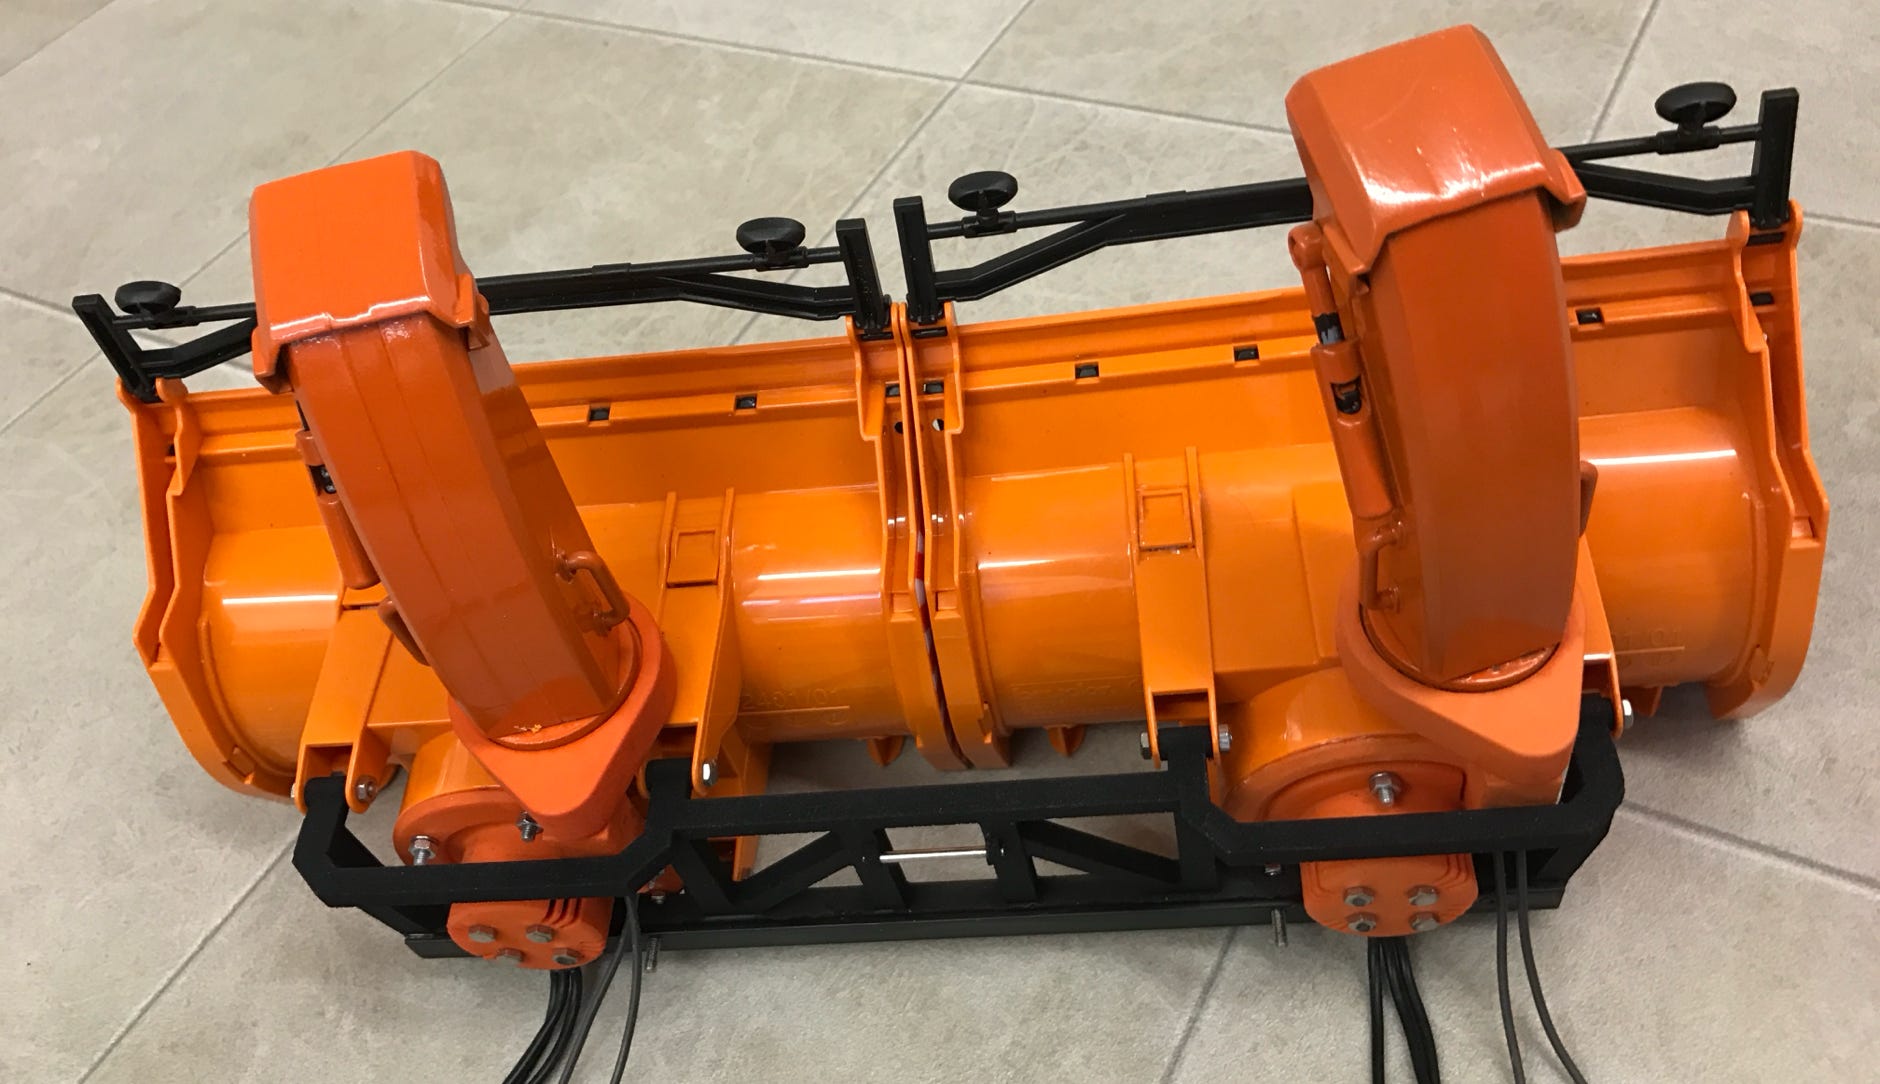
Double snow blower with two identical single blowers
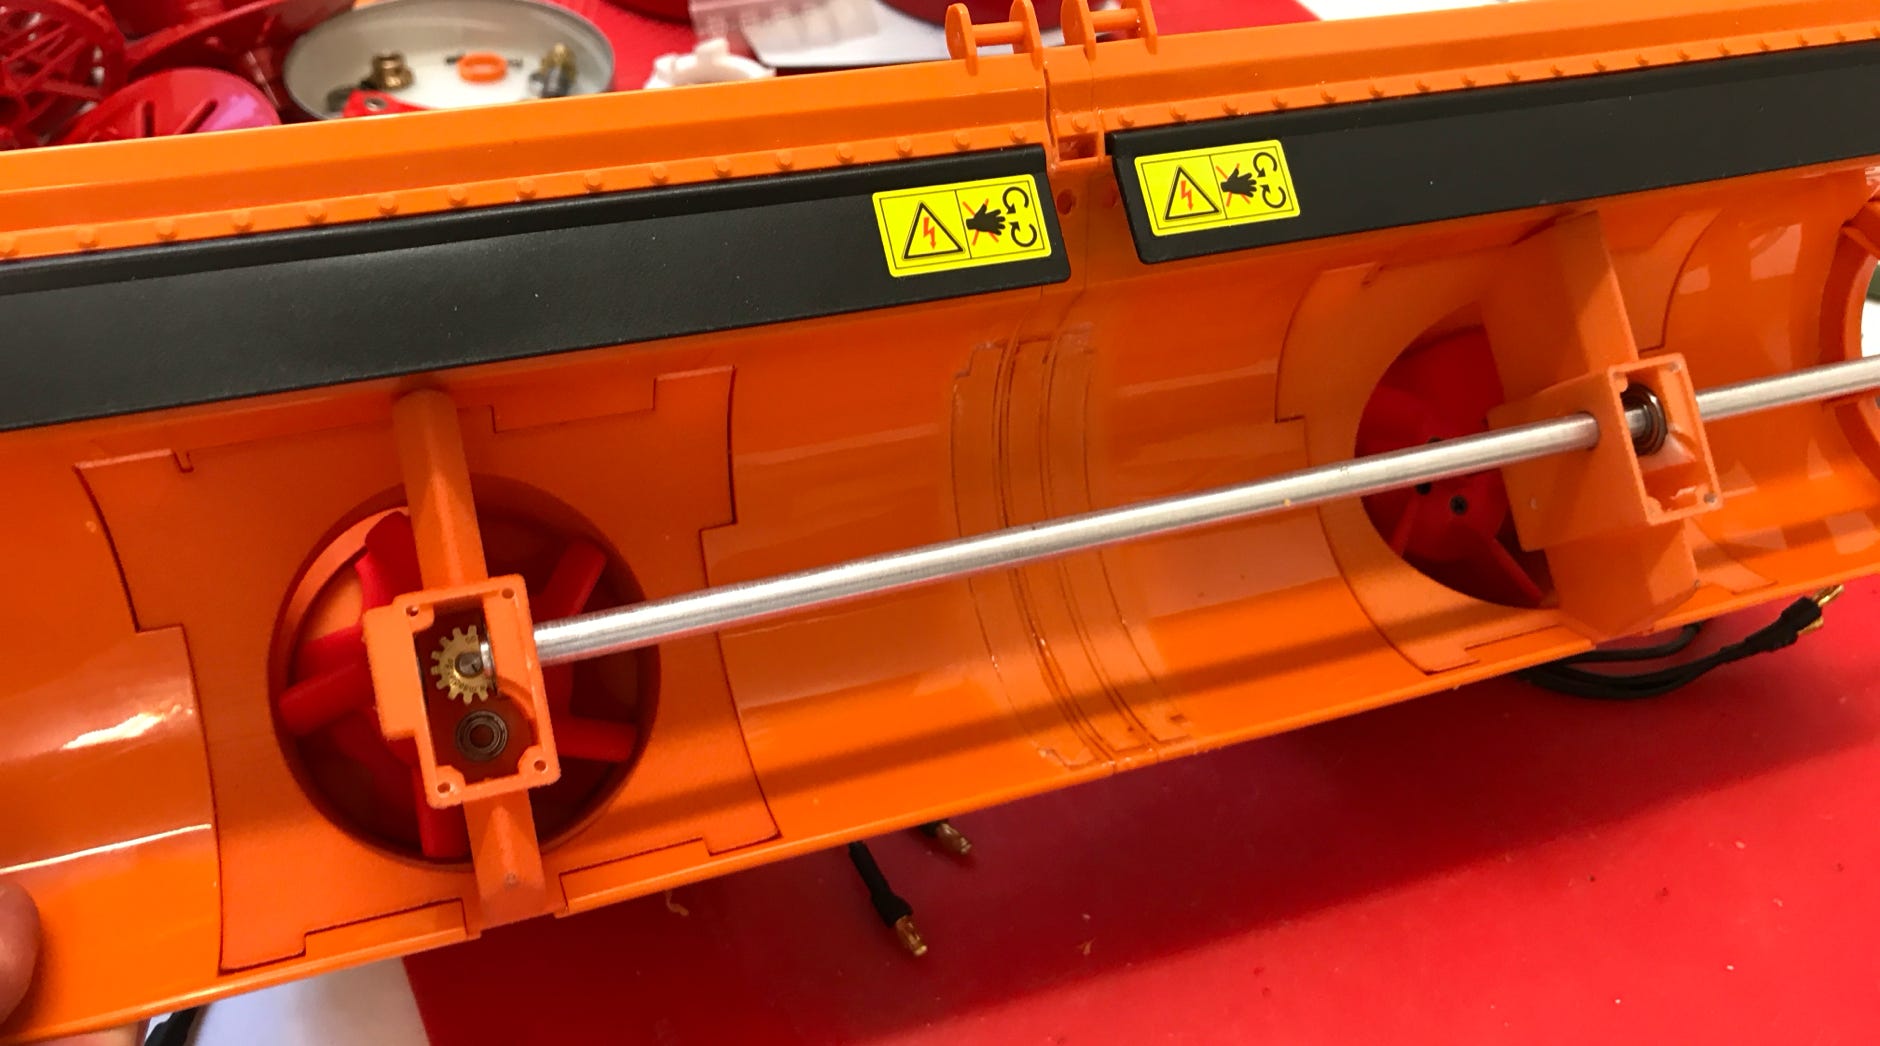
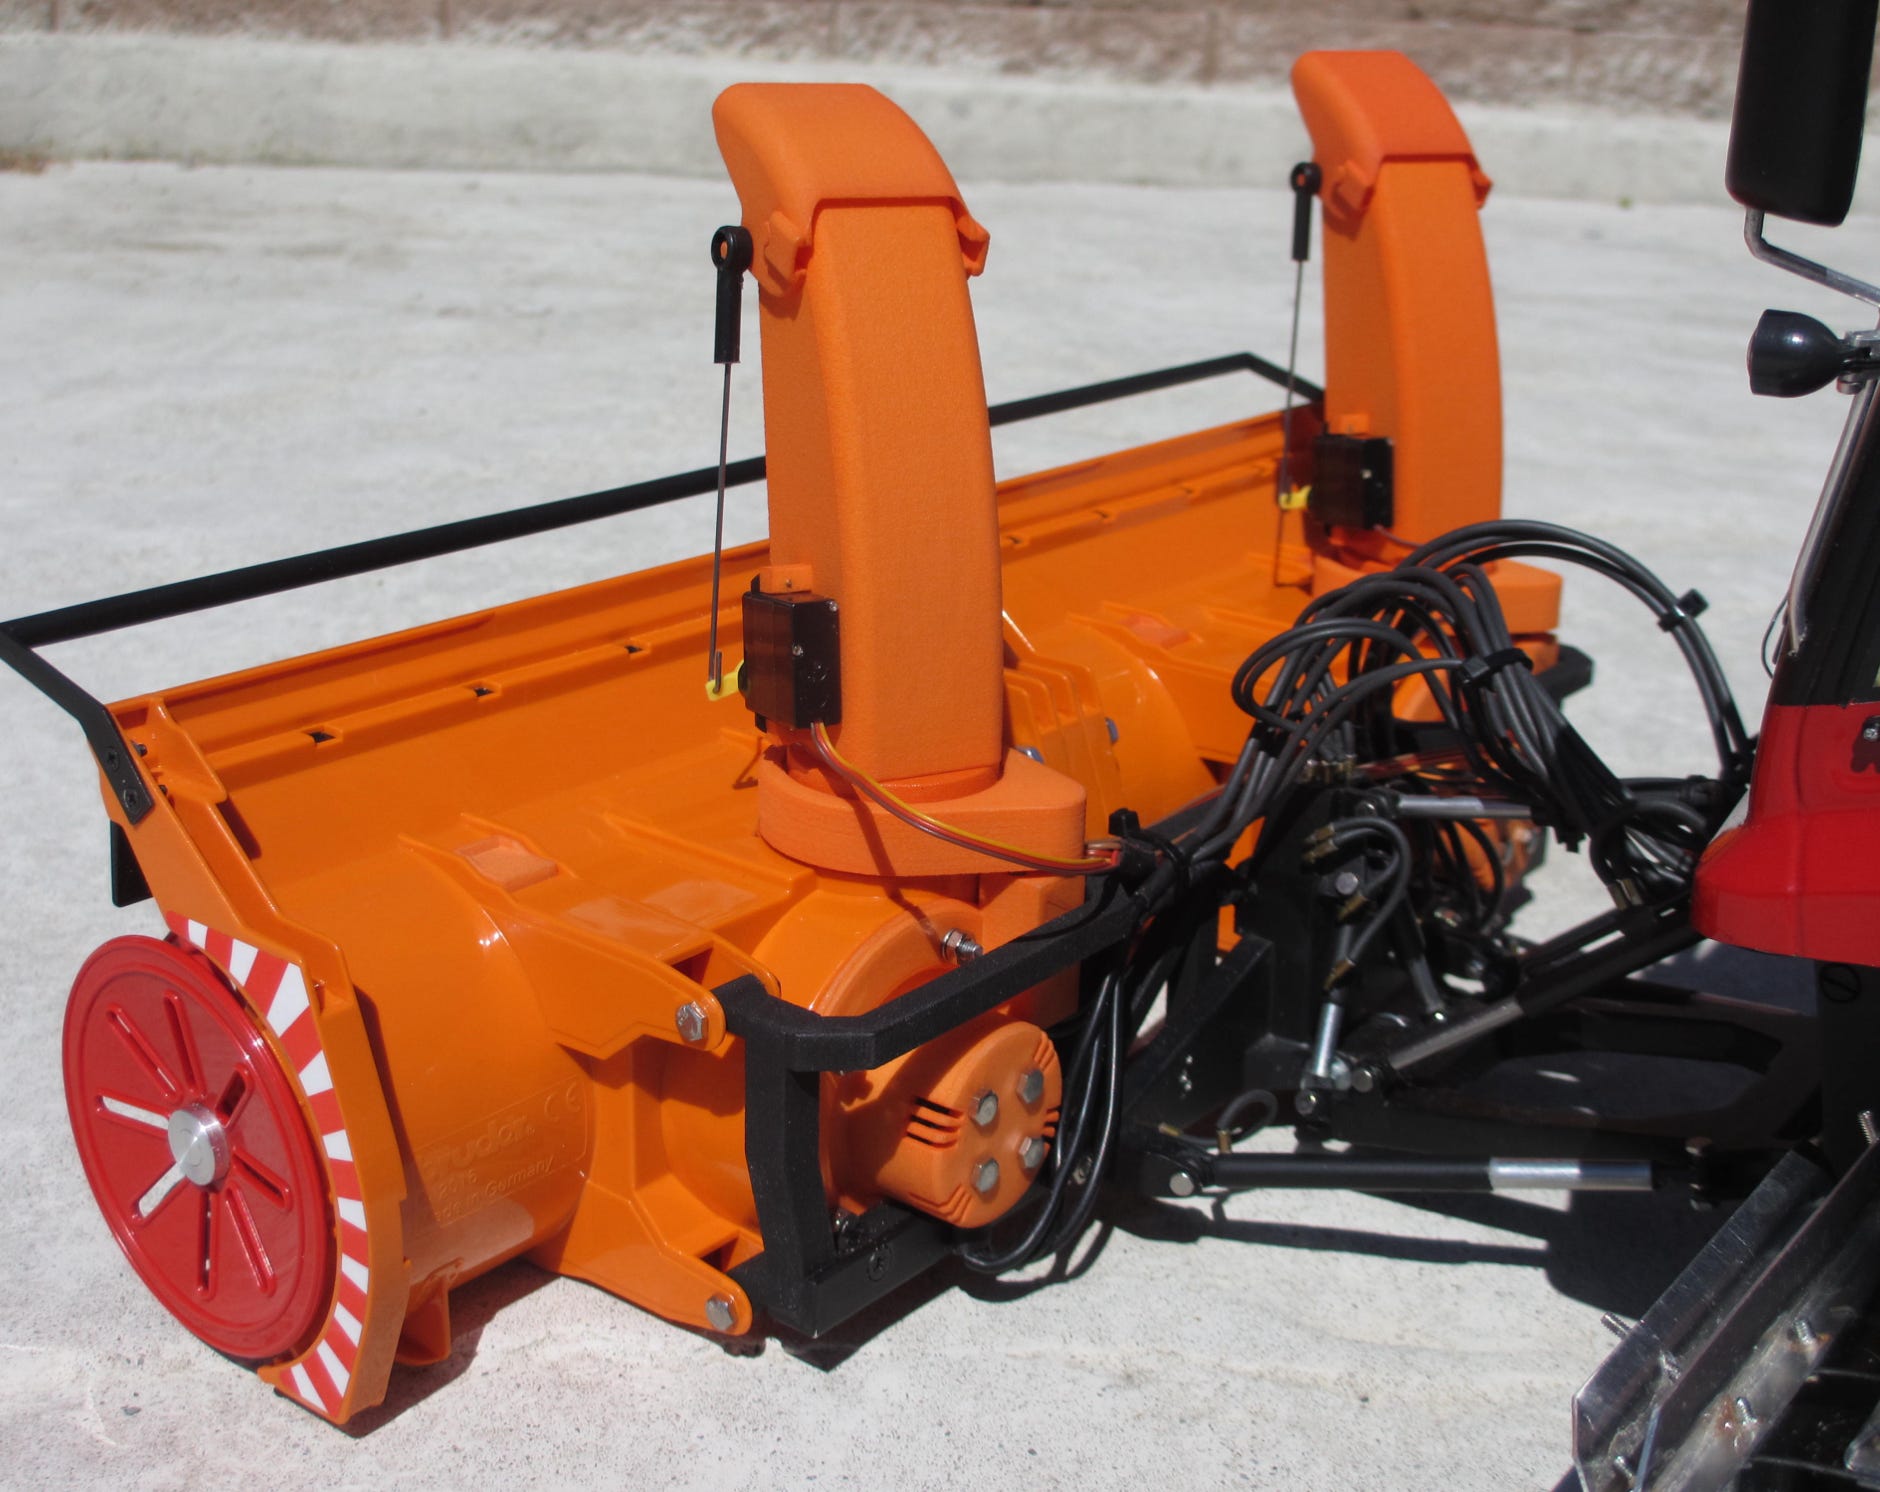
This version is realized at the original, the center drum is one piece. To built this as a model 3 Bruder blowers are needed, because one has to be a part donor.
Due to the self-locking worm drive the drum shaft has to be made of two pieces: the (in driving direction) left motor powers the left outer drum and the entire center drum. The right motor powers only the right outer drum. Therefore the right blower housing has an additional bearing mount as can be seen in the picture below. This housing must be to the right because only then both shafts are hold in position by the end disks and the worm gears and can thus not move.
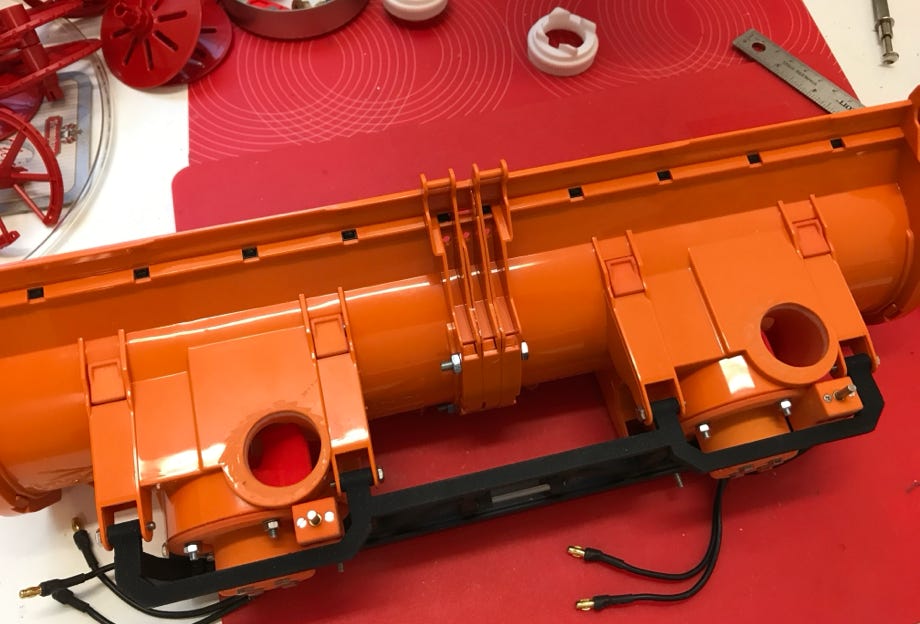
To connect the housings I cut the drum mounts like shown in the lower right picture and fixed them with plenty of epoxy glue. The easiest way of filling the 7 mm wide gap is by using the special printed part (see part list at the bottom) which was designed by Constantin Woywod. Alternatively it can be made from parts of the 3rd Bruder blower. I glued both housings together and I additionally used bolts (lower left picture).
Double snow blower with single housing and center shaft
Connecting both housings with bolts
Cutting of the center pieces
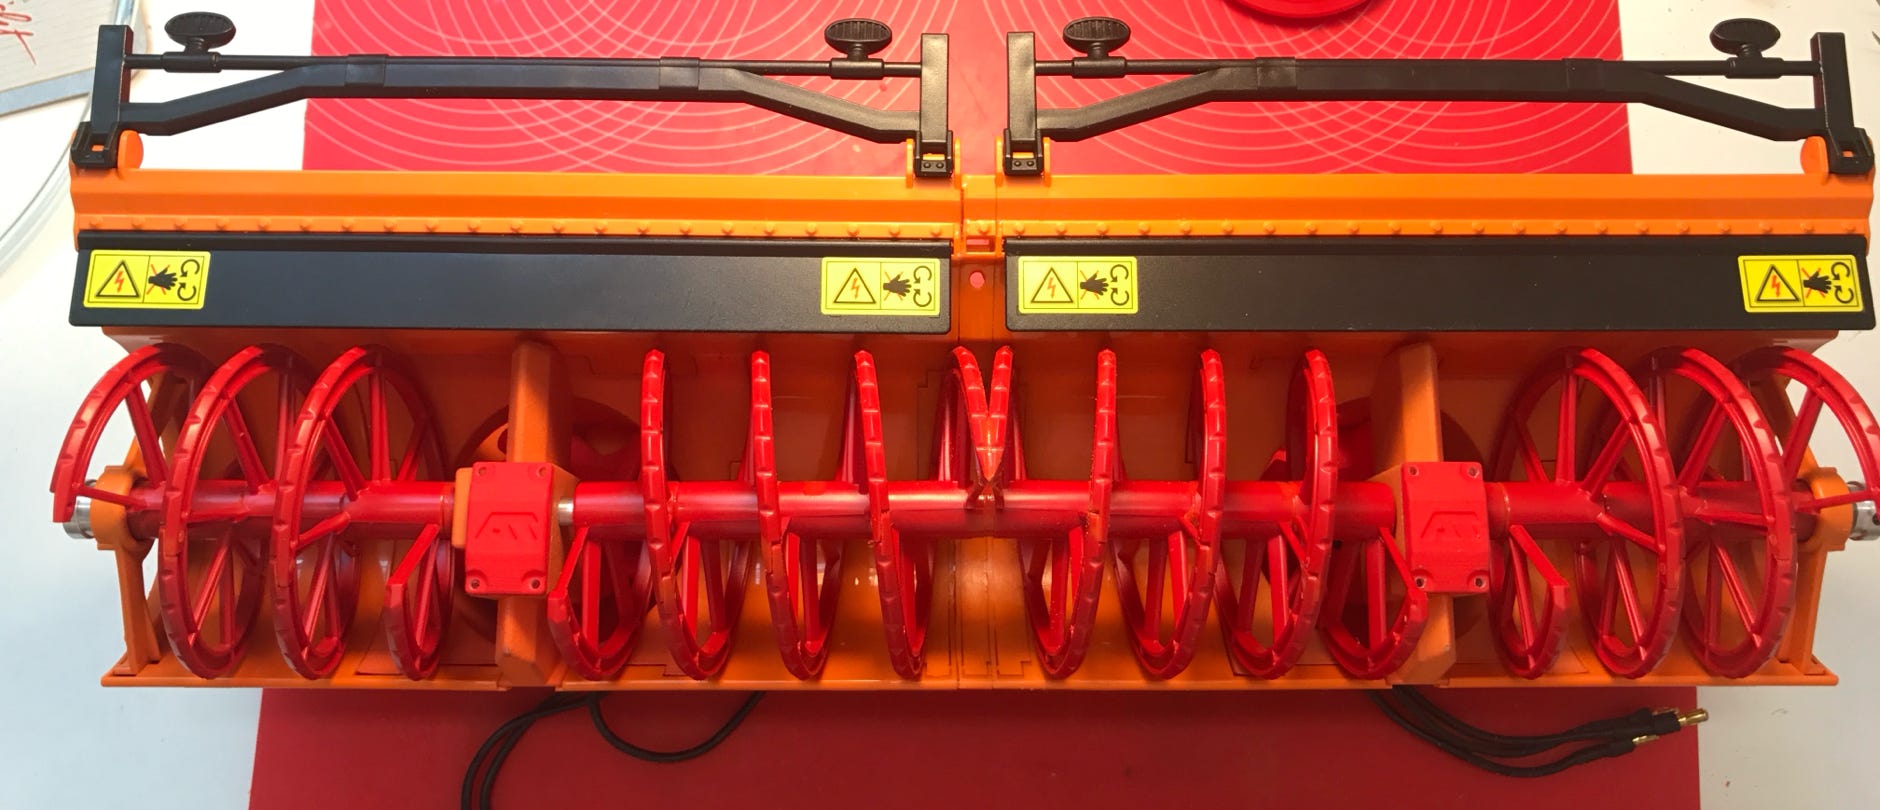
One piece center drum
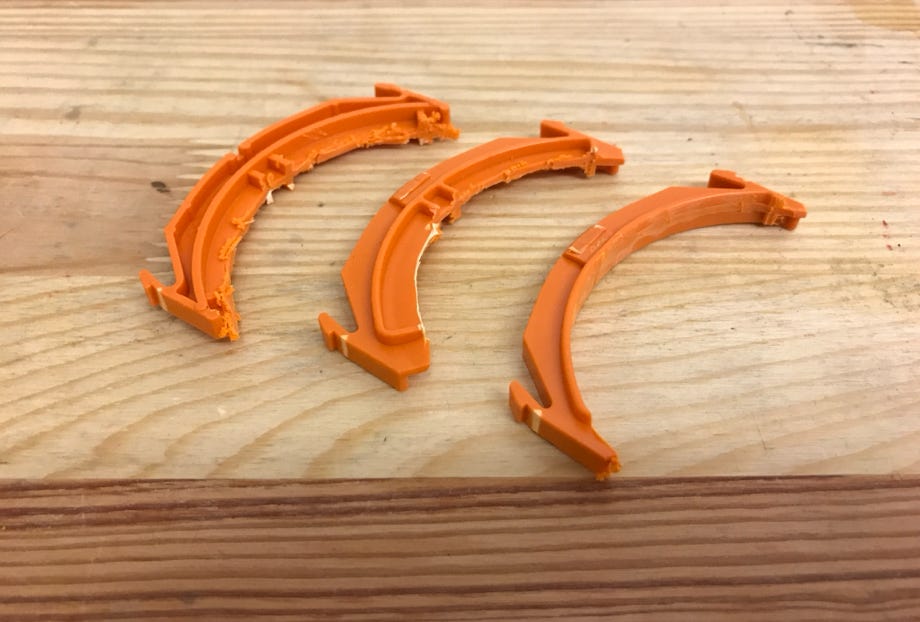
Two additional spiral rake pieces are needed for the center drum. That's why a 3rd Bruder blower is needed. The picture below shows how the finished part looks like.
To combine the rakes I sanded them accordingly and glued them together after I added a plastic washer to fill the gap of the shaft. The washer was made from no longer needed parts.

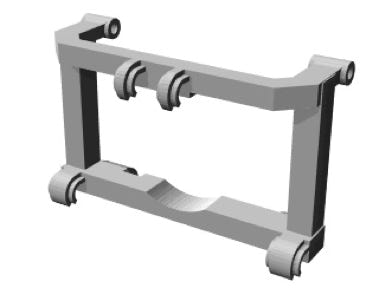
To mount it to the snow cat I designed a frame in CAD based on the mounting frame which Westa is using for their double snow blowers. Eric made good photos a couple of years ago when he visited the Westa factory. I removed the bolts at the snow blower housing and drilled 3 mm holes in the exact center (see photo below). I attached the snow blower to the frame with M3 screws.
The lower screws of the engine mount have to be cut flush to the nut because otherwise they would not fit into the gaps of the mounting frame.
Finally the cables of the motors had to be extended, for which I used black silicone wires to make them look like hydraulic hoses.

Machined mounts on the housing
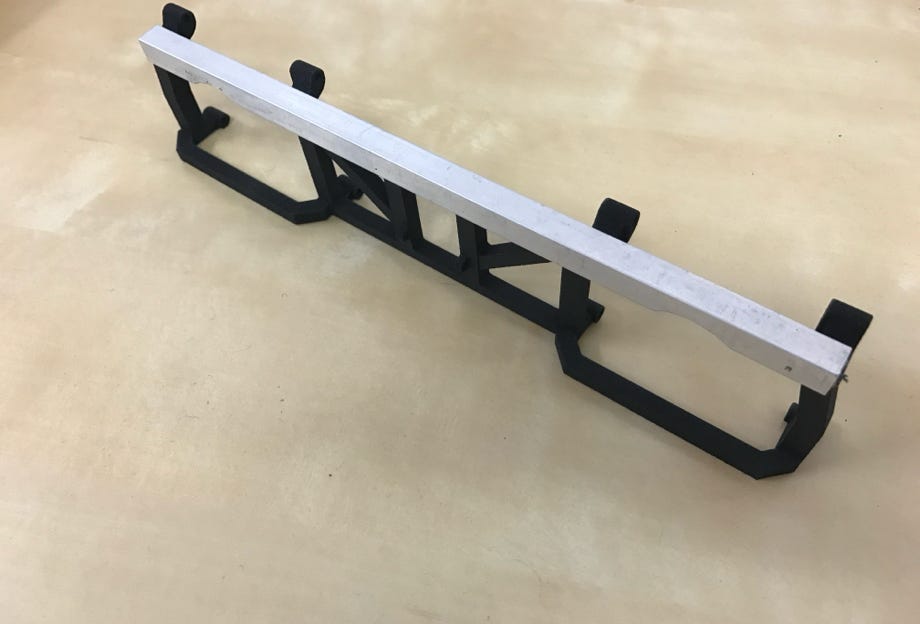
Aluminum angle profile to re-enforce the frame (only needed for the frame of the blower with a one piece center drum)
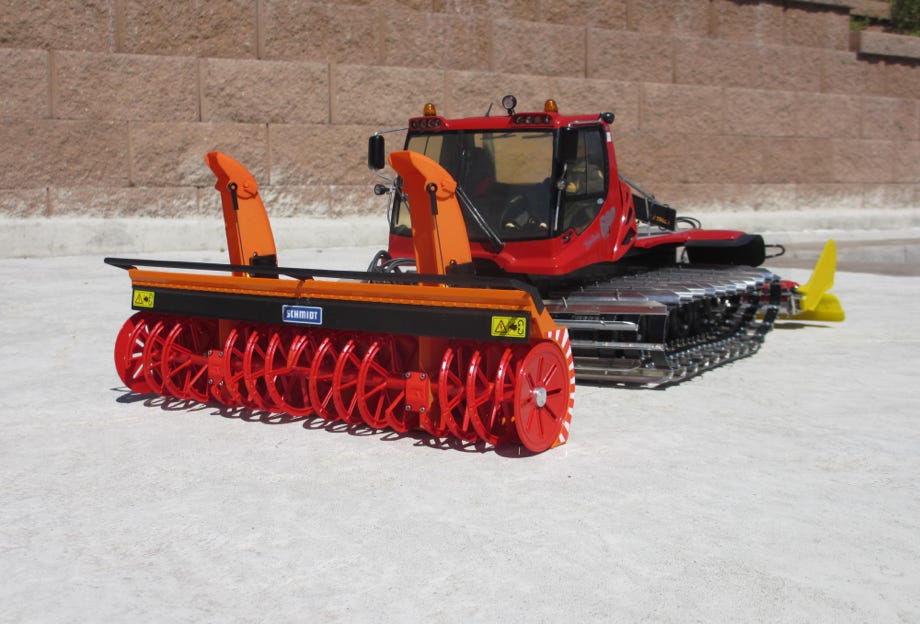
Of course I made the frame fitting to the Pistenking attachment carrier to make the mounting on the snow cat really easy. The multiple wires were bundled with zip ties and guided into the chassis. I'm using a separate battery for the blower motors.
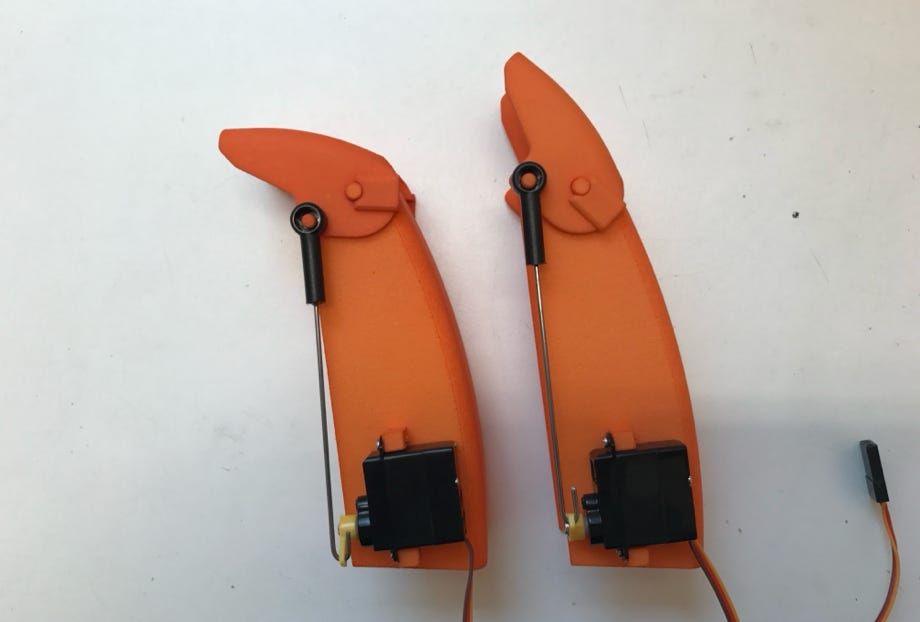
Each snow blower weighs about 375 grams and both can still be easily lifted by the blade servo. The massive snow blower fits size wise quite well to my PistenBully 600 Polar.
To mount a single blower to the Dickie PistenBully 600 I designed a fitting mounting frame as well. It can be simply clipped to the Dickie front attachmend carrier instead of the snow blade.
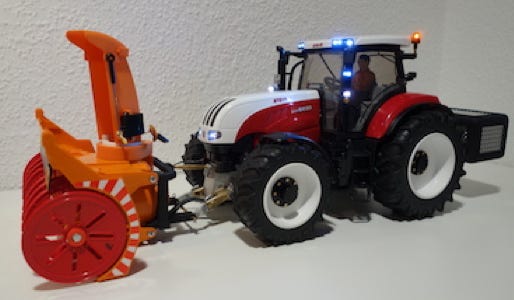
To mount a single blower to a Bruder tractor conversion kit by ML-Tec a fitting mounting frame is available as well (it was designed by Jonas Dietrich). With this a single blower can be mounted to a ML-Tec front hydraulics Art.-No.: ML-FH-100-01.
Dickie PistenBully (model by Michi Weiermair) and mounting frame
Tractor conversion with ML-Tec (Model by Jonas Dietrich) and fitting mounting frame

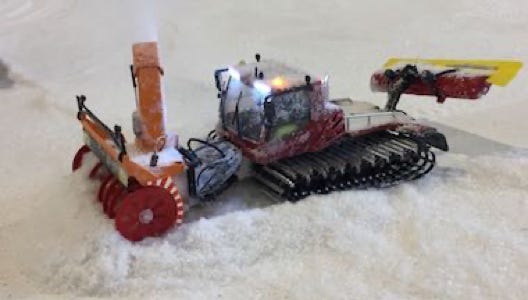
Upper right shows a video of the snowblower in operation.
The measured power consumption for the double snow blower while blowing snow is about 1300 - 1800 mAh for 10 minutes operating time.
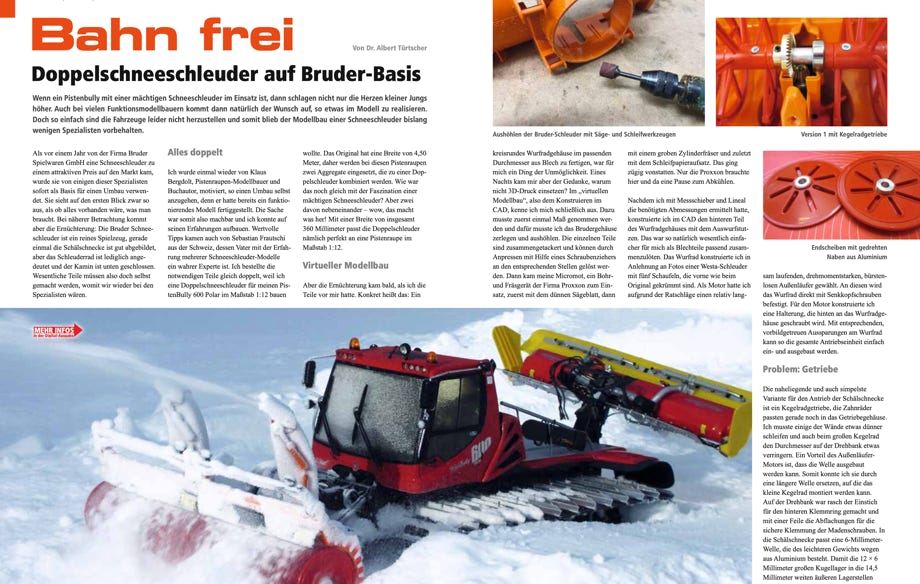
The German magazine Rad & Kette 1/2018 issued an article by me about building the double snow blower. It's in German language.
The article can be downloaded as PDF file, with friendly permission by the magazine. Just click on the picture for downloading.
Diese Seite verwendet Cookies. Sie stimmen der Verwendung von Cookies durch Anklicken von “OK” zu. Nähere Informationen finden Sie in unseren Datenschutzbestimmungen.
This page is using Cookies. You are permitting the use of cookies by clicking on “OK”. More information can be found at our Privacy Protection.
OK


