Walser
Pistenraupen
Modellbau
I had the idea to build a ParkPro version already for quite some time, and as we can make our own micro hydraulic cylinders the realization became possible. The large movements of the blade can be realized almost only with model hydraulics.
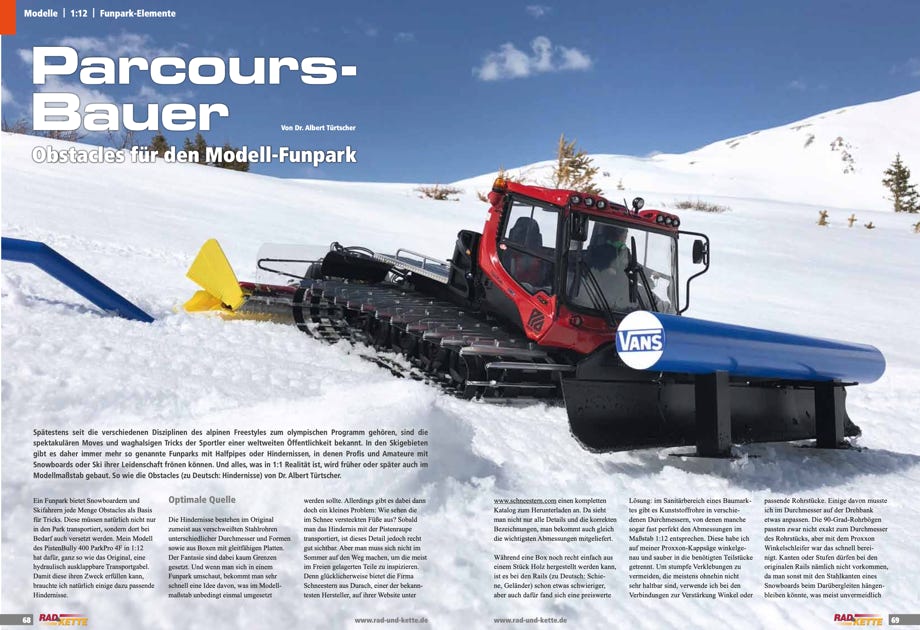
Also the possible application range is greatly enlarged: instead of preparing a slope track by track behind the house a fun park can be built with kickers and obstacles.
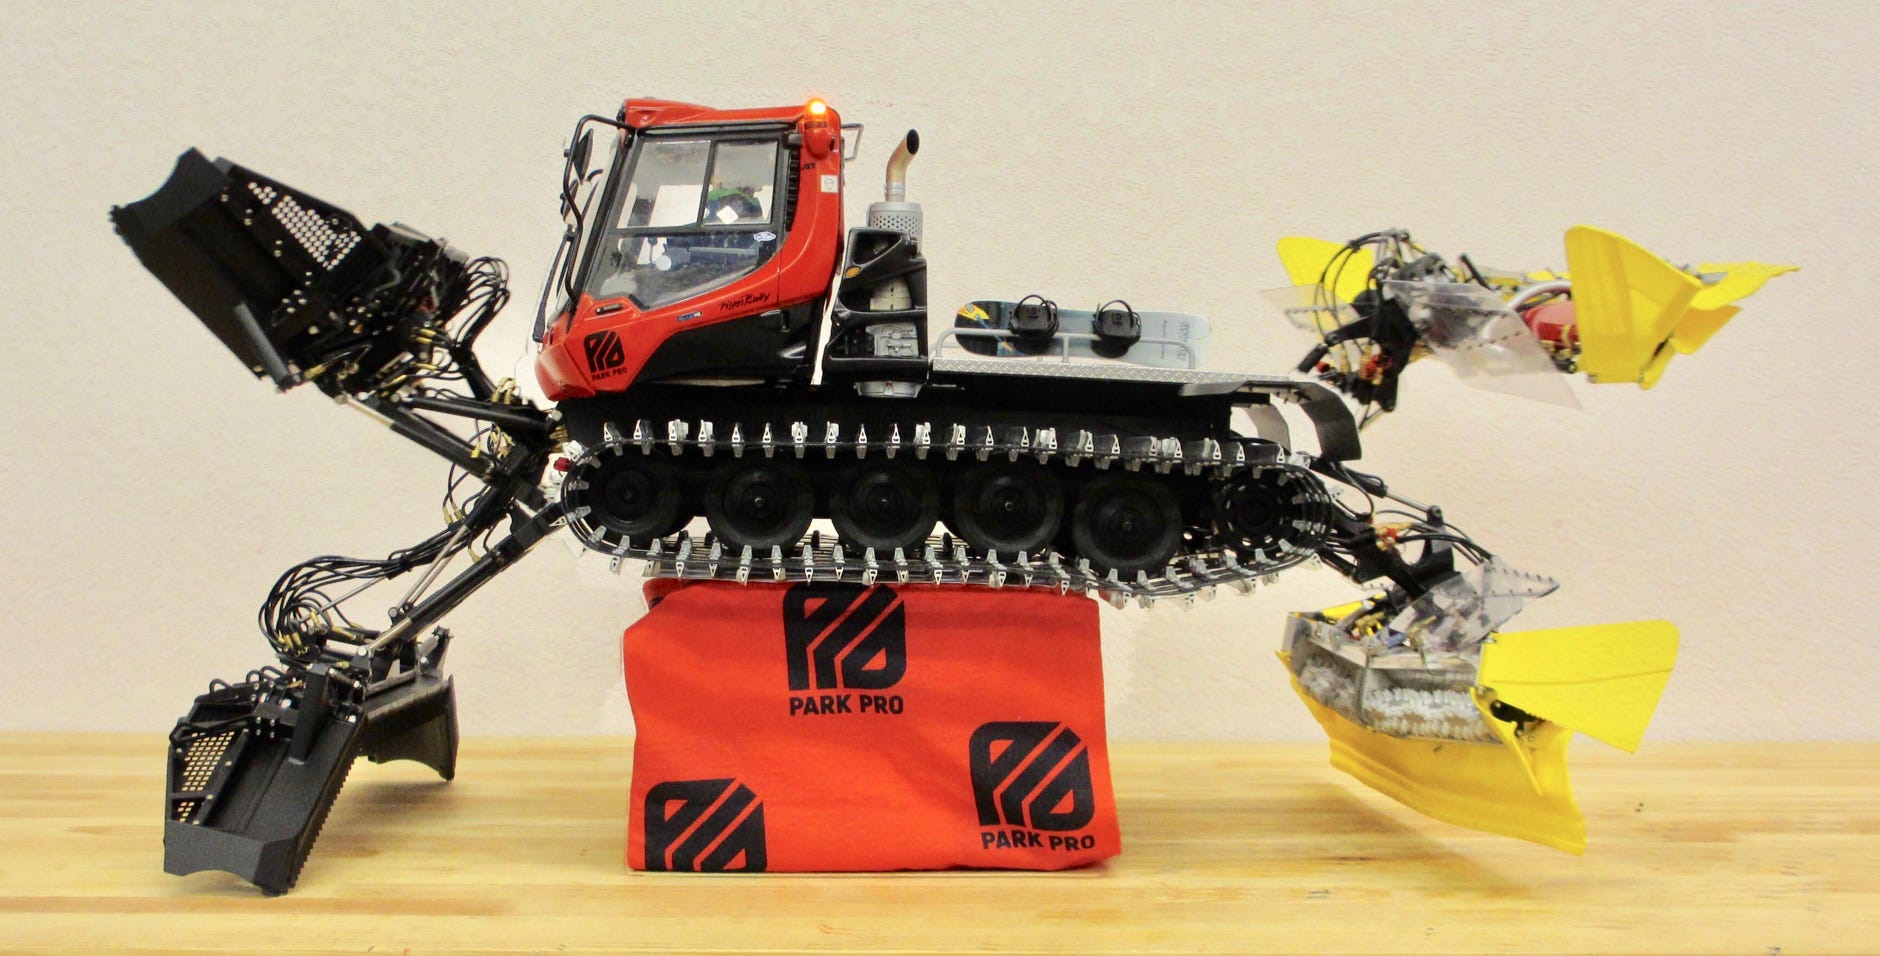
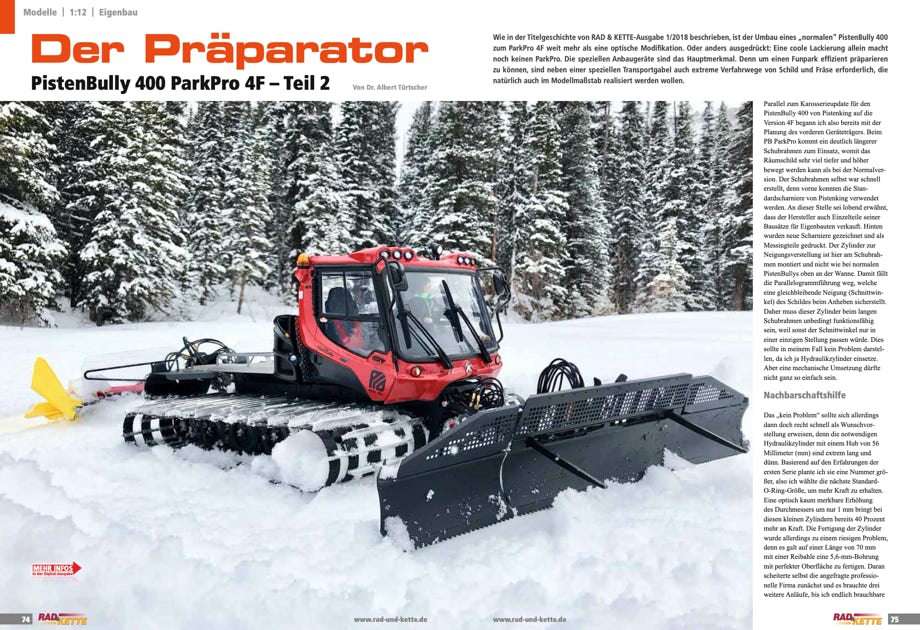
And of course it had to be the top model for park building, the PB400 ParkPro 4F.
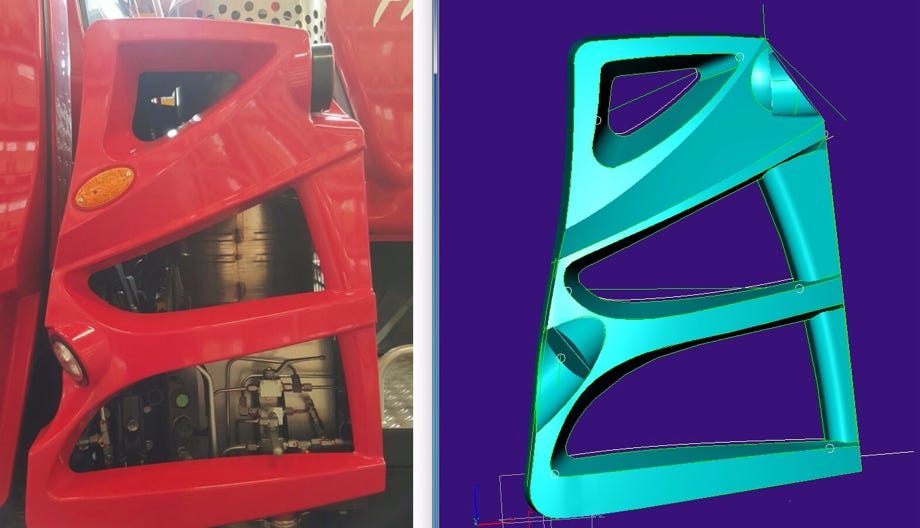
Besides the cool paint job in red/black the new air intakes are the most striking visual changes to the PB400 base model.
The model is a conversion of my PB400 which is described here in detail.
Body, Park-Pro parts, Switchblade and rear equipment carrier are available at Pistenking as kits.

Kaessbohrer was so friendly to quickly send me the necessary drawings, and Adrian Humbel supplied the urgently needed detail photos of the air intakes and the back pack. Big thanks!!!
So after some long time I was into 3D modeling again in CAD to create the shape of the air intake. A comparison of the original and the CAD model can been seen to the right.
I CNC-milled the molds for vacuum forming on my Stepcraft 400 which thus had it's first real 3-axle job. It was controlled by the proven Mach 3 software. One milling job takes about 1,5 hours per air intake.
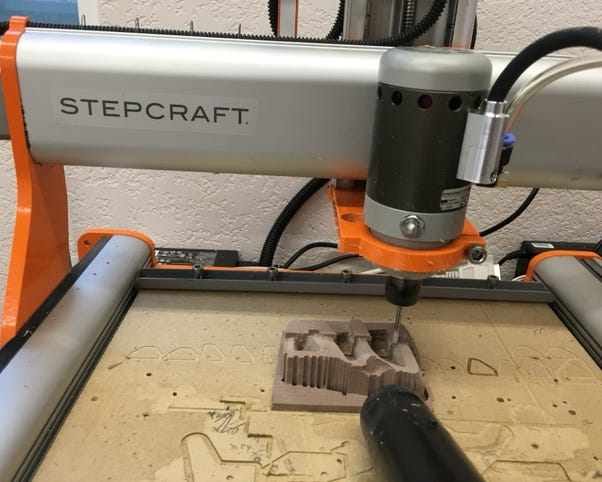
3D-Milling on the Stepcraft
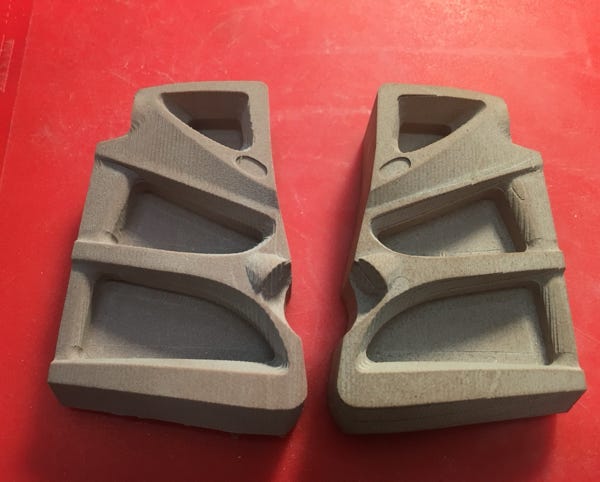
Vacuum forming molds for the 4F air intakes before sanding with clearly visible milling paths
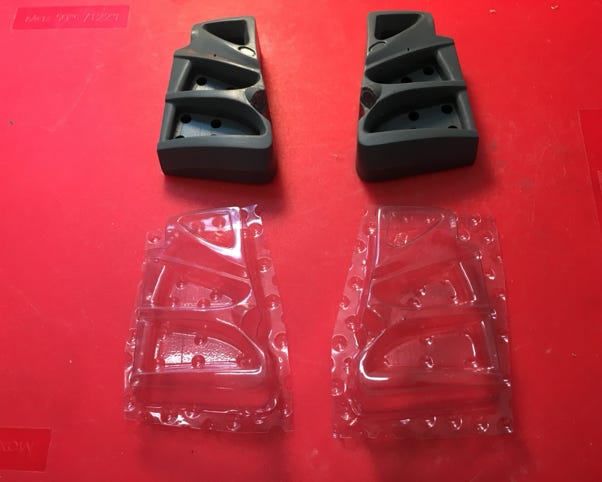
After the molds have been sanded and painted the first air intakes could be vacuum formed
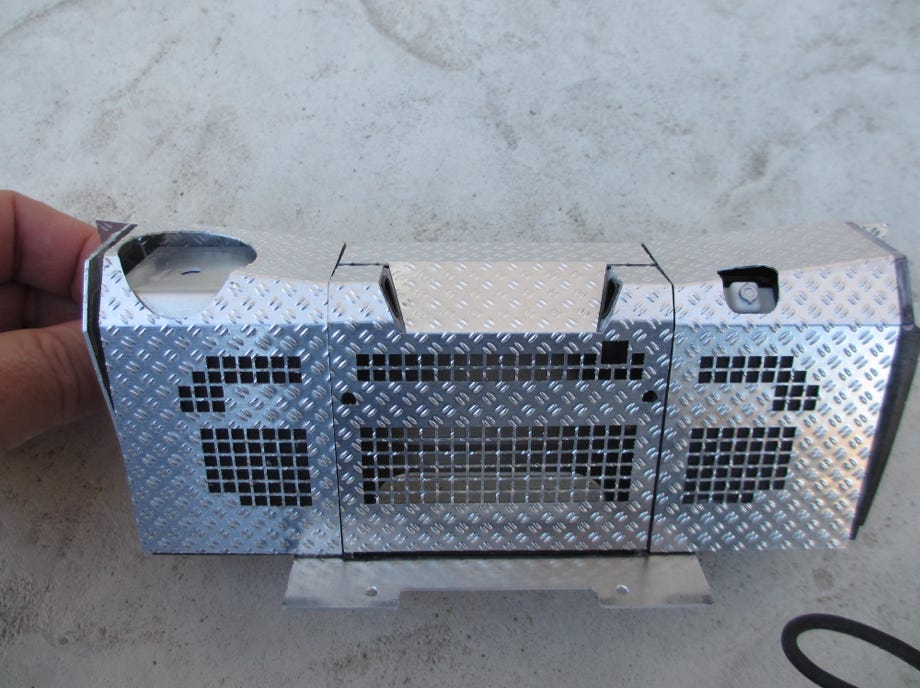
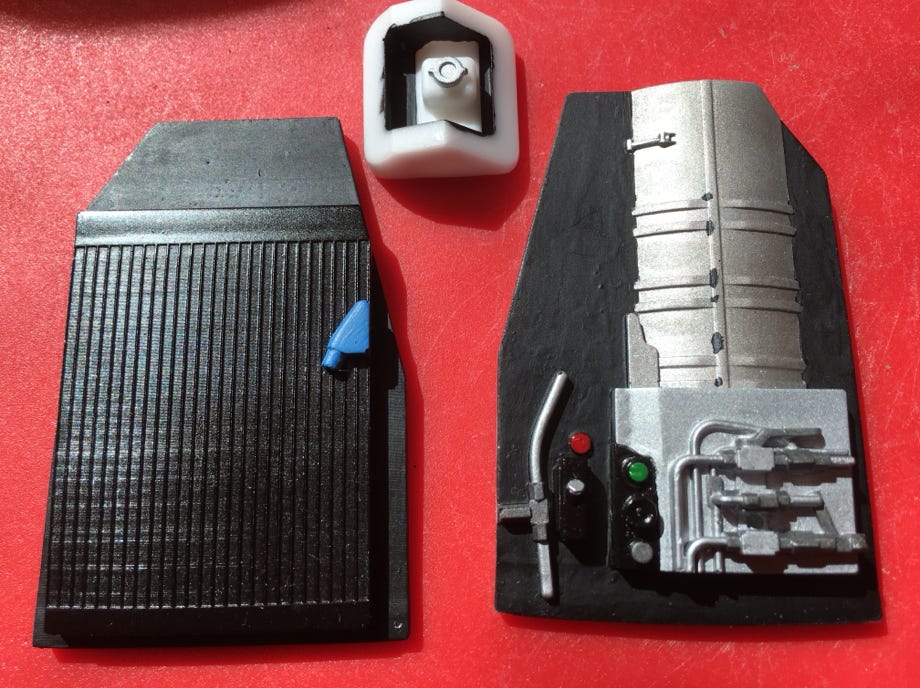
The sheet metal parts of the back were designed in CAD and laser cut out of special aluminum sheet. The exhaust was made as a 3D printed part. A few other details like the tank inlet for the urea tank were made as cast resin parts. They were printed with High Definition Acrylate, a new printing technology allowing finest details, and then a mold was made of silicon. Due to the large air inlets I modeled the visible details behind the air inlets in CAD and had them printed. On the driver side the hydraulic controls for lifting the driver cabin and loading platform can be seen, and on the passenger side is the engine radiator with the pre-heating plug.
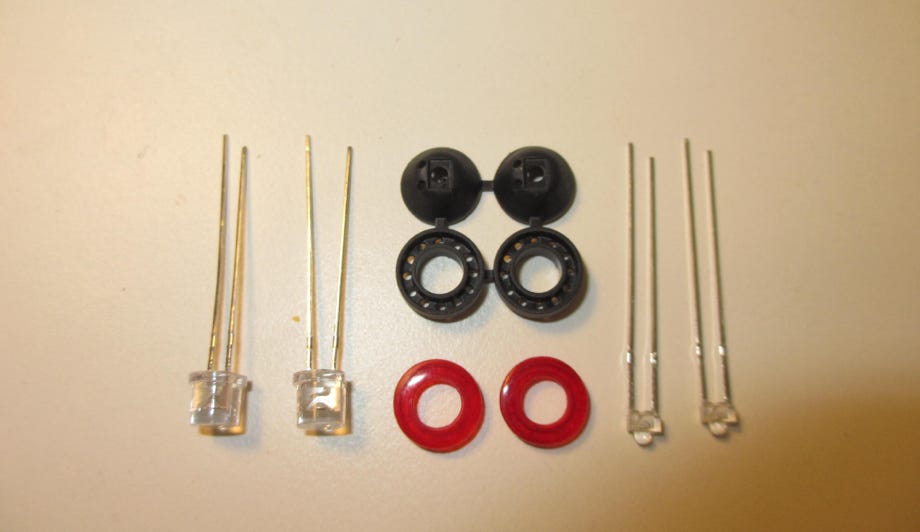
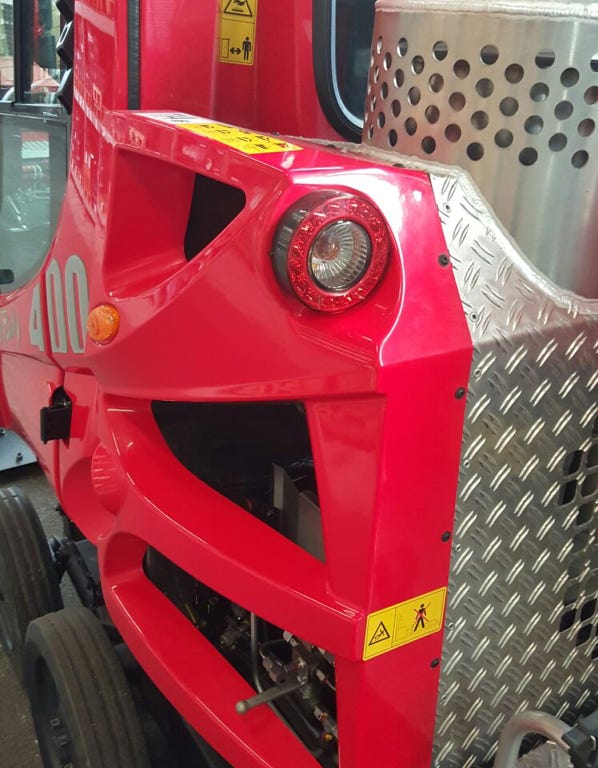
The rear combination lights were a challenge. At the original they are a ring of LEDs for the rear light and a flashing light in the center. I designed the parts in CAD and had them printed. The drillings in the ring simulate the LEDs of the original, which looks quite realistic as can be seen in the picture above. The rear light is a red 1.8 mm LED, the flashing light is an amber light 5 mm LED which I sanded flat.
The red glass was also printed, molded in silicon and then casted with red colored transparent resin. This resin has to be cured at 70°C for 90 minutes in an oven. So all in all it was quite some effort.
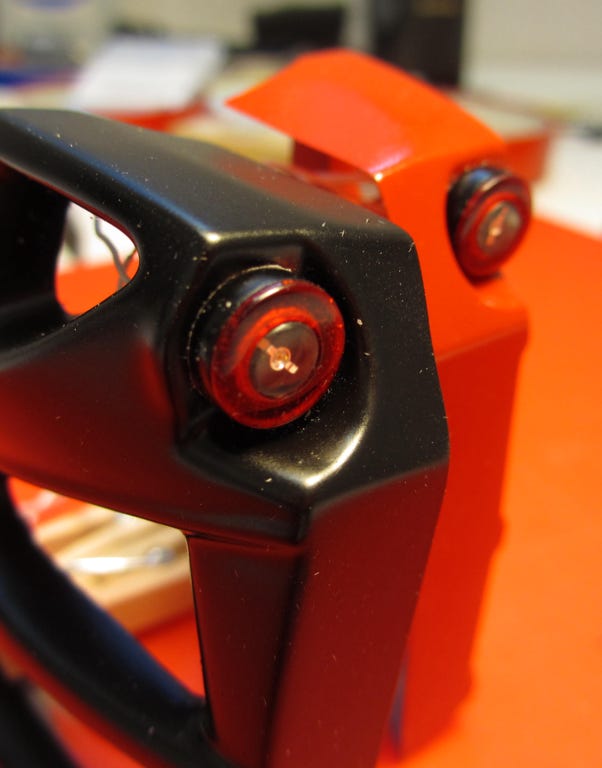
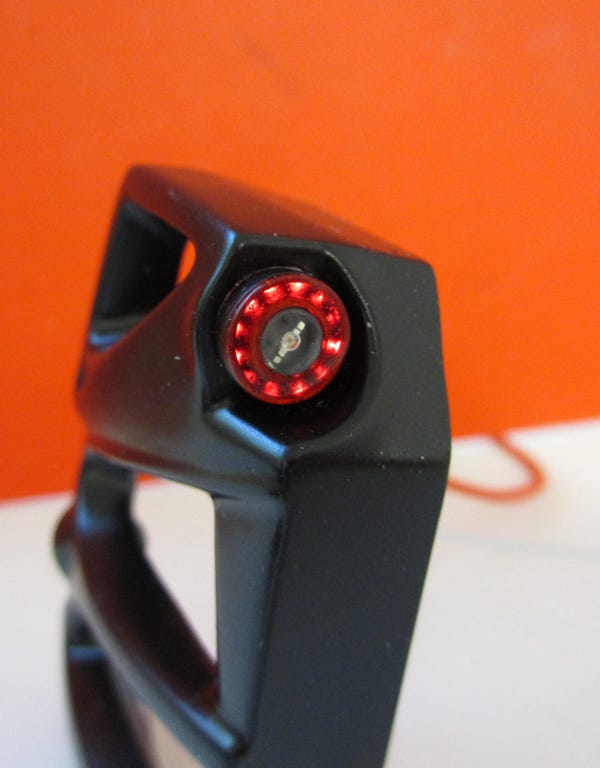
Combination rear lights of the model
Combination rear lights of the model with the LED ring effect
Combination light of the original
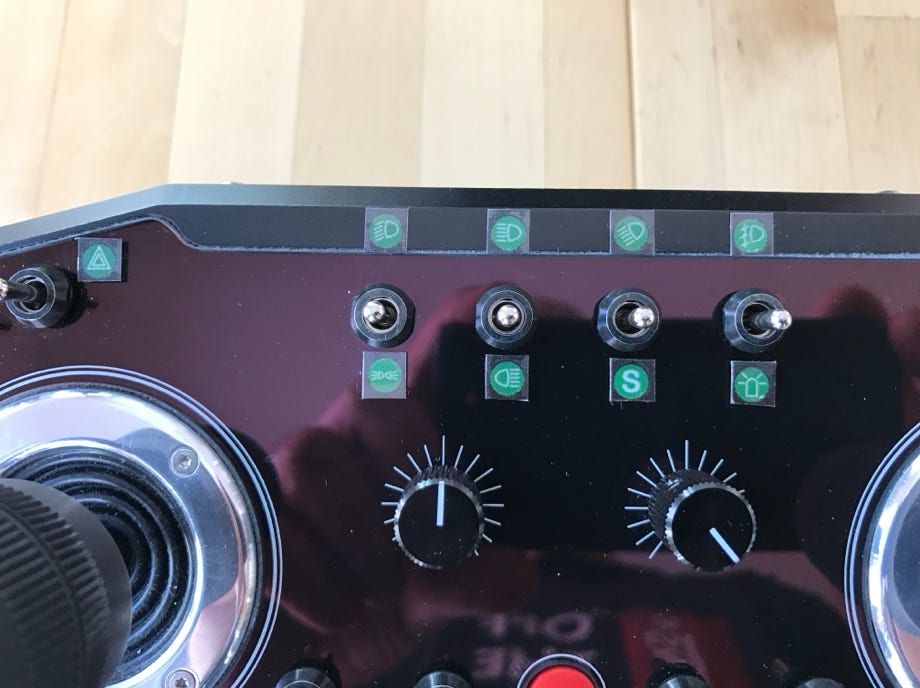
I also changed the light controls to Pistenking Kingbus light modules which are available for the PB400 as well. The great advantage is that only two wires are coming out of the cabin and that the board with the resistors is no longer needed. Thus the operating safety is enhanced. Furthermore the Kingbus can be connected directly to the ScaleArt Commander and icons on the display show exactly which lights are on. Very cool!
As there is no KingPad needed for the ScaleArt Commander I applied icons to help find the right switch.
The ParkPro features a lever control contrary to the other PistenBullys. This makes it easier to maneuver the vehicle in the park. Therefore the steering column was removed also in my model and replaced by control levers on the arm rest. A foot rest is installed instead of the steering column at the ParkPro.
Finally the driver cabin's lower part was painted black. The ParkPro logos were generously supplied in printable format by Kaessbohrer. Also the mirror mounts and hand rails war painted black.
The body and a cool paint work do not yet make a ParkPro. For shaping a park enormous movements of snow blade and tiller are necessary. Therefore Kässbohrer developed a longer pushing frame and a special snow blade for the ParkPro version. To make these parts was more difficult and expensive than I first thought.
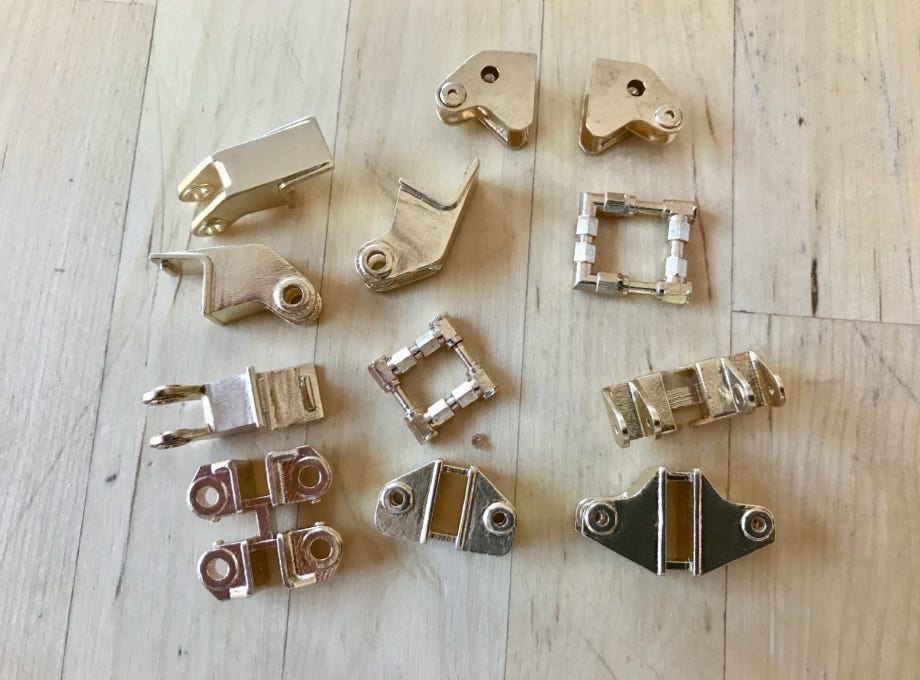
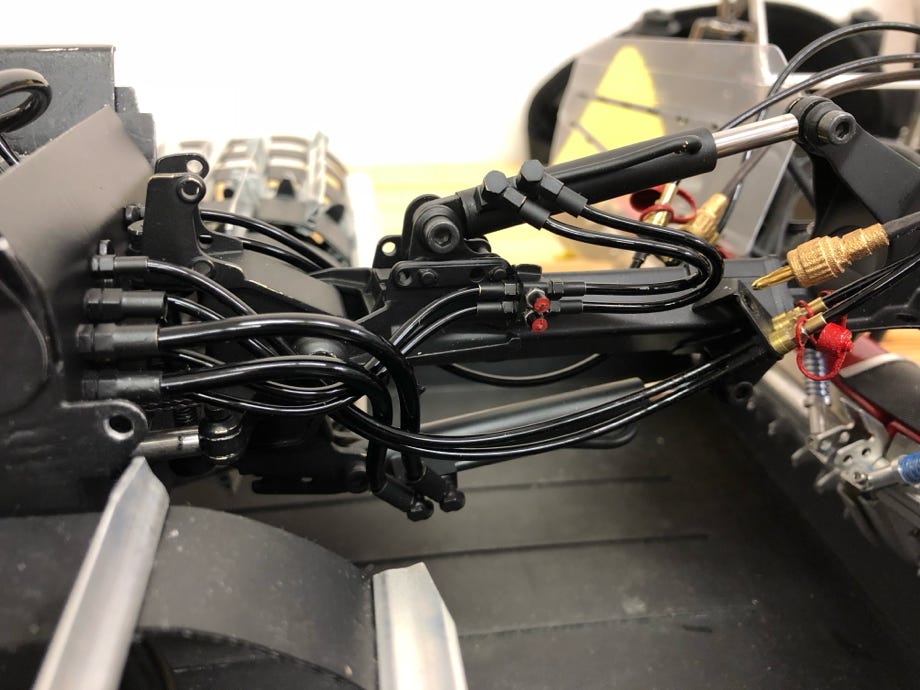
The pushing frame is water cut from 10 mm aluminum, the rear joints are cast brass parts. The long hydraulic cylinders could finally be made after three tries, even professional workshops had to capitulate. It turned out to be really difficult to machine a precise surface on this long and thin parts.
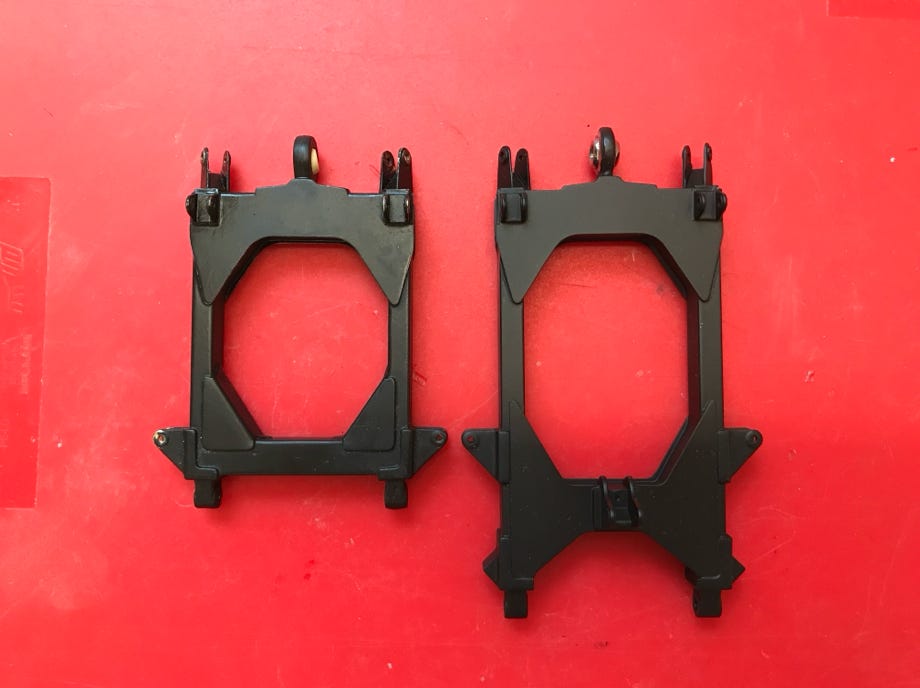
Regualar pushing frame (left) and ParkPro (right)
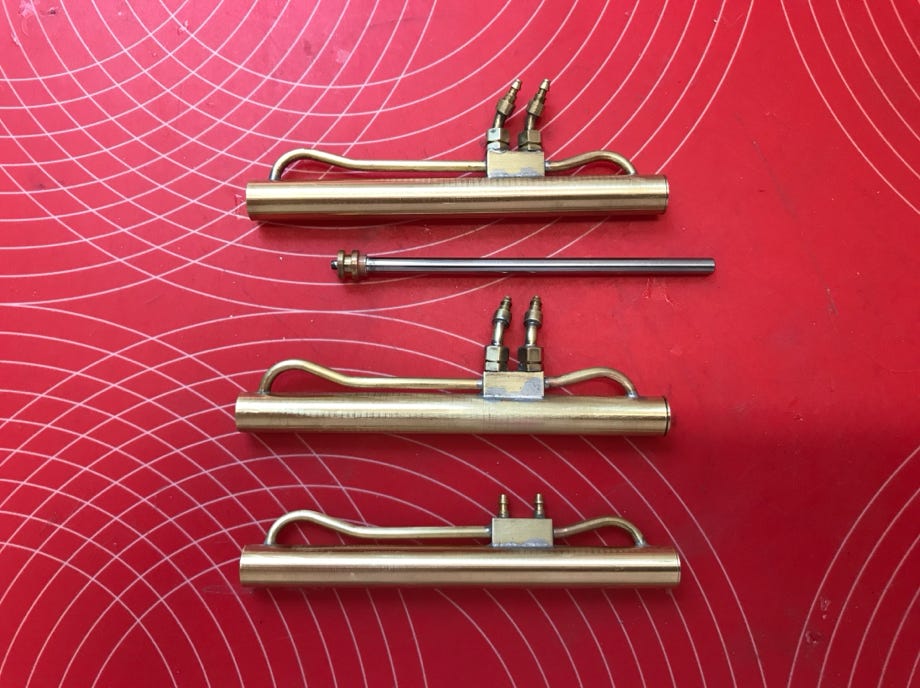
ParkPro lifting and blade angle cylinders
I had CAD data from Kaessbohrer available for the regular snow blade, but I could use these for the lower part only. For the fork mechanism and the snow mesh I had good pictures covering the details. The main dimensions could be taken from a drawing of a PB400 Park which I got from Kaessbohrer.
The fork mechanism consists mainly of delicate printed Nylon parts which are surprisingly sturdy. The forks are out of aluminum and glued into mounts of printed brass parts. Each fork has 2 ball bearings.
I purchased a metal bending brake to bend the parts. Although I made some practice parts a few of the real parts did not come out right after the first try. Luckily I had ordered more than one set of laser cut parts. Precise metal bending is for sure a science of it's own...
CAD model of the fork mechanism
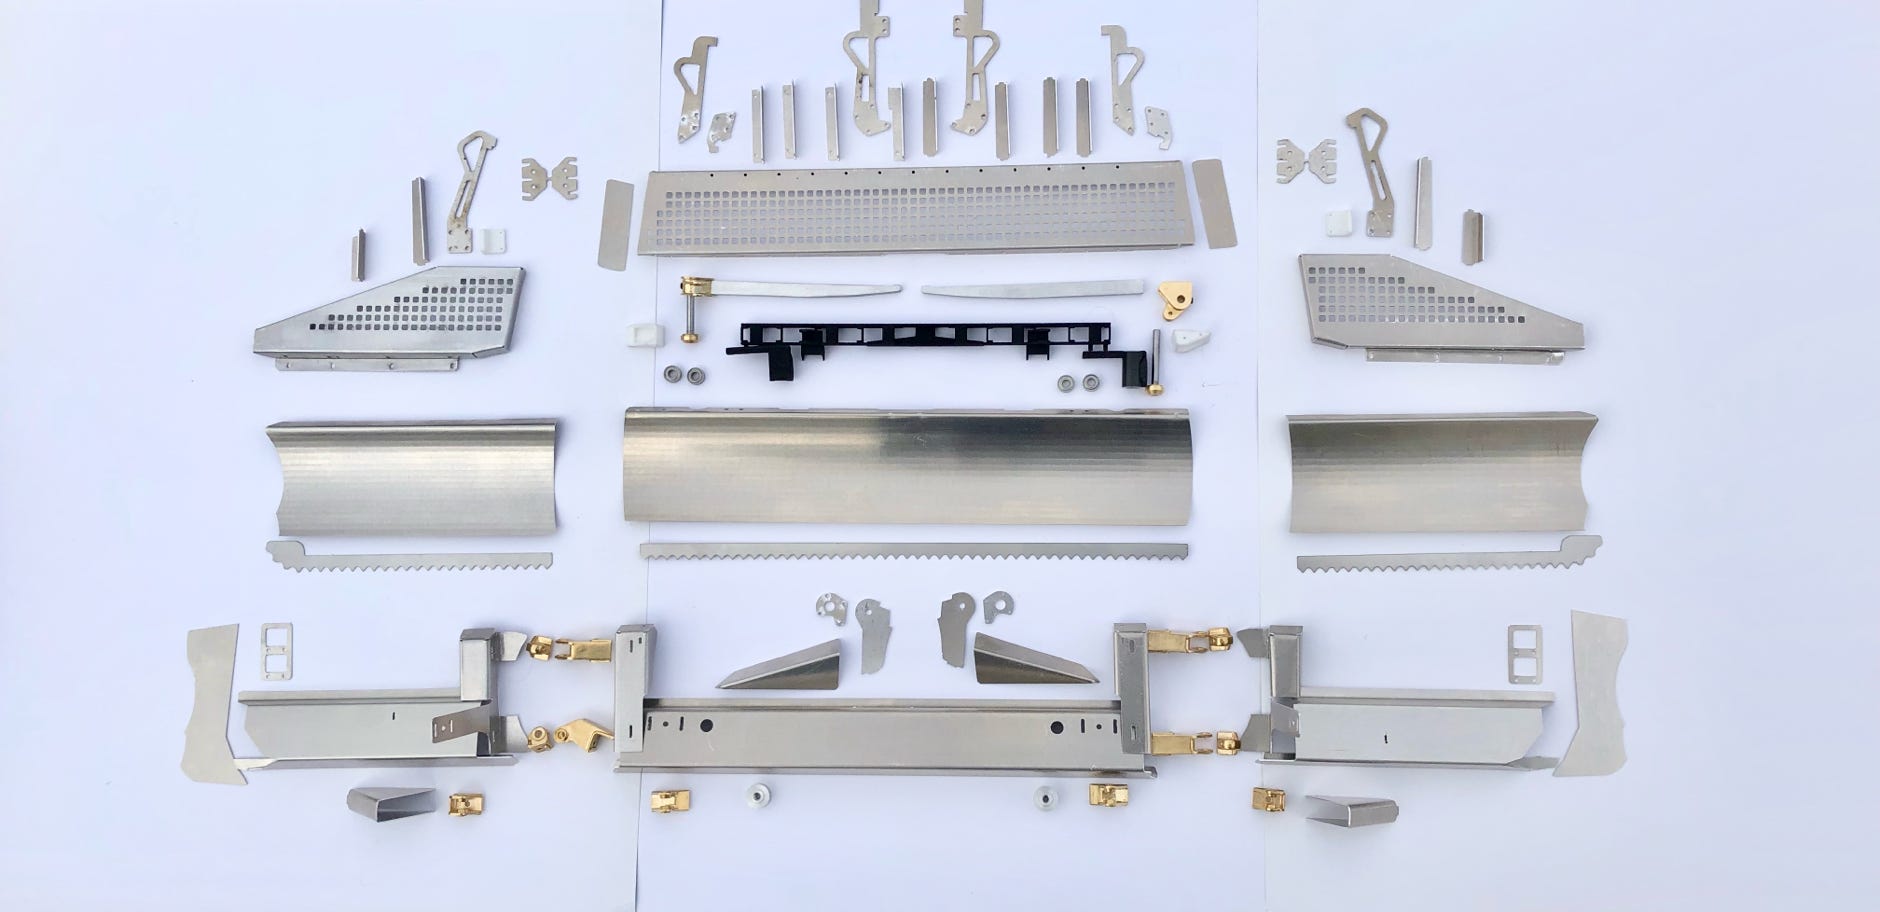
The blade consists of 117 parts and 100 screws
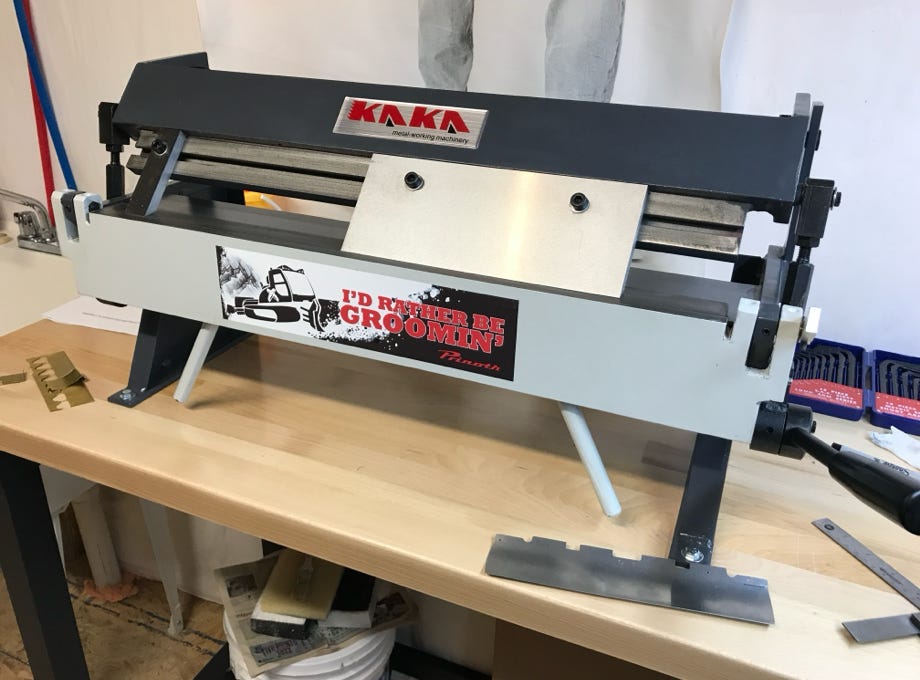
Bending Brake
Casted brass parts for the joints and hydraulics
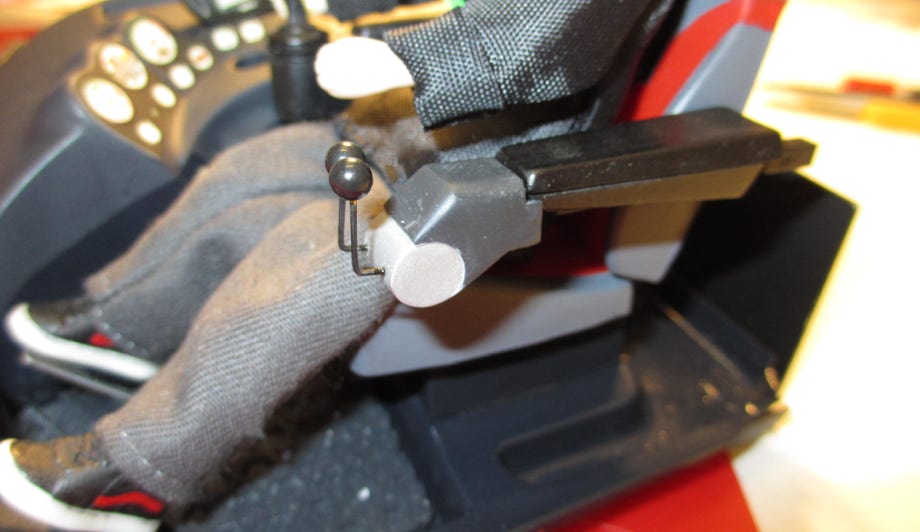
Moving the fork is also done by hydraulics, I simply shortened the old lifting cylinders to a 10 mm stroke. I made the hydraulic connectors as printed brass parts as original as possible. Due to the hose dimensions of the model they cannot be scaled down true to scale.
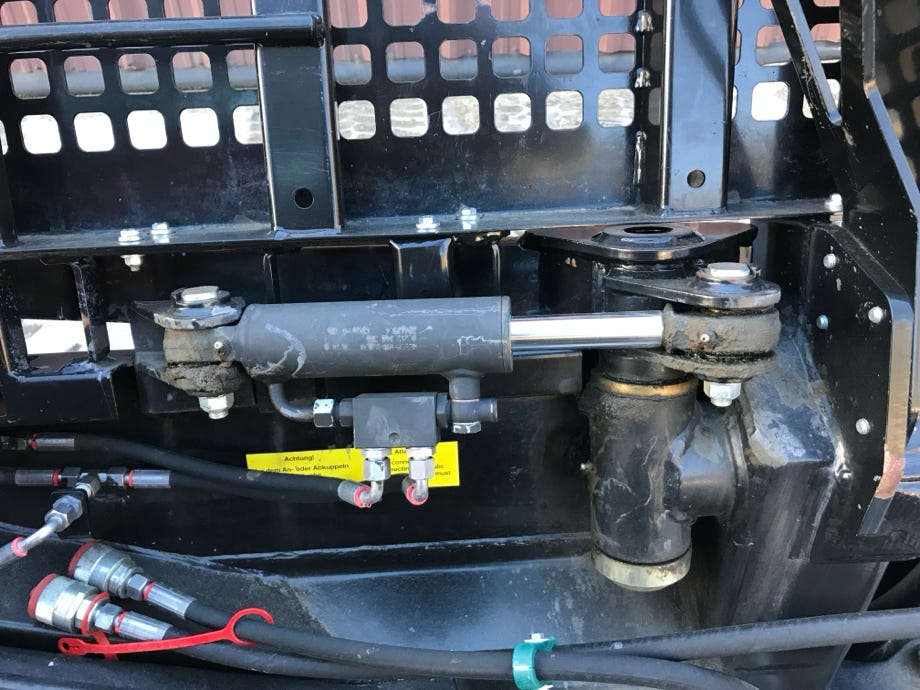
Fork cylinder at the original…

... and at the model
Hose connectors and mounts at the original...
... and at the model
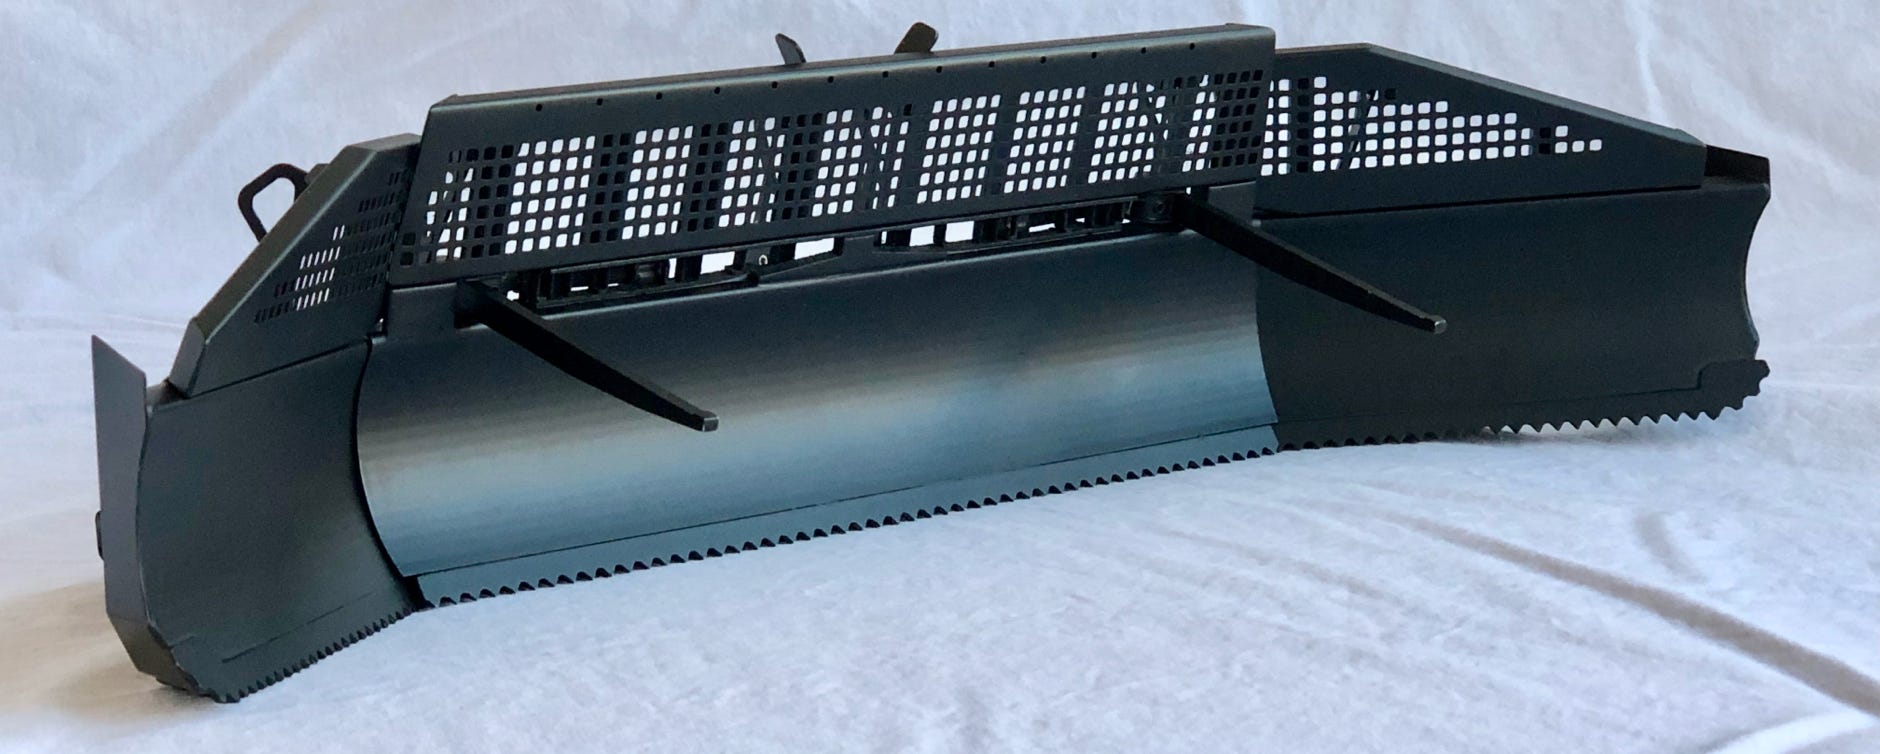

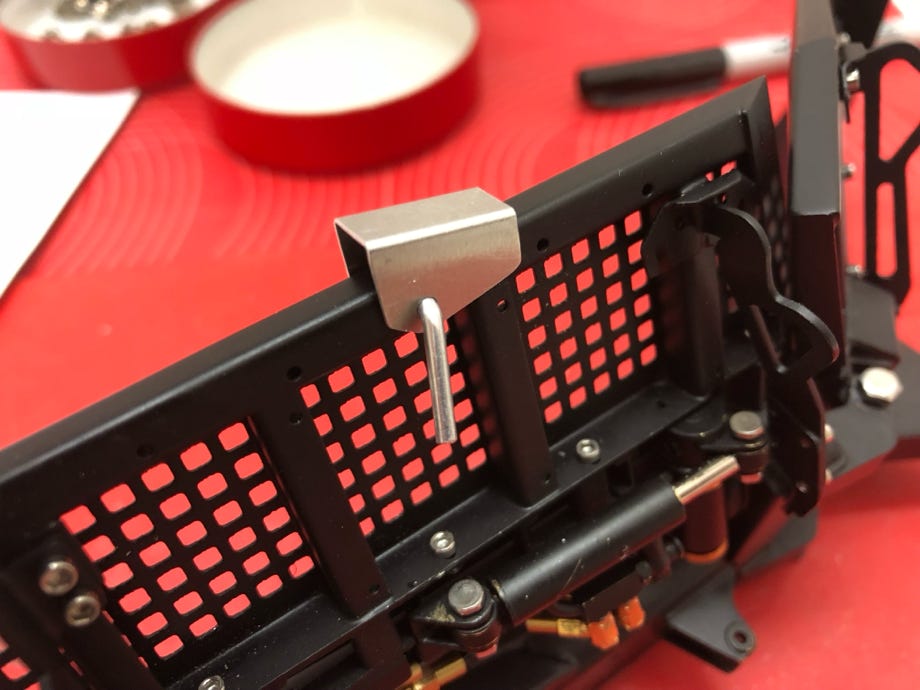
At the Switchblade the snow mesh is stabilized by struts which serve as tie down eyelets for transported parts.
When shaping the park the corduroy is often made with the blade when driving backwards (back blading). Therefore I attached grooved blocks to the skid like at the original. For this I had a part printed in ultrafine detail, made a mold and replicated it with PU resin.
Grooved blocks on the skid for back blading
Details: Transport mounts
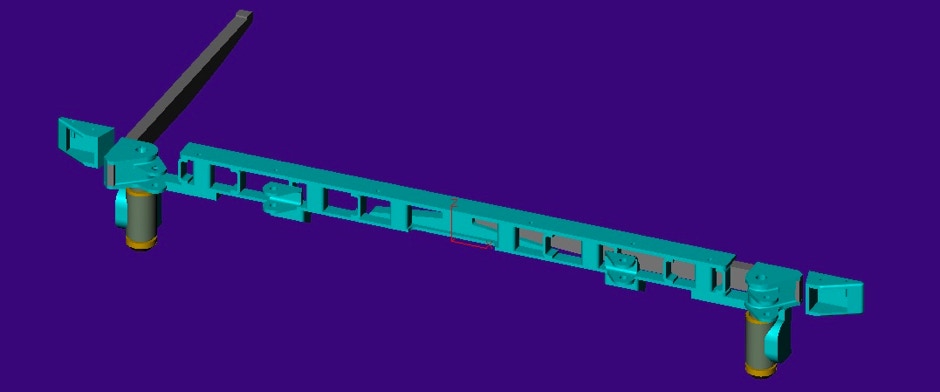
At the PB400 the older version of the equipment carrier is still used. As it is not available in scale 1:12 I again had to make it from scratch. I designed the parts in CAD and had them printed in brass which is rather costly. To achieve the maximum possible movement I also had to make the hydraulic cylinders by myself. In addition to the lifting function I also made the angle of the tiller hydraulically adjustable.
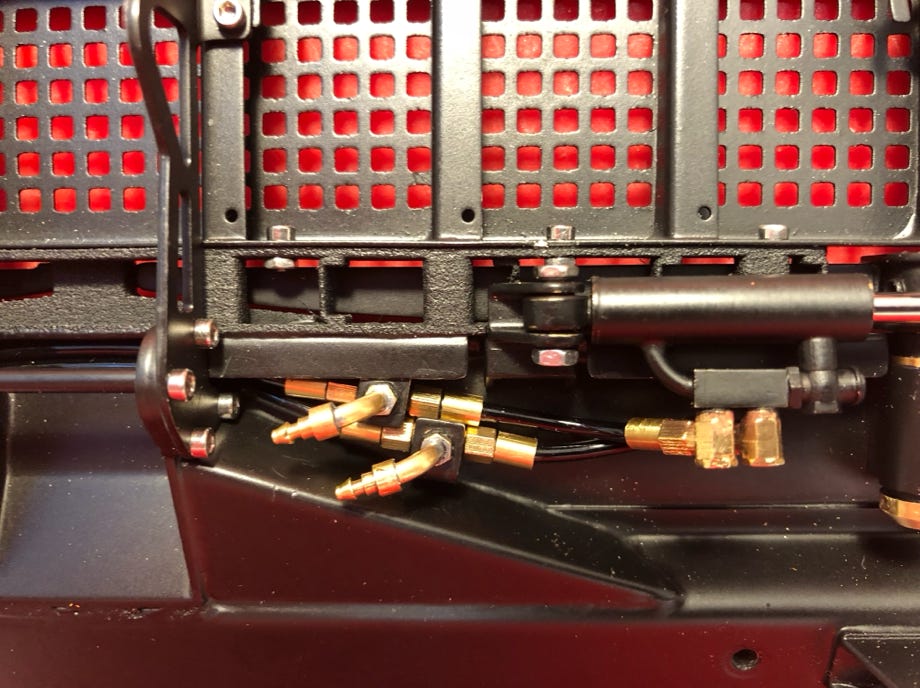
Also here I realized every detail as good as possible, like for example the attachment of the hoses for the upper cylinder.
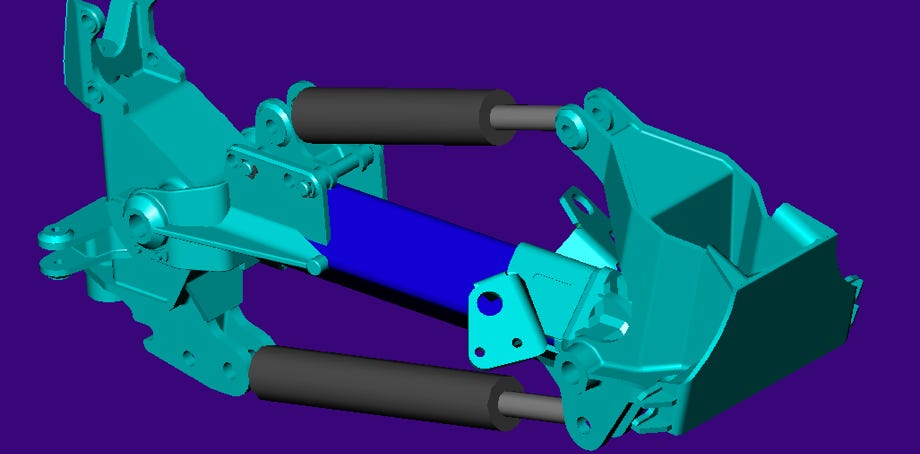

CAD model of the rear equipment carrier
Printed brass parts
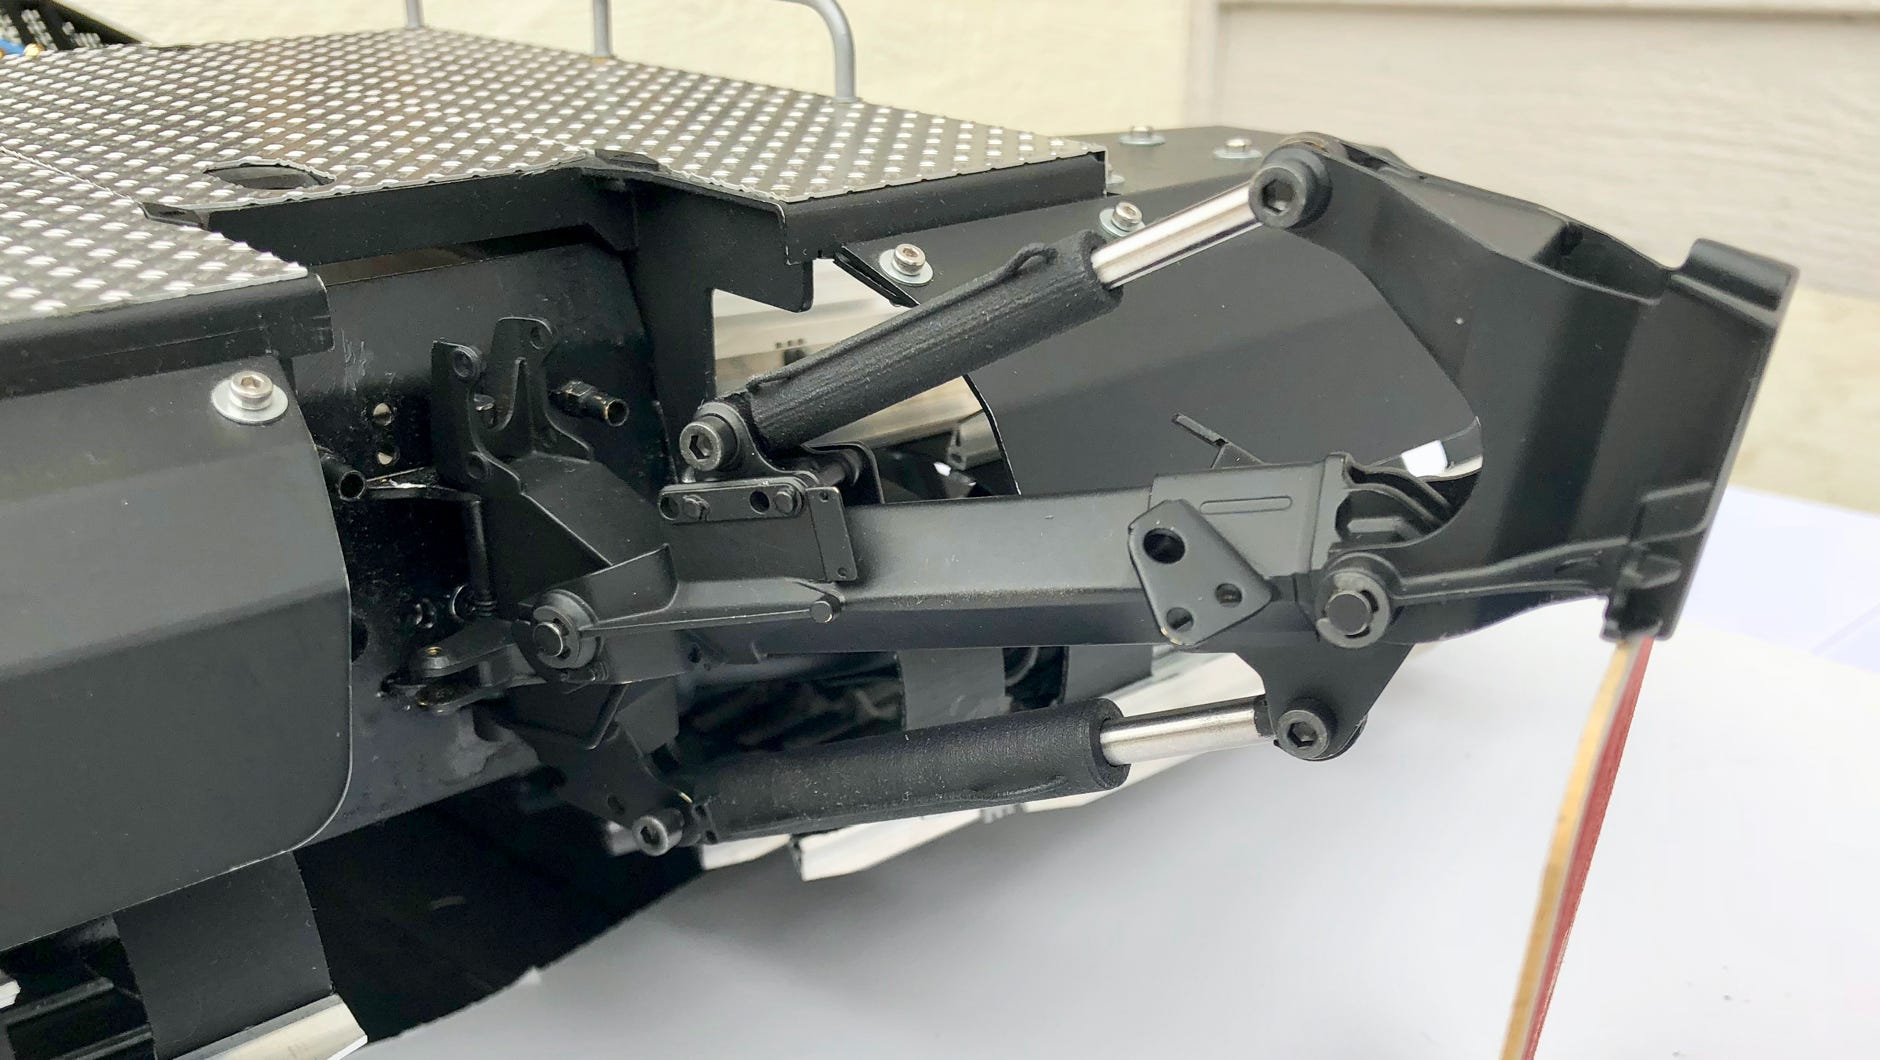
Painted and installed rear equipment carrier
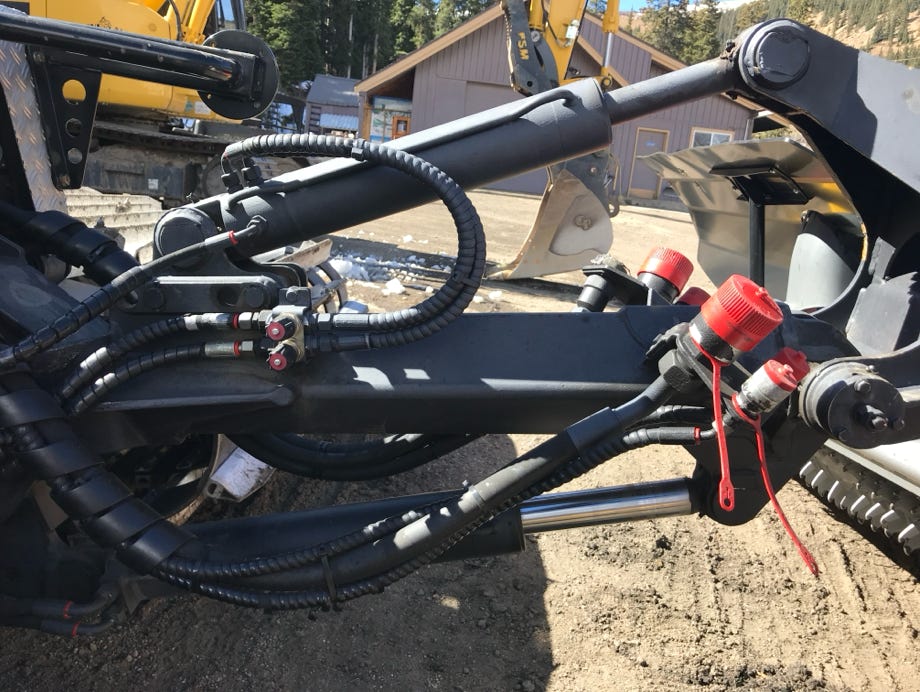
Equipment carrier of the original...
… and at the model
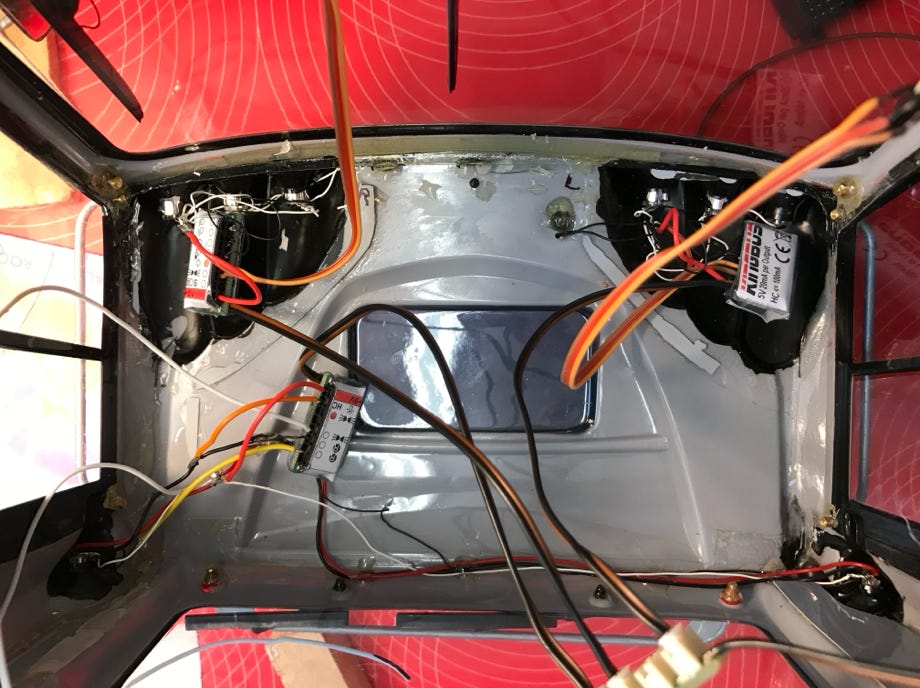
For the ParkPro I finally had to replace the entire hydraulic system. First I replaced the pump because a smaller volume flow allows more precise control.
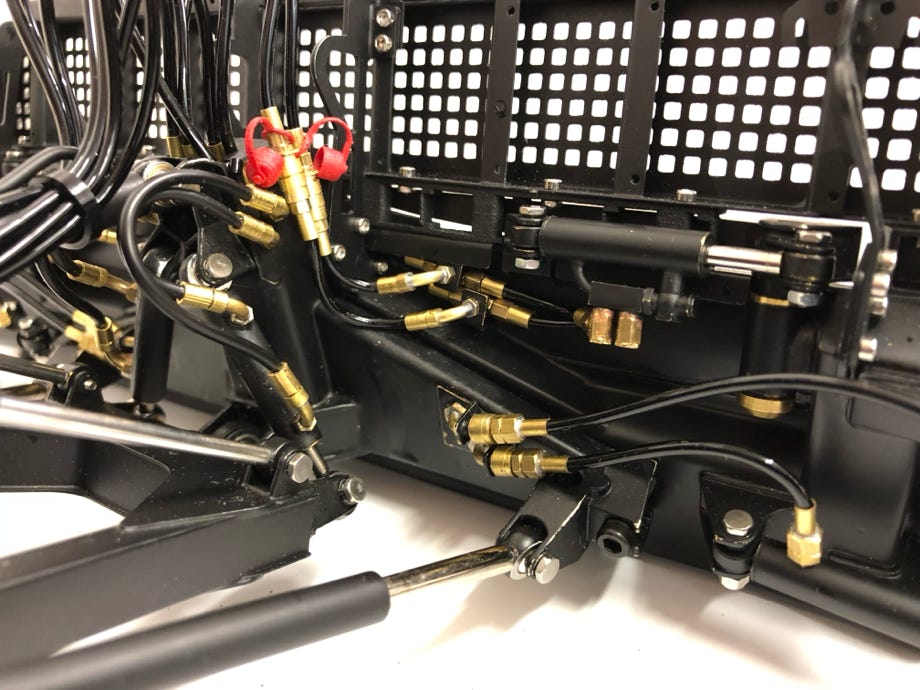
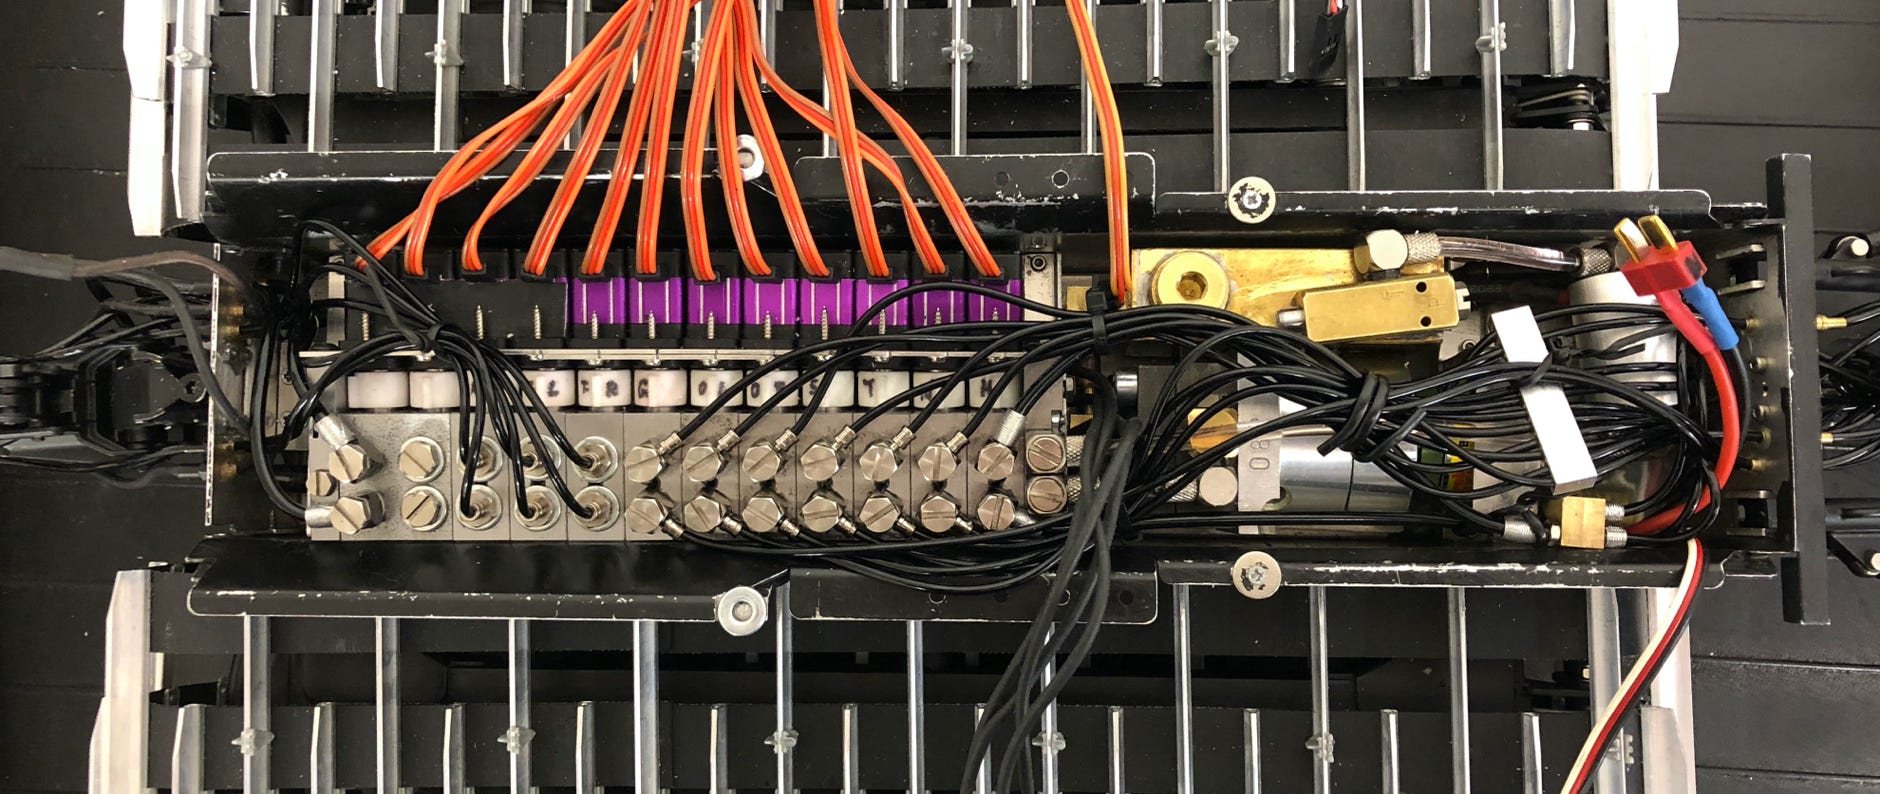
For the transport fork an additional hydraulic valve was needed, but I could by no means extend the current system. I decided to use a valve block by Modellbau Tobias Braeker, which arguably is one of the best currently available on the market. Now I could realize even more hydraulic functions like the already mentioned angle of the tiller. And as icing on the cake, now the two side finisher are separately foldable, just like the original. These are 12 hydraulic valves including the floating function for the tiller and thus the largest block which Tobias Braeker ever delivered. With the speed controler, pump and tiller wheel all 16 ports of the Scaleart Commander receiver are fully used.
The hydraulic valve block by Modellbau Tobias Braeker fits exactly into the narrow tub:
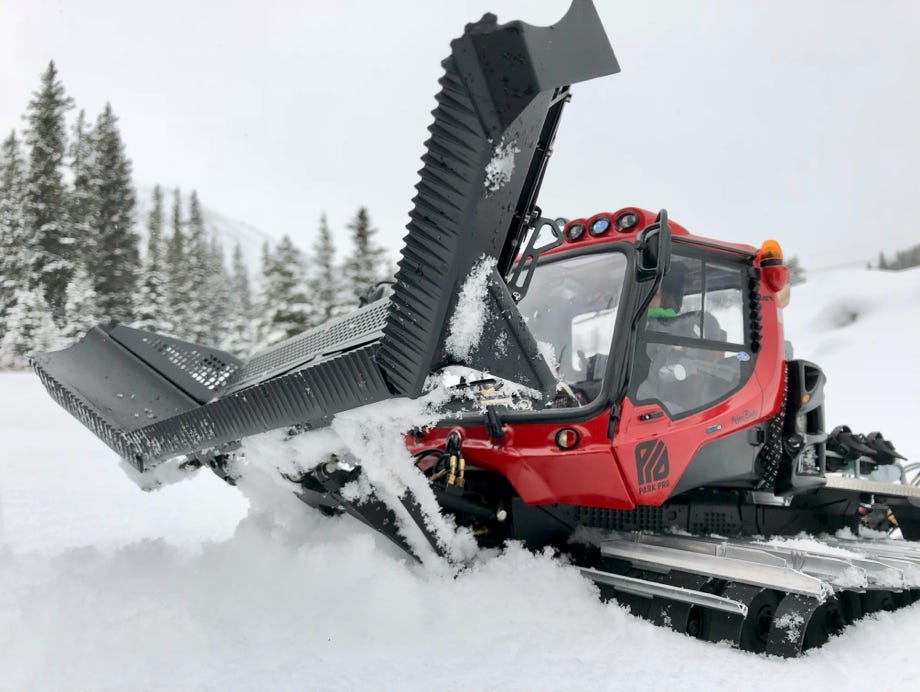
With the long front hydraulic cylinders and the scale rear equipment carrier the impressive movements of snow blade and tiller of the ParkPro version are also possible with the model:
General:
- Scale: 1:12
- Chassis, tracks, equipment carriers, snow blade, tiller by Pistenking
- PB400 body by AT modellbau
- Weight: 6,7 kg (including battery)
Hydraulic Components:
- Pump drive by Modellbau Martin Kampshoff, Robbe brushless motor with Robbe speed controller
- Pump IPZ0-HR2 by Jung-Fluidtechnik, 180 ml/min volume flow
- Valves: valve block by Modellbau Tobias Braeker
- Hoses and fittings by Modellbau Tobias Braeker
- Hydraulic cylinders: all made by myself
- Current Pump: 4,8 A
- Operating pressure: 25 bar
Electronic Components:
- RC system ScaleArt Commander SA-1000 with CM-5000 receiver
- Double Speed Controller Pistenking
- Castle Creations CC BEC to supply the tiller wheel motors with 7,2 V
- Pistenking Kingbus Universal Modules for controlling the lights
- Battery Turnigy nano-tech LiFePo 4S, 13.2 V, 20C discharge, 2100mAh
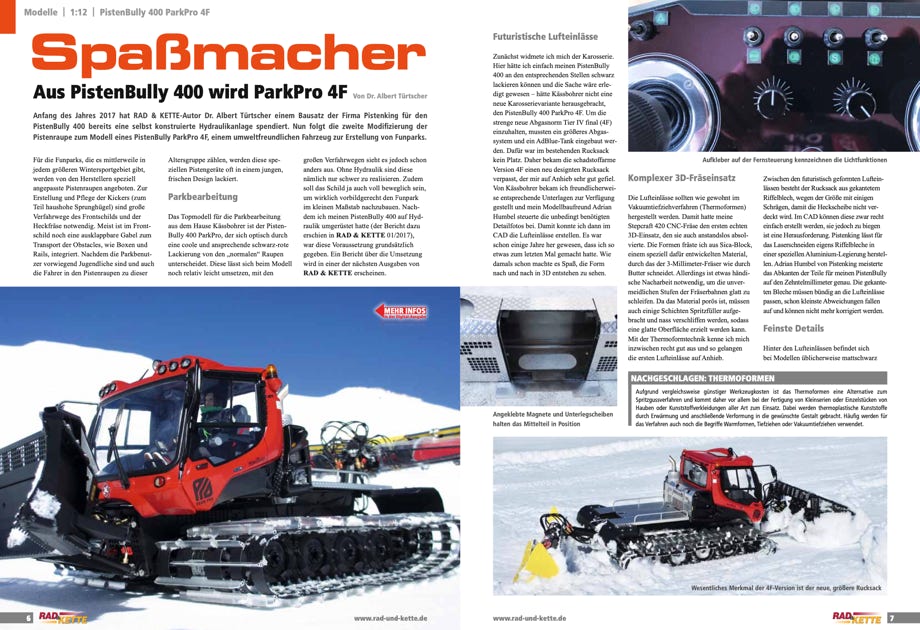
The german magazine Rad & Kette 1/2018 and 2/2018 issued an article in 2 parts by me about building the PB400 ParkPro 4F. Part 1 deals with building the body, part 2 is about the accessories and the hydraulics. In issue 1/2019 is an article about building obstacles for a fun park. They are in German language.
The articles can be downloaded as PDF file, with friendly permission by the magazine. Just click on the picture for downloading.
Diese Seite verwendet Cookies. Sie stimmen der Verwendung von Cookies durch Anklicken von “OK” zu. Nähere Informationen finden Sie in unseren Datenschutzbestimmungen.
This page is using Cookies. You are permitting the use of cookies by clicking on “OK”. More information can be found at our Privacy Protection.
OK


